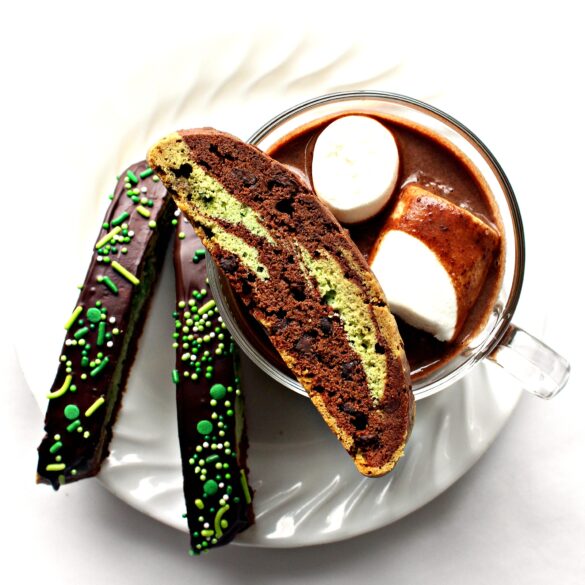
Chocolate Mint Biscotti are crunchy Italian cookies, beautifully swirled with rich chocolate and cooling peppermint. Enjoy them on their own, with coffee, or with ice cream.
Some flavors are considered to be seasonal whether they have to be or not. Pumpkin is for fall, even though canned pumpkin is available all year. Gingerbread is for winter, even though the spices are available all year.
Chocolate mint is different. There are chocolate mint drinks, candy, ice cream and baked goods all year. In my opinion that's a good thing.
Based on the popularity of chocolate mint recipes on The Monday Box, I think many of you agree!
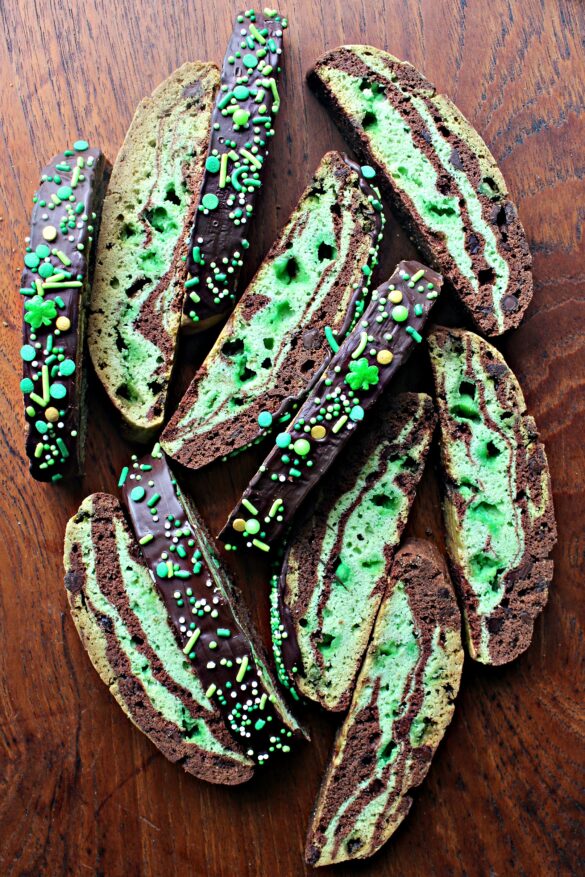
Chocolate Mint Biscotti are a variation of my Chocolate Peanut Butter Biscotti. The cookies are made with two different flavored doughs which are combined by mushing and twisting to create a marbled look.
The method is easy, like playing with playdoh. The end result is both beautiful and delicious. Luckily this recipe makes plenty of cookies to keep and to share.
The only thing seasonal about these biscotti is the availability of mint chips, which can be hard to find out of Christmas baking season.
Rather than skip the boost of creamy peppermint flavor the mint chips provide to the mint dough, I easily made homemade mint chips! With just 3 ingredients you can bake with mint chips year round. (They are great sprinkled on ice cream too!)
Would you like to save this?
Directions for mint chips
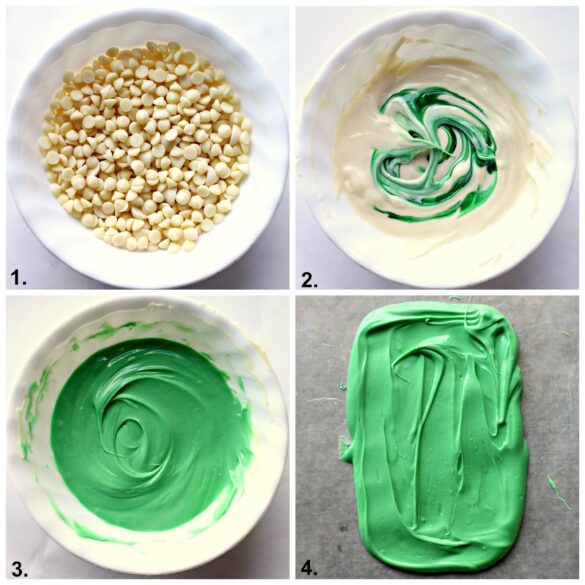
- Melt the white chocolate chips at 50% power in the microwave until completely melted when stirred.
- Add the green coloring and mint flavoring oils. Be sure to use candy oil coloring and candy oil flavoring or the chocolate will seize into a lumpy mess.
- Mix until uniform in color.
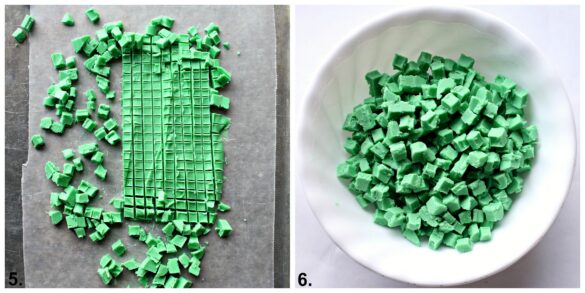
- Spread the green chocolate onto wax paper to form a rectangle about ¼" thick.
- Refrigerate to firm the chocolate then cut into mini chip sized pieces.
- Refrigerate or freeze until ready to use.
Directions for marbled biscotti
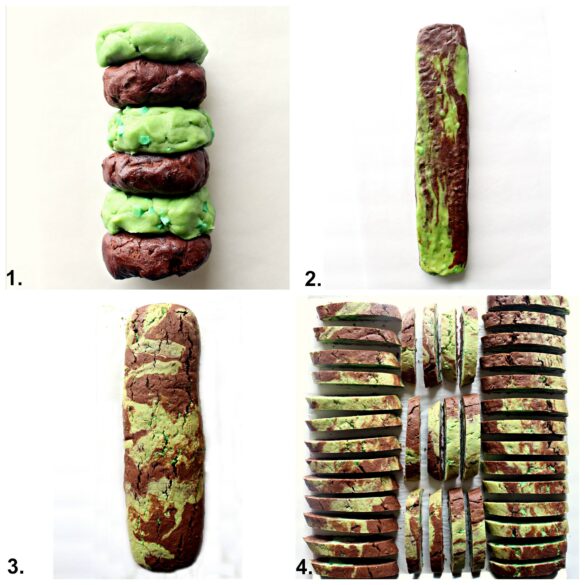
- Divide each dough flavor portion into thirds and press the thirds into thick discs. Stack the discs, alternating flavors.
- Press, stretch, and mush the stack into a log approximately 14" long and 2" wide.
- Bake for 25 minutes, then remove from the oven and allow to cool on the baking sheet for at least 30 minutes (or as long as overnight).
- When the logs are cool, use a serrated knife to cut into ¾" slices.Stand the biscotti on a parchment lined baking sheet with a small space between each. Bake for 30-35 minutes.
(The Monday Box participates in affiliate marketing programs. As an Amazon Associate I earn from qualifying purchases. Additional affiliate programs may be linked when applicable. If you chose to purchase a product after following a link on this page, I will receive a small commission, at no cost to you, which helps make The Monday Box possible.)
You may need
Peppermint flavoring oil Green candy coloring oil


More chocolate mint recipes
Chocolate Covered Chocolate Mint Cookies
Chocolate Mint Sandwich Cookies
Chocolate Peppermint Shortbread Cookies
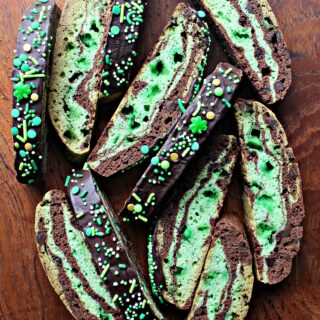
Chocolate Mint Biscotti
Ingredients
MINT CHIPS:
- ½ cup white chocolate chips I use Whole Foods 365 fair trade brand
- 10 drops green candy coloring oil
- 3 drops peppermint oil
MINT DOUGH:
- 6 tablespoons unsalted butter room temperature
- ⅔ cup granulated sugar
- ¼ teaspoon salt
- 1 ½ teaspoons baking powder
- 2 teaspoons vanilla extract
- ½ teaspoon mint extract
- 2 large eggs room temperature
- 2 cups all-purpose flour
- ½ cup chopped mint chips
CHOCOLATE DOUGH:
- 6 tablespoons unsalted butter room temperature
- ⅔ cup granulated sugar
- ¼ teaspoon salt
- 1 tablespoon vanilla extract
- 2 large eggs room temperature
- 1 ¾ cups all-purpose flour
- 1 ½ teaspoons baking powder
- ¼ cup Dutch-process cocoa powder I use Whole Foods 365 fair trade brand
- 4 ounces semi-sweet chocolate chopped or broken into small pieces
- 1 teaspoon espresso powder
- ½ cup mini semi-sweet chocolate chips I use Whole Foods 365 fair trade brand
DECORATING
- ½ - ¾ cup melting chocolate
- Sprinkles
Instructions
MINT CHIPS
- Melt the white chocolate chips at 50% power in the microwave for about 1 minute until completely melted when stirred.
- Mix in the coloring and flavoring oils.
- Cover a cutting board with a sheet of wax paper. Spread the chocolate onto the wax paper to form a rectangle about ⅛” – ¼” thick.
- Place the cutting board in the refrigerator for about 15 minutes or until the chocolate has firmed.
- Cut the firmed chocolate into mini chip sized pieces.
- Store in the refrigerator or freezer until ready to use.
MINT DOUGH
- Preheat oven to 350° F. Line a baking sheet with parchment paper.
- In the bowl of an electric mixer, cream together butter, sugar, salt, vanilla, and baking powder.
- Beat in the eggs one at a time. The dough may look curdled, but is fine.
- Gradually add the flour until combined.
- Fold in the mint chips.
- Wrap the mint dough in plastic wrap and refrigerate while making the chocolate dough.
CHOCOLATE DOUGH:
- In the bowl of a food processor, combine the flour, baking powder, cocoa, semi-sweet chocolate pieces, and espresso powder. Pulse until the chocolate is ground into the flour mixture. Set aside.
- In the bowl of an electric mixer, cream together butter, sugar, salt, and vanilla.
- Beat in the eggs one at a time. The dough may look curdled but is fine.
- Gradually add the flour mixture until combined.
- Fold in the chocolate chips.
FORMING BISCOTTI LOGS
- Remove the mint dough from the refrigerator.
- The dough will be formed into two logs. To form one dough log, use one half of the mint dough and one half of the chocolate dough.
- Divide each dough flavor portion into thirds and press the thirds into thick discs.
- On the prepared baking sheet, stack the discs, alternating flavors. Press, stretch, and mush the stack into a log approximately 14” long and 2” wide.
- Repeat using the remaining dough to form a second dough log. Place logs about 4” apart on the prepared baking sheet.
- Bake for 25 minutes, then remove from the oven and allow to cool on the baking sheet for at least 30 minutes (or as long as overnight).
- Reduce the oven temperature to 325°. Place the logs on a cutting board and use a serrated knife to cut into ¾” slices (approximately 20 biscotti per log).
- Stand the biscotti on the parchment lined baking sheet with a small space between each. Return to the oven for 30-35 minutes.
- Remove from the oven and cool completely on a wire rack. Biscotti will continue to firm up as they cool.
DECORATING
- Line a small baking sheet with wax paper.
- Place melting chocolate in a small cup or bowl in the microwave at 50% power for about 1 minute or until melted.
- Working in small batches of about 6 biscotti, spread the melted chocolate on top of the biscotti with a spoon or offset spatula.
- Add sprinkles.
- Refrigerate for 5-10 minutes to firm the chocolate.
- Stored in an airtight container at room temperature, Mint Chocolate Biscotti will stay fresh for up to one month with only slight softening over time. If dipped in chocolate, store for up to 2 weeks.
Notes
Nutrition




Lynda Marie Sandora
Haven't tried these yet but I have made chocolate mint cookies with Andes Mints. Wondering if those would work here? Thanks! Making these for upcoming St Patrick's Day!
Wendy Sondov
Using Andes Mints (chopped into chip sized pieces) will give you the same flavor as using mint chips, but the chocolate on the mint will change the green dough visually. The change will probably be minimal, but I'm not sure.
Cindy P
These look wonderful. Can’t wait to try them… One question, to get a really good mint flavor, would it be better to use a peppermint oil, and if so, what would you recommend?
Wendy Sondov
For these biscotti I made homemade mint baking "chips" using peppermint oil, then used peppermint extract in the cookie dough. Peppermint oil is pretty strong. If you want to use peppermint oil in the dough as well, I would start with a tiny amount. 1/8 teaspoon of peppermint oil = the strength of 1/2 teaspoon of peppermint extract. You don't want the flavor to get overwhelming.
Cindy P
Thank you!
Do you have a recipe for your homemade chips?
Susan
These are beautiful! Thank you for letting me post them to my round-up.
Chelsea R
Hi Wendy! Thanks for sharing your biscotti recipe. This Christmas season, I have been really into making them, and this is the perfect addition to the batches I've made. I was wondering, is it normal for my green dough to turn a slight brown after the second bake? Or did I maybe do something wrong? My biscotti taste fabulous, but the look is a little off. They almost look burnt, but definitely don't have that burnt taste. Any suggestions?
Thank you again for the share!
Always,
Chelsea
Wendy Sondov
Hi, Chelsea! I agree that baking biscotti is so much fun and they make such great snacks and gifts. Your green dough changing color sounds normal. My biscotti stayed bright green inside but the tops turned an odd brownish green. You can see it in the photos. I solved that beauty issue by "icing" the biscotti in chocolate to cover the unwanted color. Is the inside of your biscotti turning brown too? If the inside is brownish, are you standing the biscotti (on their bottom edge) for the second bake or lying them down (on a cut side)? It may be that contact with the heat turns the coloring brown, so I would be sure to stand them up. A lower temperature during the second bake could help too. I hope this helps! Happy baking!
Cincy
Wendy, these look like so much fun to make. Love the play-doh analogy. Perfect. Biscotti are one of my favourite cookies and I adore anything mint! On my must bake list. Such a clever work around if we can't find mint chips.
Wendy Sondov
Thanks, Cindy! I did have fun making these biscotti. There is real therapeutic value in mushing dough 😉 The fact that you end up with delicious cookies is just a bonus!