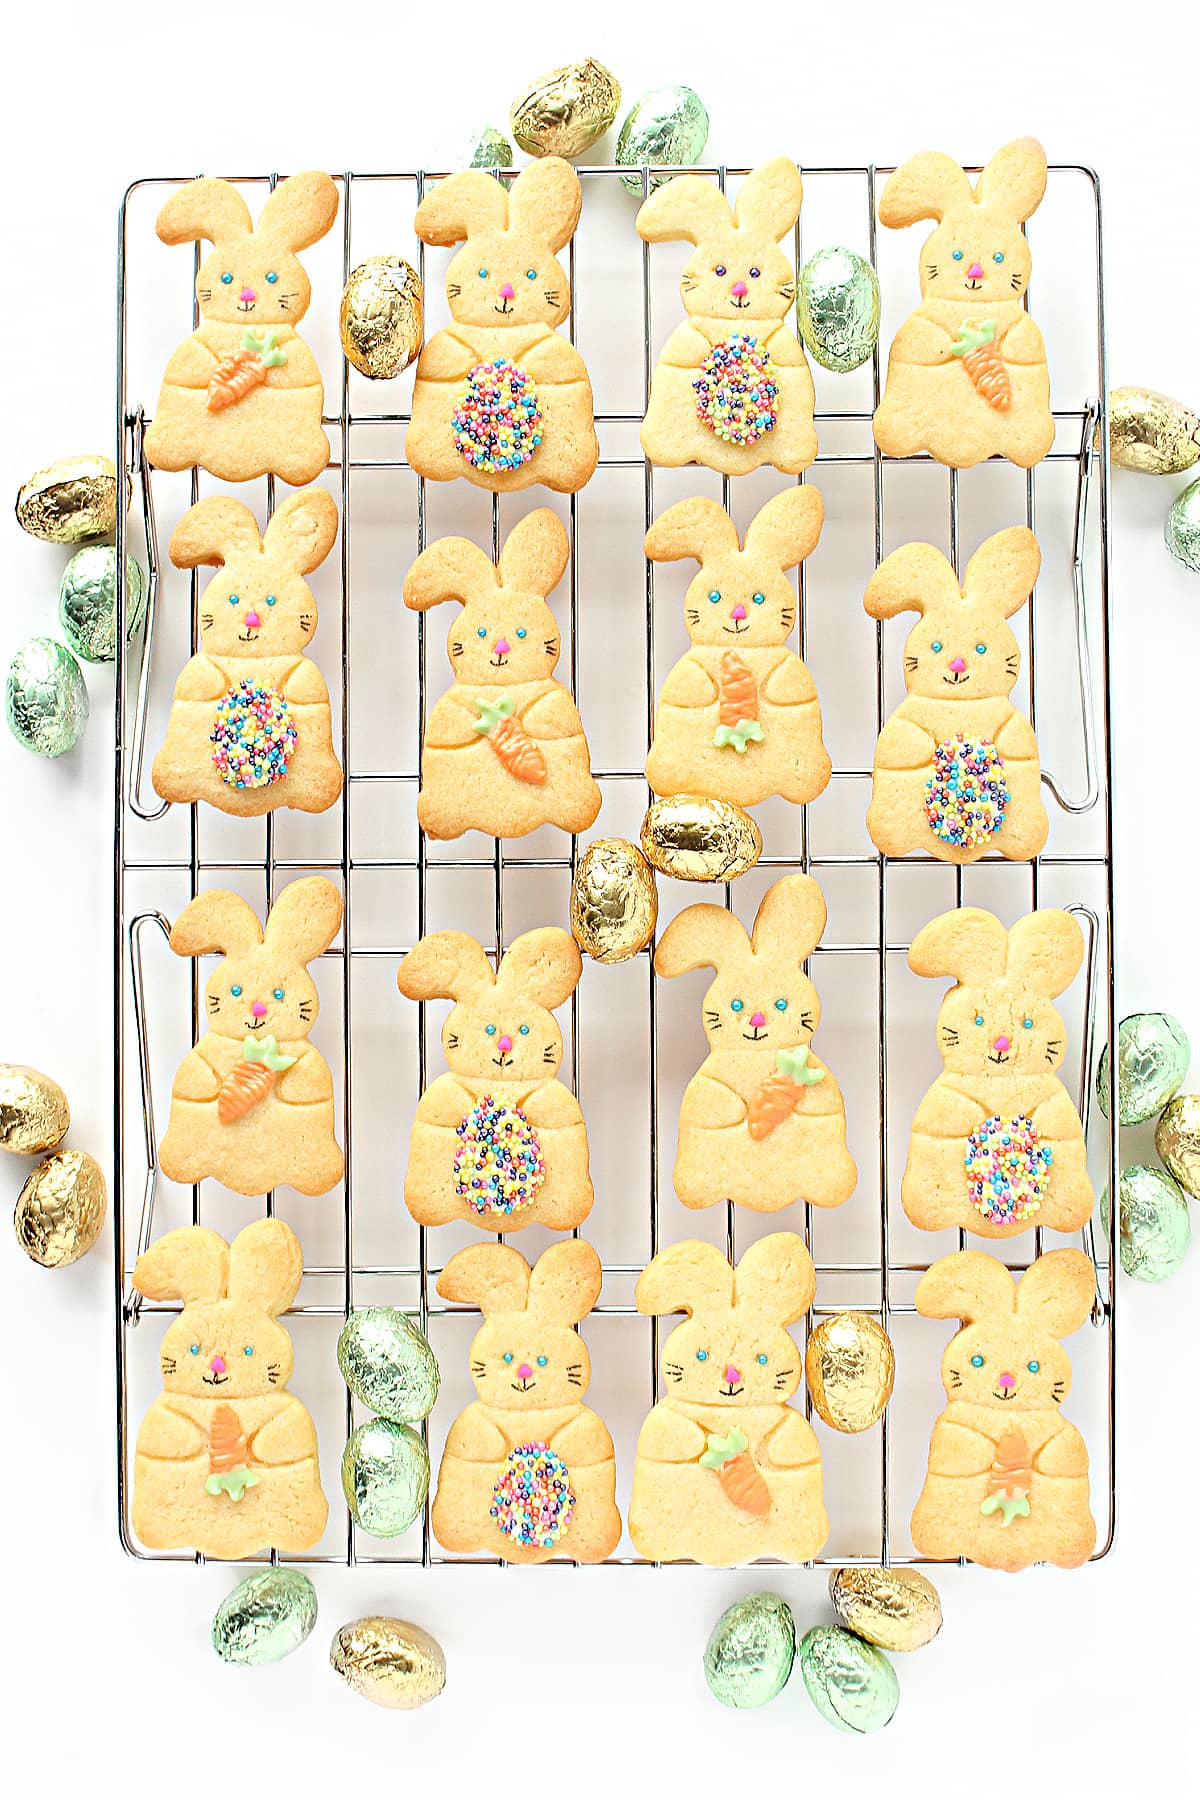
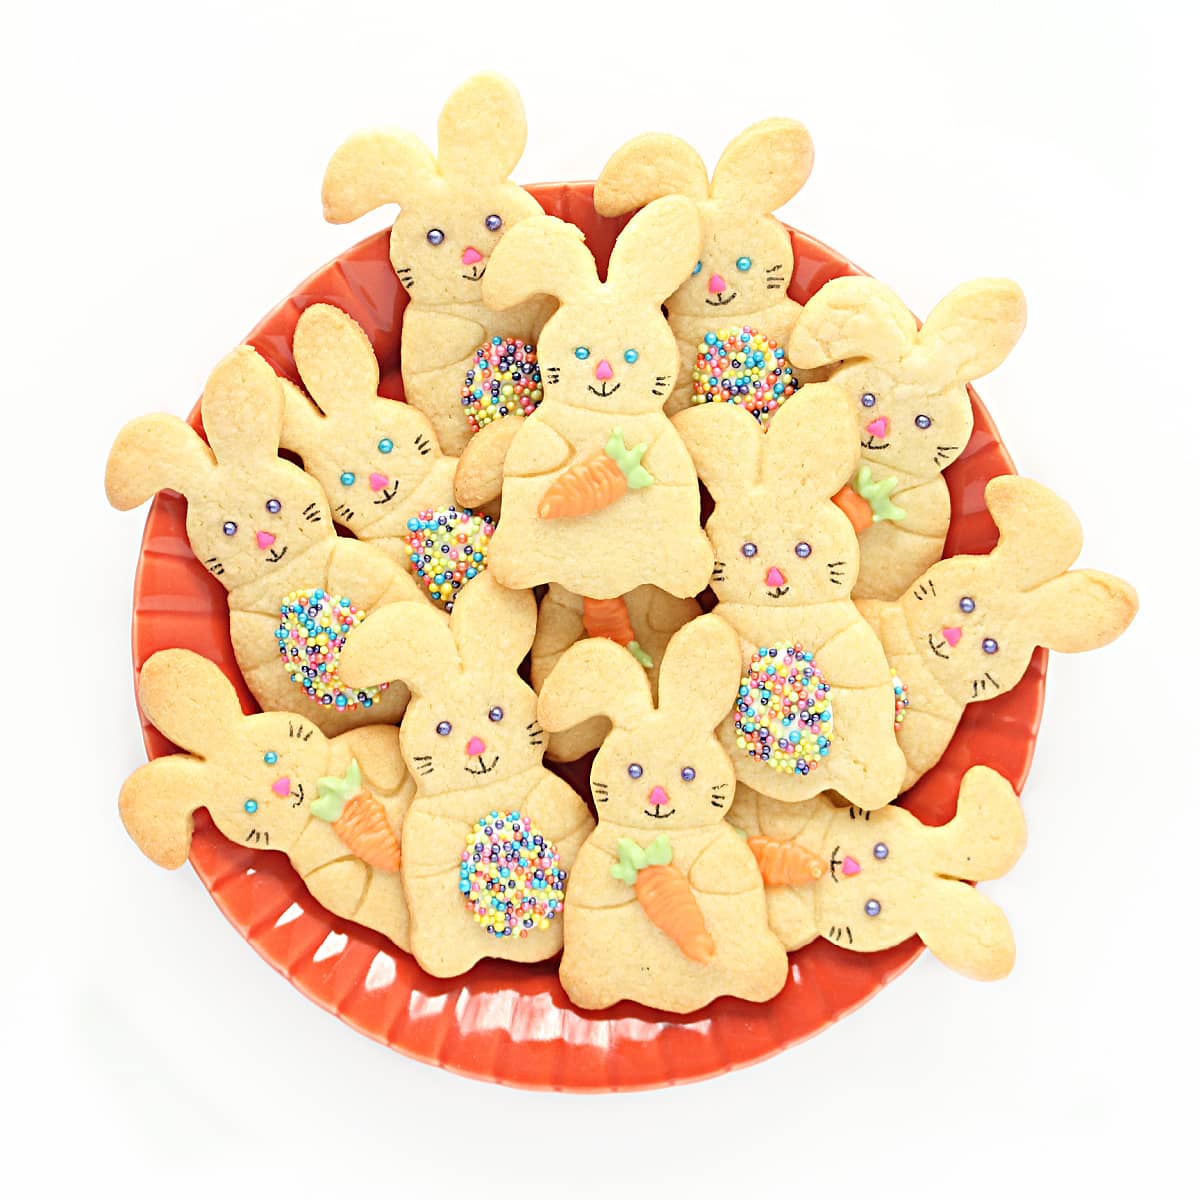
Crunchy lemon Bunny Cookies are almost too cute to eat. Colorful candy melt decorations make it easy to create adorable decorated Easter cookies.
Why you'll love this recipe
Lemon cutout cookies, with their bright, fresh flavor, are perfect for spring. Make Bunny Cookies for Easter time, then make other shapes with this butter cookie recipe to enjoy all through the summer with a glass of iced tea!
Cookie decorating can be fun and easy. Four simple tricks add cuteness to these cookies:
- The edges of the cookie cutter are used to imprint details (front paws, line between head and body) in the cutout cookie before baking.
- Sprinkles added before baking, easily add features to the bunny faces.
- Use candy melts decorations, made with a template, which stick onto the warm cookies adding color and charm.
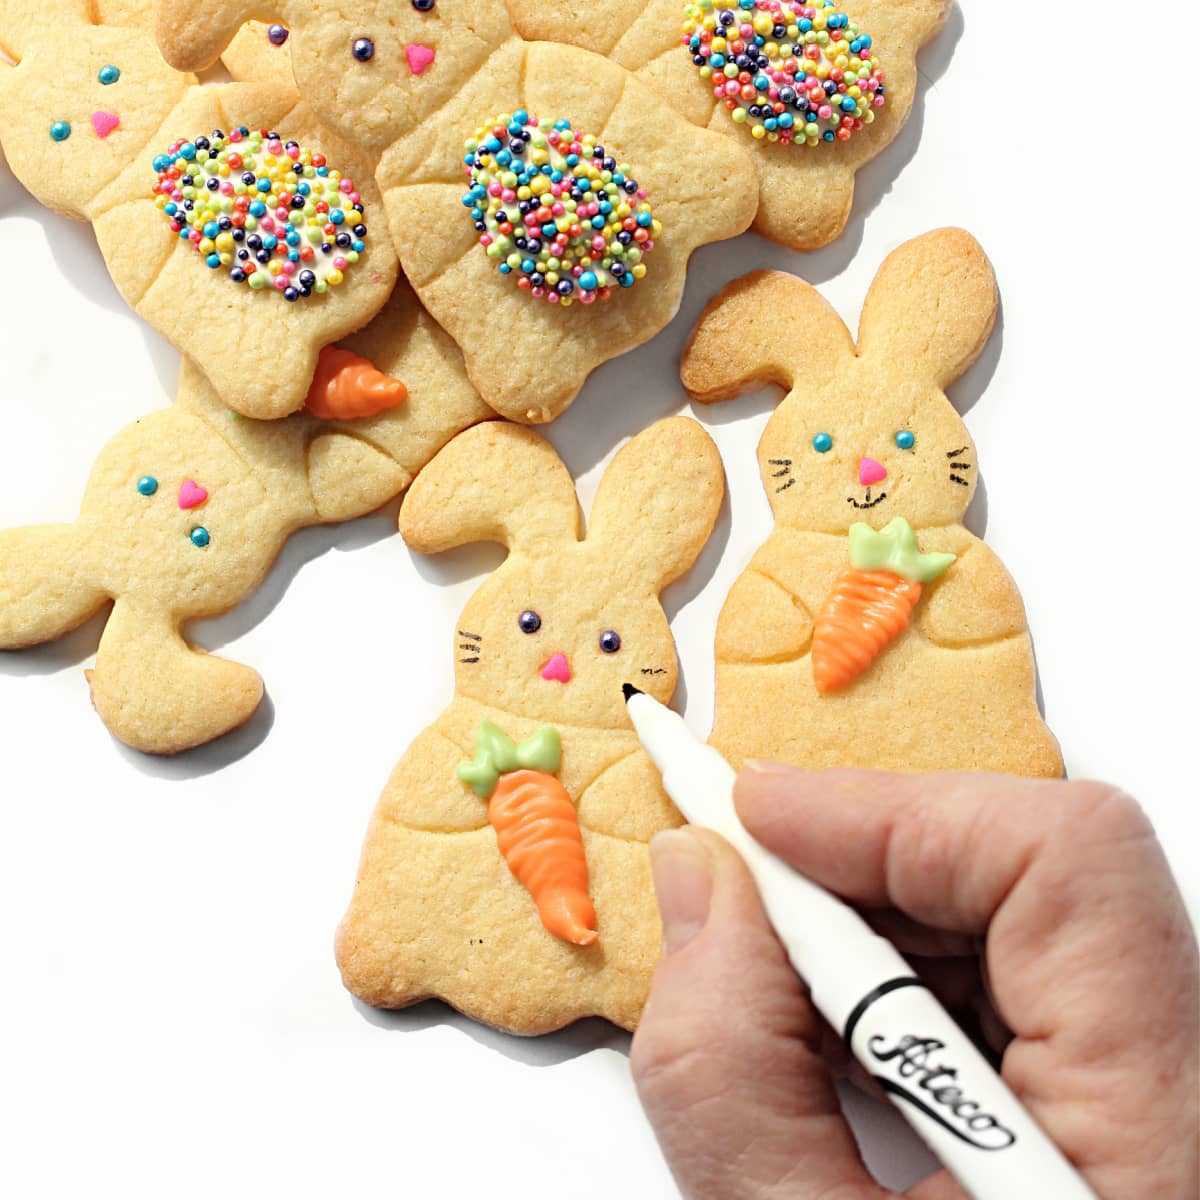
- Fine lines and details are added using a fine tip food marker. Quick and easy!
Whether you're baking these Easter Rabbit cookies for kids or with kids, these fun to make treats will make everyone smile.
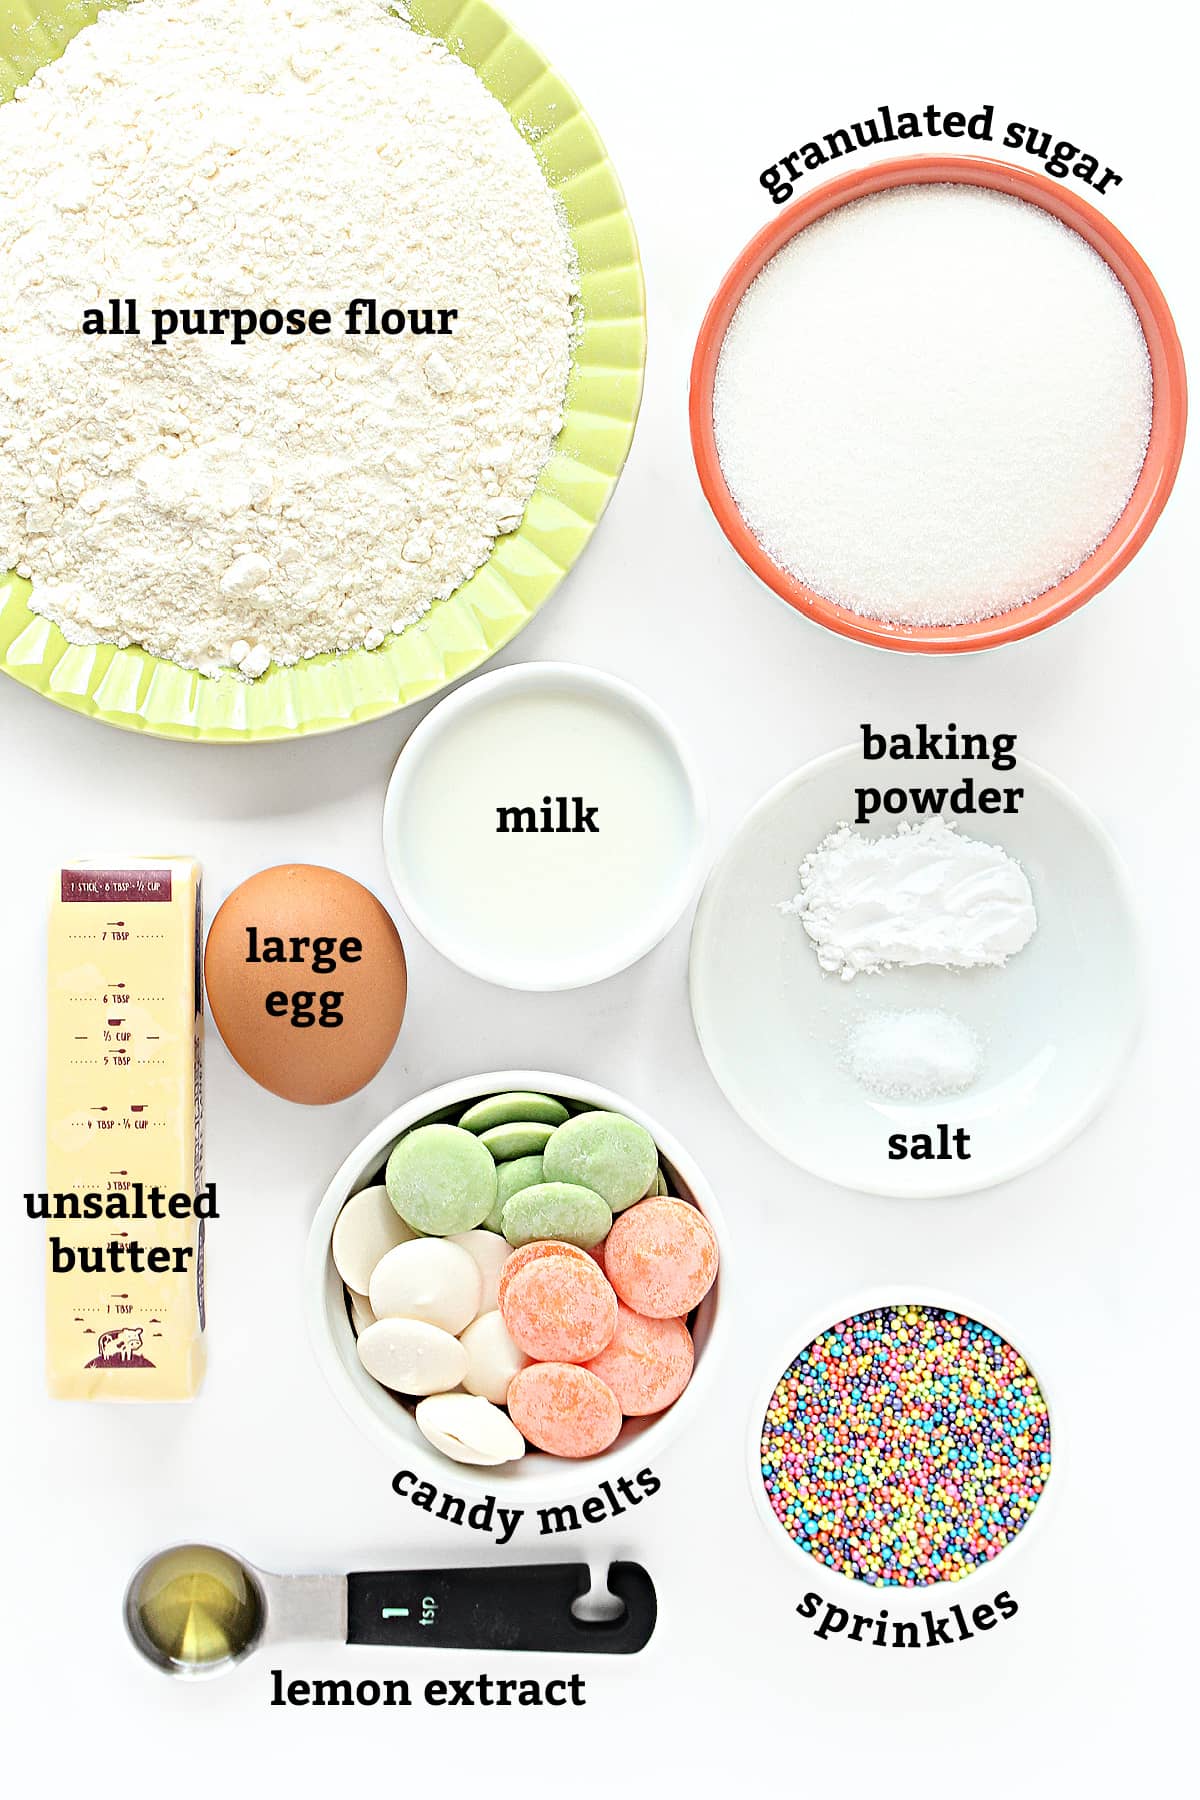
Ingredients
Instructions
This is an overview of the instructions. The full recipe instructions are in the recipe card below.
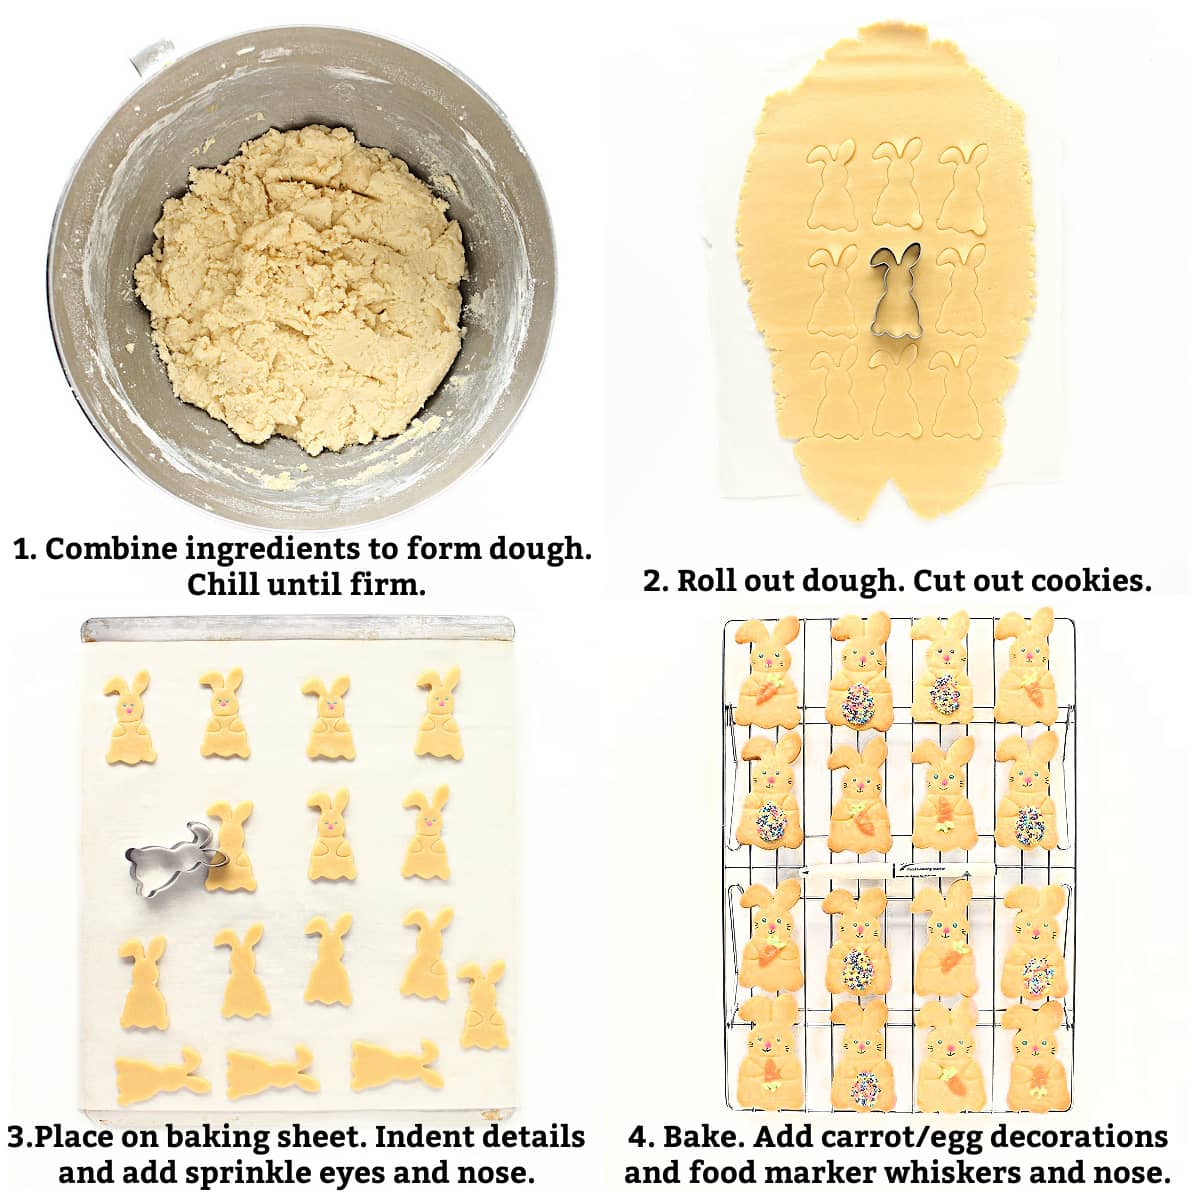
- Combine the ingredients to form the sugar cookie dough. Wrap the dough in plastic wrap and refrigerate 2 hours or until firm.
- Roll out the chilled dough and cut out the cookies with a bunny shape cookie cutter.
- Place the cookies on a baking sheet lined with a piece of parchment paper. Use the cookie cutter bunny ear to indent paws on each cookie. Use a cookie cutter edge to indent a line between the head and body. Press on sprinkle eyes and nose. Bake sugar cookies until edges are golden brown.
- Remove cookies from the oven and transfer to a wire cooling rack. Add the candy melt decorations while the cookies are still warm. Allow the bunny cookies to cool completely and the decorations to re-firm. Use a food marker to add whiskers and mouth.
How to make candy melt decorations
Carrots
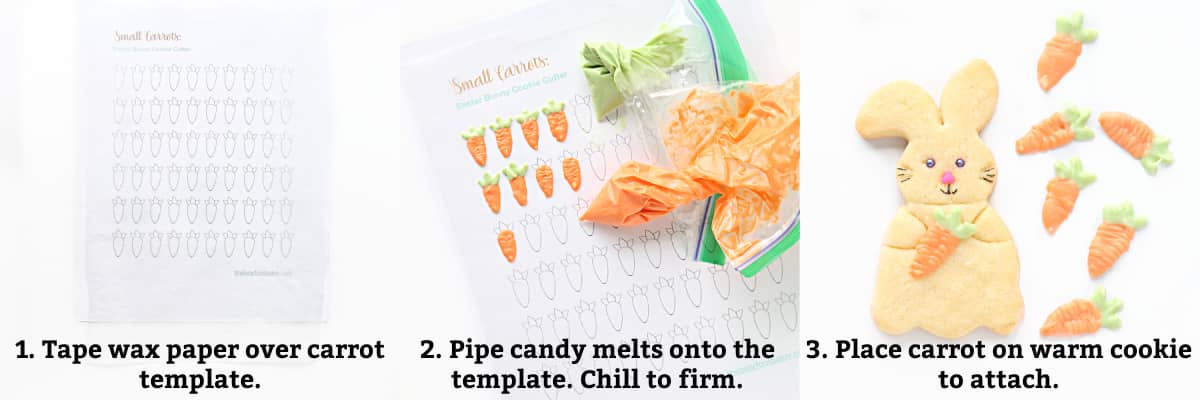
- Print the carrot template. Tape a sheet of wax paper over the template.
- Pipe melted orange candy melts onto the carrot shapes. Pipe green candy melts to top each carrot. Chill to firm then gently peel the carrots off the wax paper.
- Attach the carrot decorations to the bunny cookies either with a dot of melted candy melt as "glue" or place the decoration on the cookie while it is still warm from the oven.
Easter eggs
Would you like to save this?
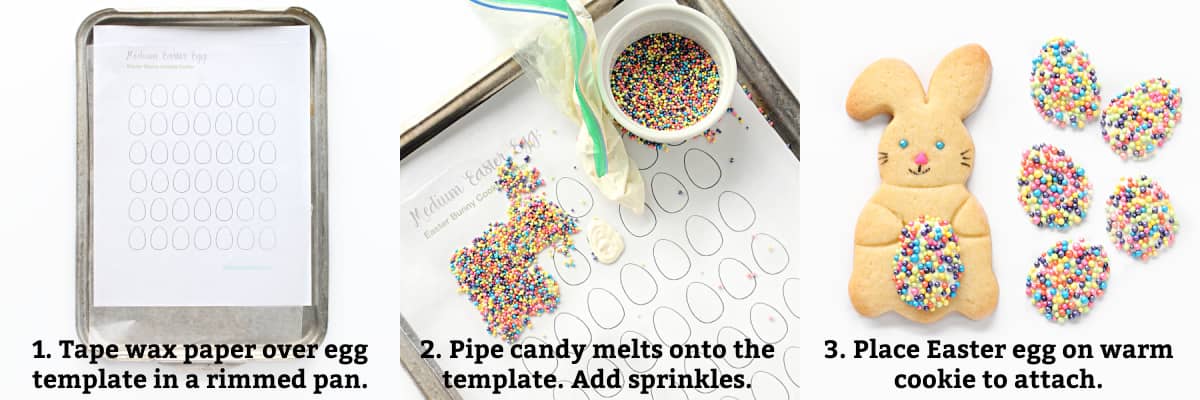
- Print the egg template. Tape a sheet of wax paper over the template and place on a rimmed baking sheet.
- Pipe melted white candy melts onto 4-6 egg shapes. Immediately cover with nonpareil sprinkles before the candy melts begin to harden. Chill to firm, then gently peel the Easter eggs off the wax paper and reuse excess sprinkles.
- Attach Easter egg decorations to the cookies either with a dot of melted candy melt as "glue" or place the decoration on the cookie while it is still warm from the oven.
Storage
Store the lemon cutout sugar cookies in an airtight container at room temperature for up to 10 days.
Tips and variations
- The cookie cutter used for this recipe is 3" tall. Using larger cookie cutters will produce less cookies and may affect baking time.
- A variety of extracts work well with these cookies. Try almond, fiore di sicilia, or vanilla extract.
- Add a little bit of gel food coloring to make this bunny cookies recipe in pastel shades.
- When using the edge of the cookie cutter to impress details into the dough, be careful not to press too deeply. If the details don't show as much as desired after baking, the impressions can be made again into the baked cookie while still hot.
- Food markers are a quick and easy way to decorate cookies and are especially useful for adding small details like the whiskers and mouths on these cookies.
- Save additional time by using a food marker, instead of sprinkles, to add the eyes and nose.
- When attaching the candy melt carrot or Easter egg to the warm cookies, the decorations will soften and melt slightly. Allow the decorations to re-firm before moving the cookies.
- Candy melt decorations are not recommended for warm/hot weather shipping. Instead, give your bunnies a small egg shaped sprinkle (added before baking) to hold in each paw.
Frequently asked questions
Stored in an airtight container or plastic bag, candy melt decorations should last at least 3-6 months.
Store candy melts and candy melt decorations in an airtight container in a cool, dry place.
Refrigerating will speed up the hardening of candy melts, but it's not required.
Save any leftover candy melts after completing a project. They can be re-melted and used again.
Related Recipes
Enjoy delicious bunny shortbread cookies with these Easter Shortbread Cutout Cookies in beautiful natural pastel colors. Kids love this cute cookie!
These Easter Pretzels are the most adorable Easter treat. Little bunnies and sheep dipped in chocolate and decorated with sprinkles. Guaranteed to make you smile!
Make show stopping Chocolate Covered Graham Cracker Eggs with packaged grahams, melted chocolate and the magic of sprinkles. The easiest way ever to make Easter Egg Cookies!
You won't believe how easy it is to make this stunning White Chocolate Bark for Easter! A great addition to a spring party.
Fill your Easter baskets with these gorgeous Homemade Peanut Butter Cups.
Be sure to see the recipe index for all of our Easter desserts.
Ready to bake? Join the free membership group to get new recipes and a newsletter delivered to your inbox! You can also stay in touch on Facebook, Pinterest, and Instagram. I'd love to stay in touch!
Bunny Cookies
Equipment
Ingredients
- ½ cup unsalted butter room temperature
- 1 cup granulated sugar
- 1 large egg room temperature
- 2 tablespoons milk
- 1 teaspoon lemon extract
- 2 ¼ cups all purpose flour
- 1 teaspoon baking powder
- ¼ teaspoon salt
- nonpareil sprinkles
- 8 orange candy melts
- 4 green candy melts
- 8 white candy melts
Instructions
Carrot decorations
- Print the carrot template and tape a sheet of wax paper on top.
- Microwave the orange candy melts in a small bowl at 50% power for about 1 minute or until completely melted. Transfer the melts into a piping bag or small ziplock bag and cut off a tiny tip of the bag.
- Pipe melted orange candy melts onto the carrot shapes. Chill to firm.
- Microwave the green candy melts in a small bowl at 50% power for about 1 minute or until completely melted. Transfer the melts into a piping bag or small ziplock bag and cut off a tiny tip of the bag.
- Pipe green candy melts to top each carrot. Chill to firm.
- Gently peel the carrots off the wax paper. Attach the carrot decorations to the cookies either with a dot of melted candy melt as "glue" or place the decoration on the cookie while it is still warm from the oven.
Easter egg decorations
- Microwave the white candy melts in a small bowl at 50% power for about 1 minute or until completely melted. Transfer the melts into a piping bag or small ziplock bag and cut off a tiny tip of the bag.
- Pipe melted white candy melts onto 4-6 egg shapes. Immediately cover with nonpareil sprinkles before the candy melts begin to harden. Chill to firm.
- Gently peel the eggs off the wax paper and reuse excess sprinkles. Attach the Easter egg decorations to the cookies either with a dot of melted candy melt as "glue" or place the decoration on the cookie while it is still warm from the oven.
Cookies
- In a medium mixing bowl whisk together the flour, baking powder, and salt. Set aside.
- In the bowl of a stand mixer, cream together the butter and sugar for about 5 minutes, until light and fluffy.
- Mix in the eggs, milk, and lemon extract, then stir in the flour mixture.
- Wrap the dough in plastic wrap and refrigerated for 2 hours.
- When ready to bake, heat oven to 350 degrees F and line a baking sheet with parchment paper.
- Remove the dough from the refrigerator and leave it on the counter for about 10 minutes until it is pliable enough to roll out.
- Roll out the dough to ⅛" thickness, between two sheets of parchment paper. If the dough is sticky, use a light dusting of flour under and on top of the dough. If the dough becomes too soft to handle, return it to the refrigerator to firm.
- Cut out bunny shapes and place them 2" apart on the prepared baking sheet. Repeat with remaining dough.
- Use the tip of one of the ears on the cookie cutter to impress front paws on each cookie. Use an edge of the cookie cutter to impress a line between the head and the body of each bunny.
- Gently press sprinkles into the dough for the bunny eyes and nose.
- If not using candy melt decorations, add an egg shape of nonpareil sprinkles on each cookie, gently pressing the sprinkles into the cookie.
- Bake for about 8 minutes or until the cookie edges just begin to turn golden brown.
- Remove from the oven and allow the cookies to cool slightly for about 5 minutes before transferring the warm to a wire rack.
- If using candy melt decorations, add a decoration to each cookie. The candy will melt slightly on the warm cookie. Do not move the cookies until they are cool and the candy melts have re-firmed (about 15 minutes).
- Use a fine tip food marker to add whiskers and mouth to each bunny cookie.
- Store decorated cookies in an airtight container at room temperature for up to 7 days.
Notes
- The cookie cutter used for this recipe is 3" tall. Using a larger cookie cutter will produce less cookies and may affect baking time.
- A variety of extracts work well with these cookies. Try vanilla, almond, or fiore di sicilia.
- When using the edge of the cookie cutter to impress details into the dough, be careful not to press too deeply. If the details don't show as much as desired after baking, the impressions can be made again into the baked cookie while still hot.
- Food markers are a quick and easy way to decorate cookies and are especially useful for adding small details like the whiskers and mouths on these cookies.
- Save additional time by using a food marker, instead of sprinkles, to add the eyes and nose.
- When attaching the candy melt carrot or Easter egg to the warm cookies, the decorations will soften and melt slightly. Allow the decorations to re-firm before moving the cookies.
- Candy melt decorations are not recommended for warm/hot weather shipping. Instead, give your bunnies a small egg shaped sprinkle (added before baking) to hold in each paw.
- Wrap stacks of 3-4 cookies in plastic wrap.
- Arrange the wrapped bundles in a plastic storage container with no room for movement within the container.
- Add tissue paper between the cookies and container lid if needed to keep the cookies from moving during shipping.
Nutrition
First Published: April 7, 2023. Last Updated: February 21, 2024. Updated for additional information and better reader experience.



Leave a Reply