
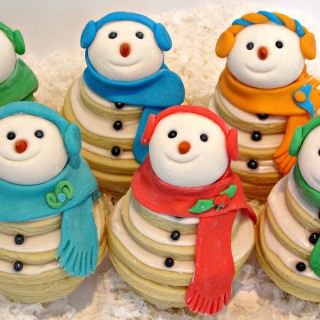
These adorable Snowmen Cookie Stacks are part craft project, part cookie, and one hundred percent adorable! A fun activity for gifts and decorations.

Why you'll love this recipe
Today is reveal day for the 2013 Great Food Blogger Cookie Exchange! There has been a lot of secretive baking and mailing going on.
Scattered across the internet you will find over 600 cookie recipes posted today by this year's cookie exchange participants.
Recipe roundups with thumbnail photos and links will be posted on December 16 by Lindsay at Love and Olive Oil and Julie at The Little Kitchen. Six hundred cookie recipes could keep you baking for a long time!

Last year, when I participated in the Great Food Blogger Cookie Exchange, The Monday Box was only a few months old. I had not yet learned the wisdom of "keep it simple".
I wanted to make something for the exchange that would stand out in the crowd of brown baked goods. I chose to make chocolate coated mallomar cookies.
My attempts at tempering chocolate failed repeatedly. I would dip beautiful cookies, only to find ugly white "blooms" the next day where there had once been dark and shiny chocolate.
In the end, my cookies were dipped in candy coating, a colorful and tasty alternative to driving yourself crazy with chocolate.

This year, The Monday Box is just over a year old and apparently I am still oblivious to the wisdom of "keep it simple". It all started with a photo on flickr of adorable snowmen.
"How hard could it be?" I thought. To be honest, these Smiling Snowmen aren't hard to make at all. They are, however, time consuming.
Using the photo as my guide, I made up my own directions. In the process I made some mistakes (nothing major, thank goodness) and learned some shortcuts.
The directions I am sharing here are streamlined to the best of my ability and produce some incredibly adorable Smiling Snowmen.

This is not a quickly thrown together cookie recipe. It is a fun and easy project that takes some time to complete, mostly because of the down time required to let the icing and fondant set firmly.
Don't be scared off by the number of steps. Each step is incredibly easy. With adult supervision, a preschooler could make these snowmen.
I've broken down the process into days just as a suggestion. If you choose to do some steps in the morning, allow time for stetting, then do more steps in the evening, the snowmen could be completed in 2 days (combine days 1 and 2, then combine days 3 and 4).
The last day in my directions is for packaging. The snowmen must have an overnight dry before packaging for shipping or gifting. The days of the week are provided to enable completing the project for Monday mailing.

Tips
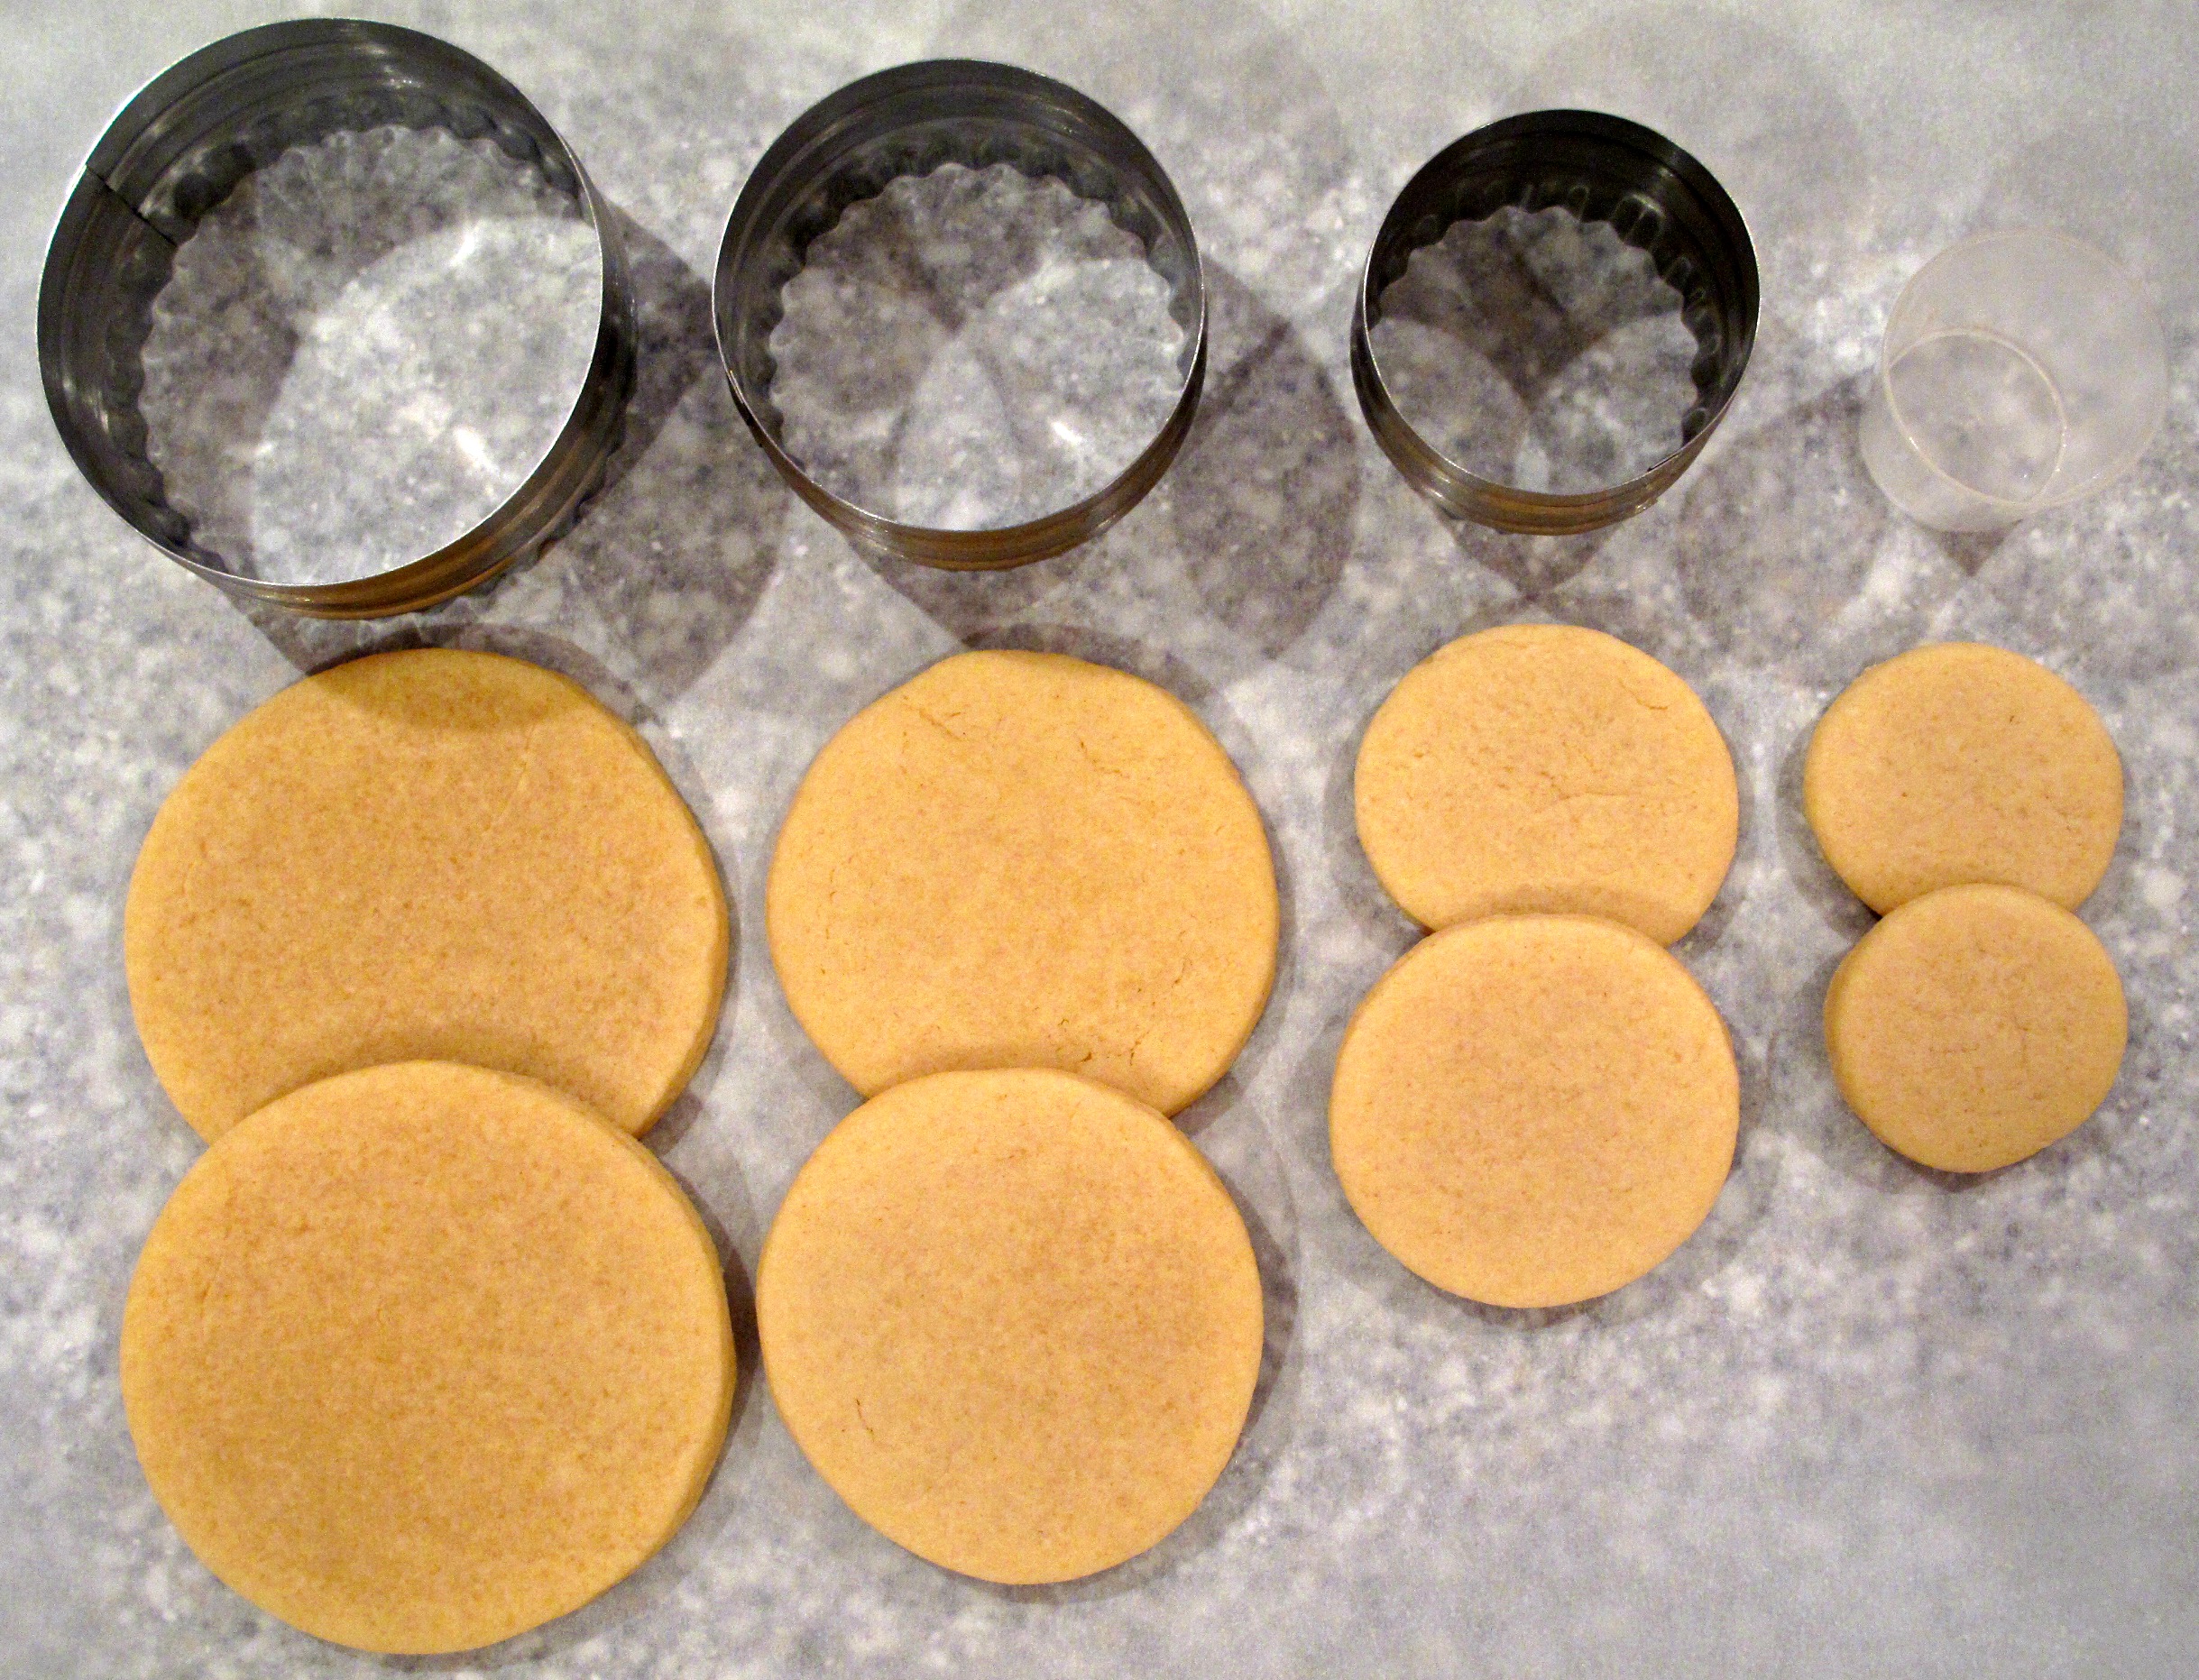
- The exact size of the circles doesn't matter. They just need to be one slightly bigger than the next. My set of circle cookie cutters didn't come with a circle small enough for the tiny cookie. I searched my kitchen "pack rat" drawer and discovered that a small medicine measuring cup was the perfect size.
- Drying or setting time is important. If the icing doesn't have time to harden, the cookies will slide around making the snowman off-centered and unable to stand.

Would you like to save this?
Time saving shortcut possibilities:
- Use packaged refrigerator sugar cookie dough instead of homemade.
- Skip the fondant. Make the heads from powdered sugar doughnut holes, cake balls dipped in white coating, or large marshmallows. Leave the snowmen au naturel (without ear muffs or scarves) or cut the decorations out of fruit roll-ups. (Kids can do this with scissors.)

Instructions
Day 1 (Thursday):
- Prepare and roll out Sugar Cookie dough. Cut out 8 circles for each Smiling Snowman. (2-tiny 1.5" , 2-small 2", 2-medium 2.5", 2-large 3")Exact size of circles is not important. The circles just need to get progressively larger.
- Bake cookies. Cool completely before storing or moving on to the next step.
Day 2 (Friday):
- Prepare icing to a thick but spreadable consistency. Spoon icing into 1 or 2 (whichever you find easier to handle) plastic bags or icing bags. If using a plastic bag, cut off a small piece of the bottom corner. If using an icing bag, cut off a small piece of the tip.
- To ice all of the cookies, squirt a small amount of icing onto each cookie and spread to the edges with a knife, spoon, or icing spatula. Icing should be spread thin but even. The centers of the cookies will not show on the finished snowmen but an even surface is important for assembly. Allow the icing to set for at least an hour.
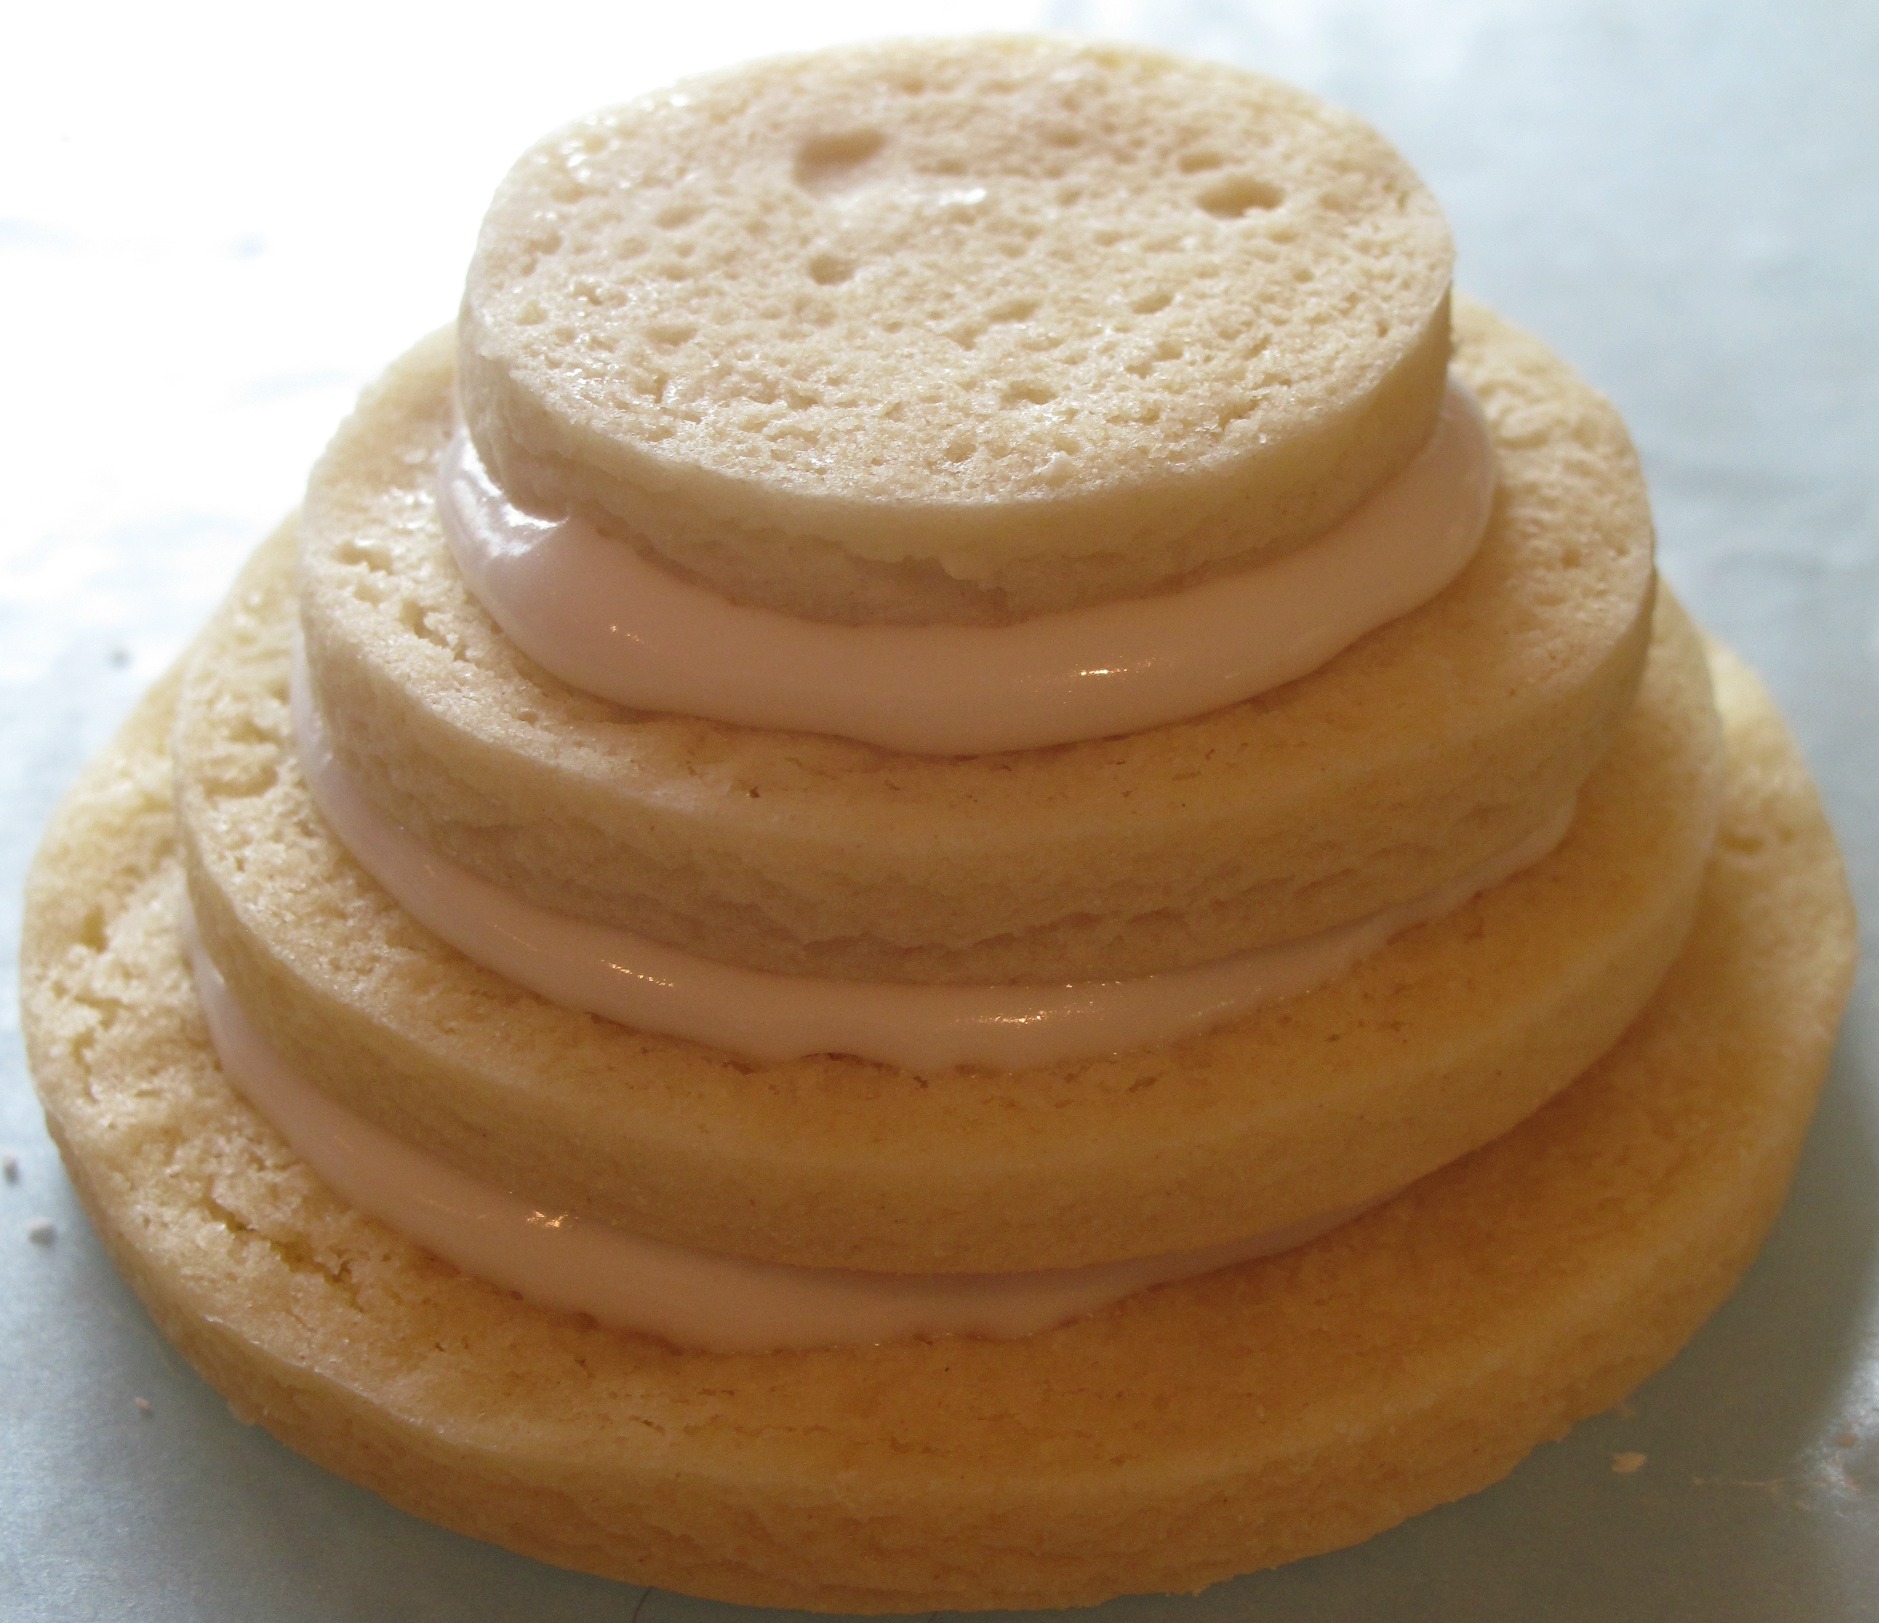
- For each snowman, assemble 2 pyramids of cookies icing side up (large-medium-small-tiny), by squirting a blob of icing glue in the center of each cookie and placing the next smaller cookie on top. For sturdiness and ease of handling, allow to completely set overnight. Refrigerate left over icing bag(s).
- Prepare fondant, wrap in plastic wrap, and refrigerate overnight.
Day 3 (Saturday):
- Remove fondant and icing from the refrigerator and warm to room temperature.
- To assemble the body for each snowman, glue together the 2 pyramids of cookie circles by sandwiching icing between the 2 largest circles. Squeeze a blob (approximately 2 teaspoons) of icing in the center of one of the largest cookie circles and gently press the other large circle on top. (You should now have a pile of 8 cookies, tiny-small-medium-large-large-medium-small-tiny.) Gently hold the cookies together for 20-30 seconds to ensure nothing moves.
- Refrigerate left over icing.
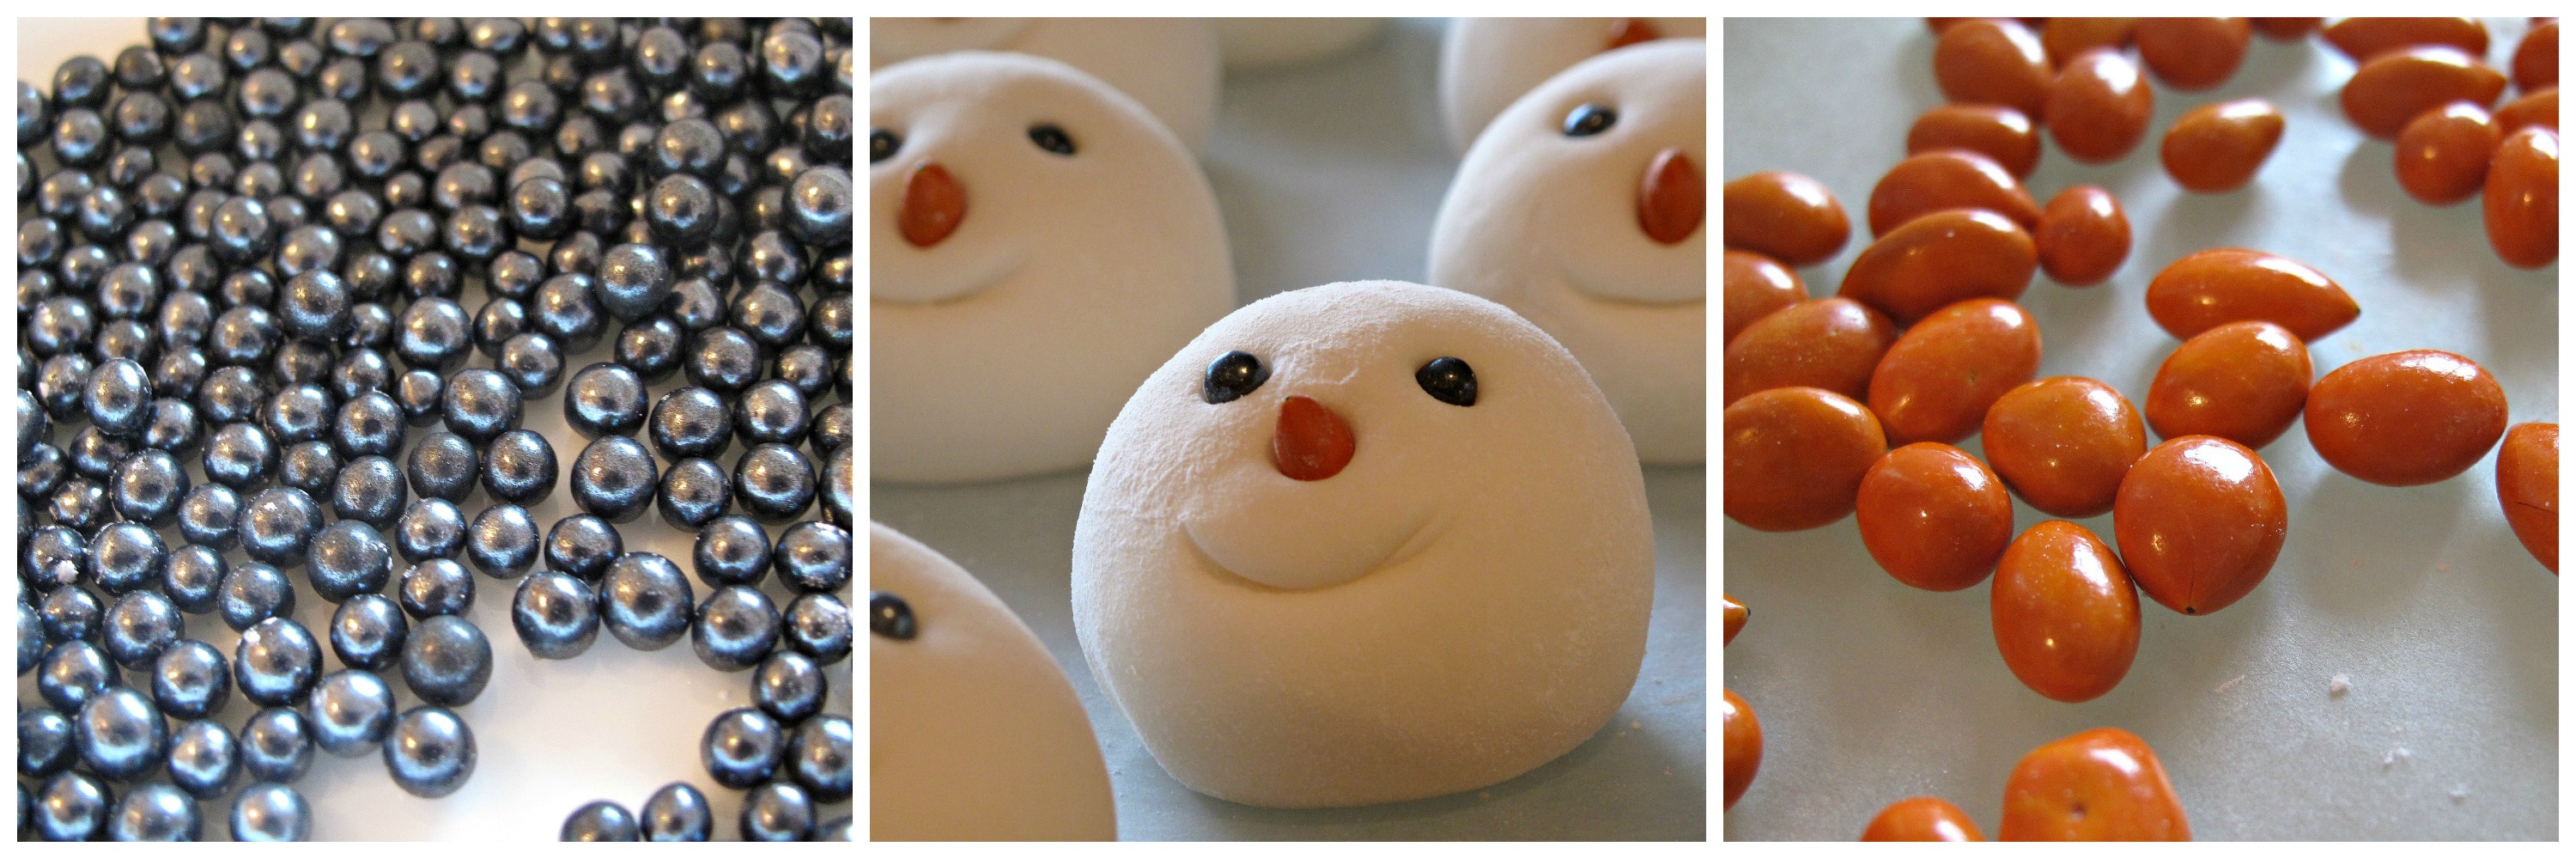
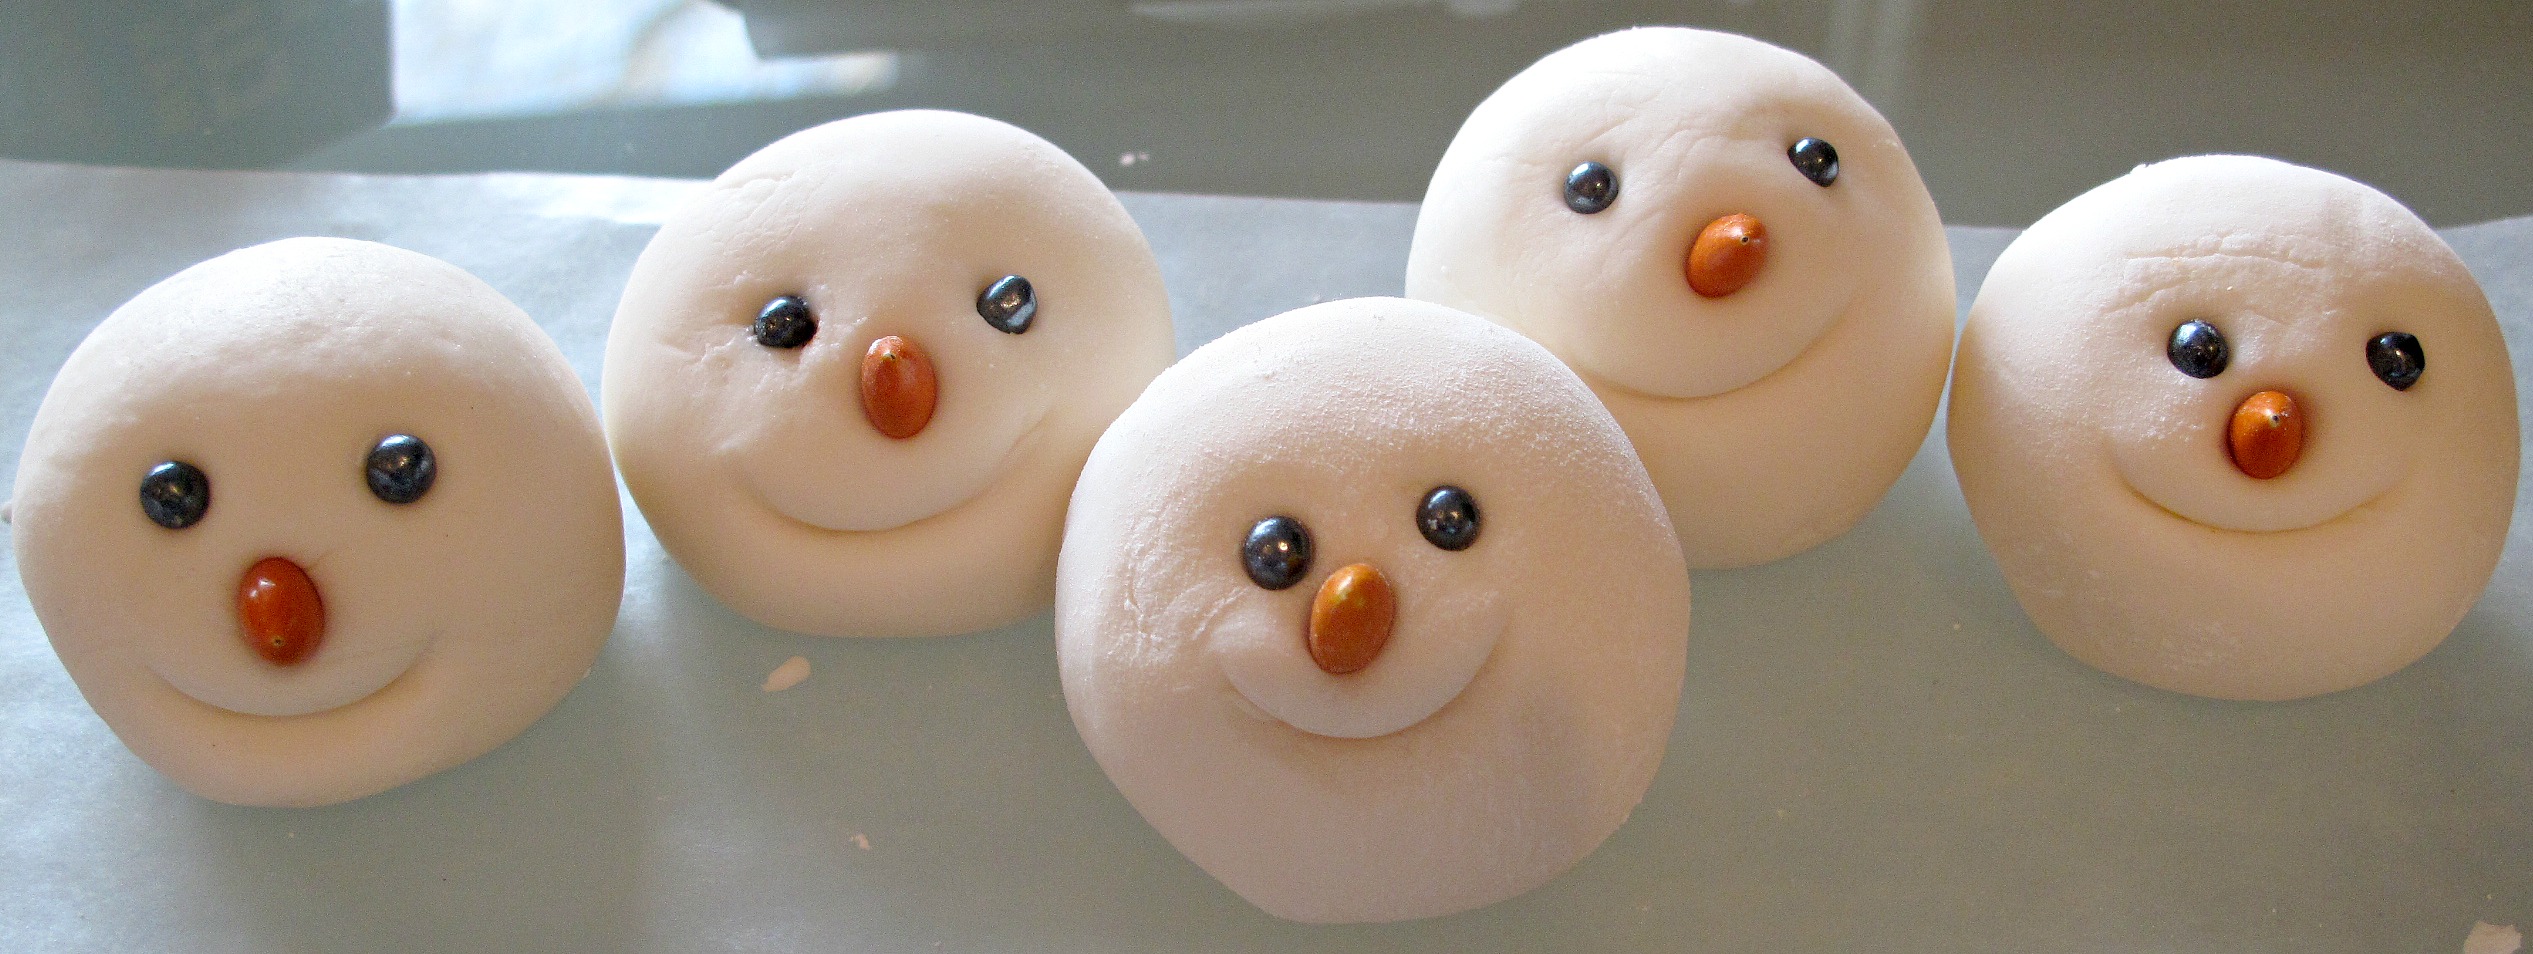
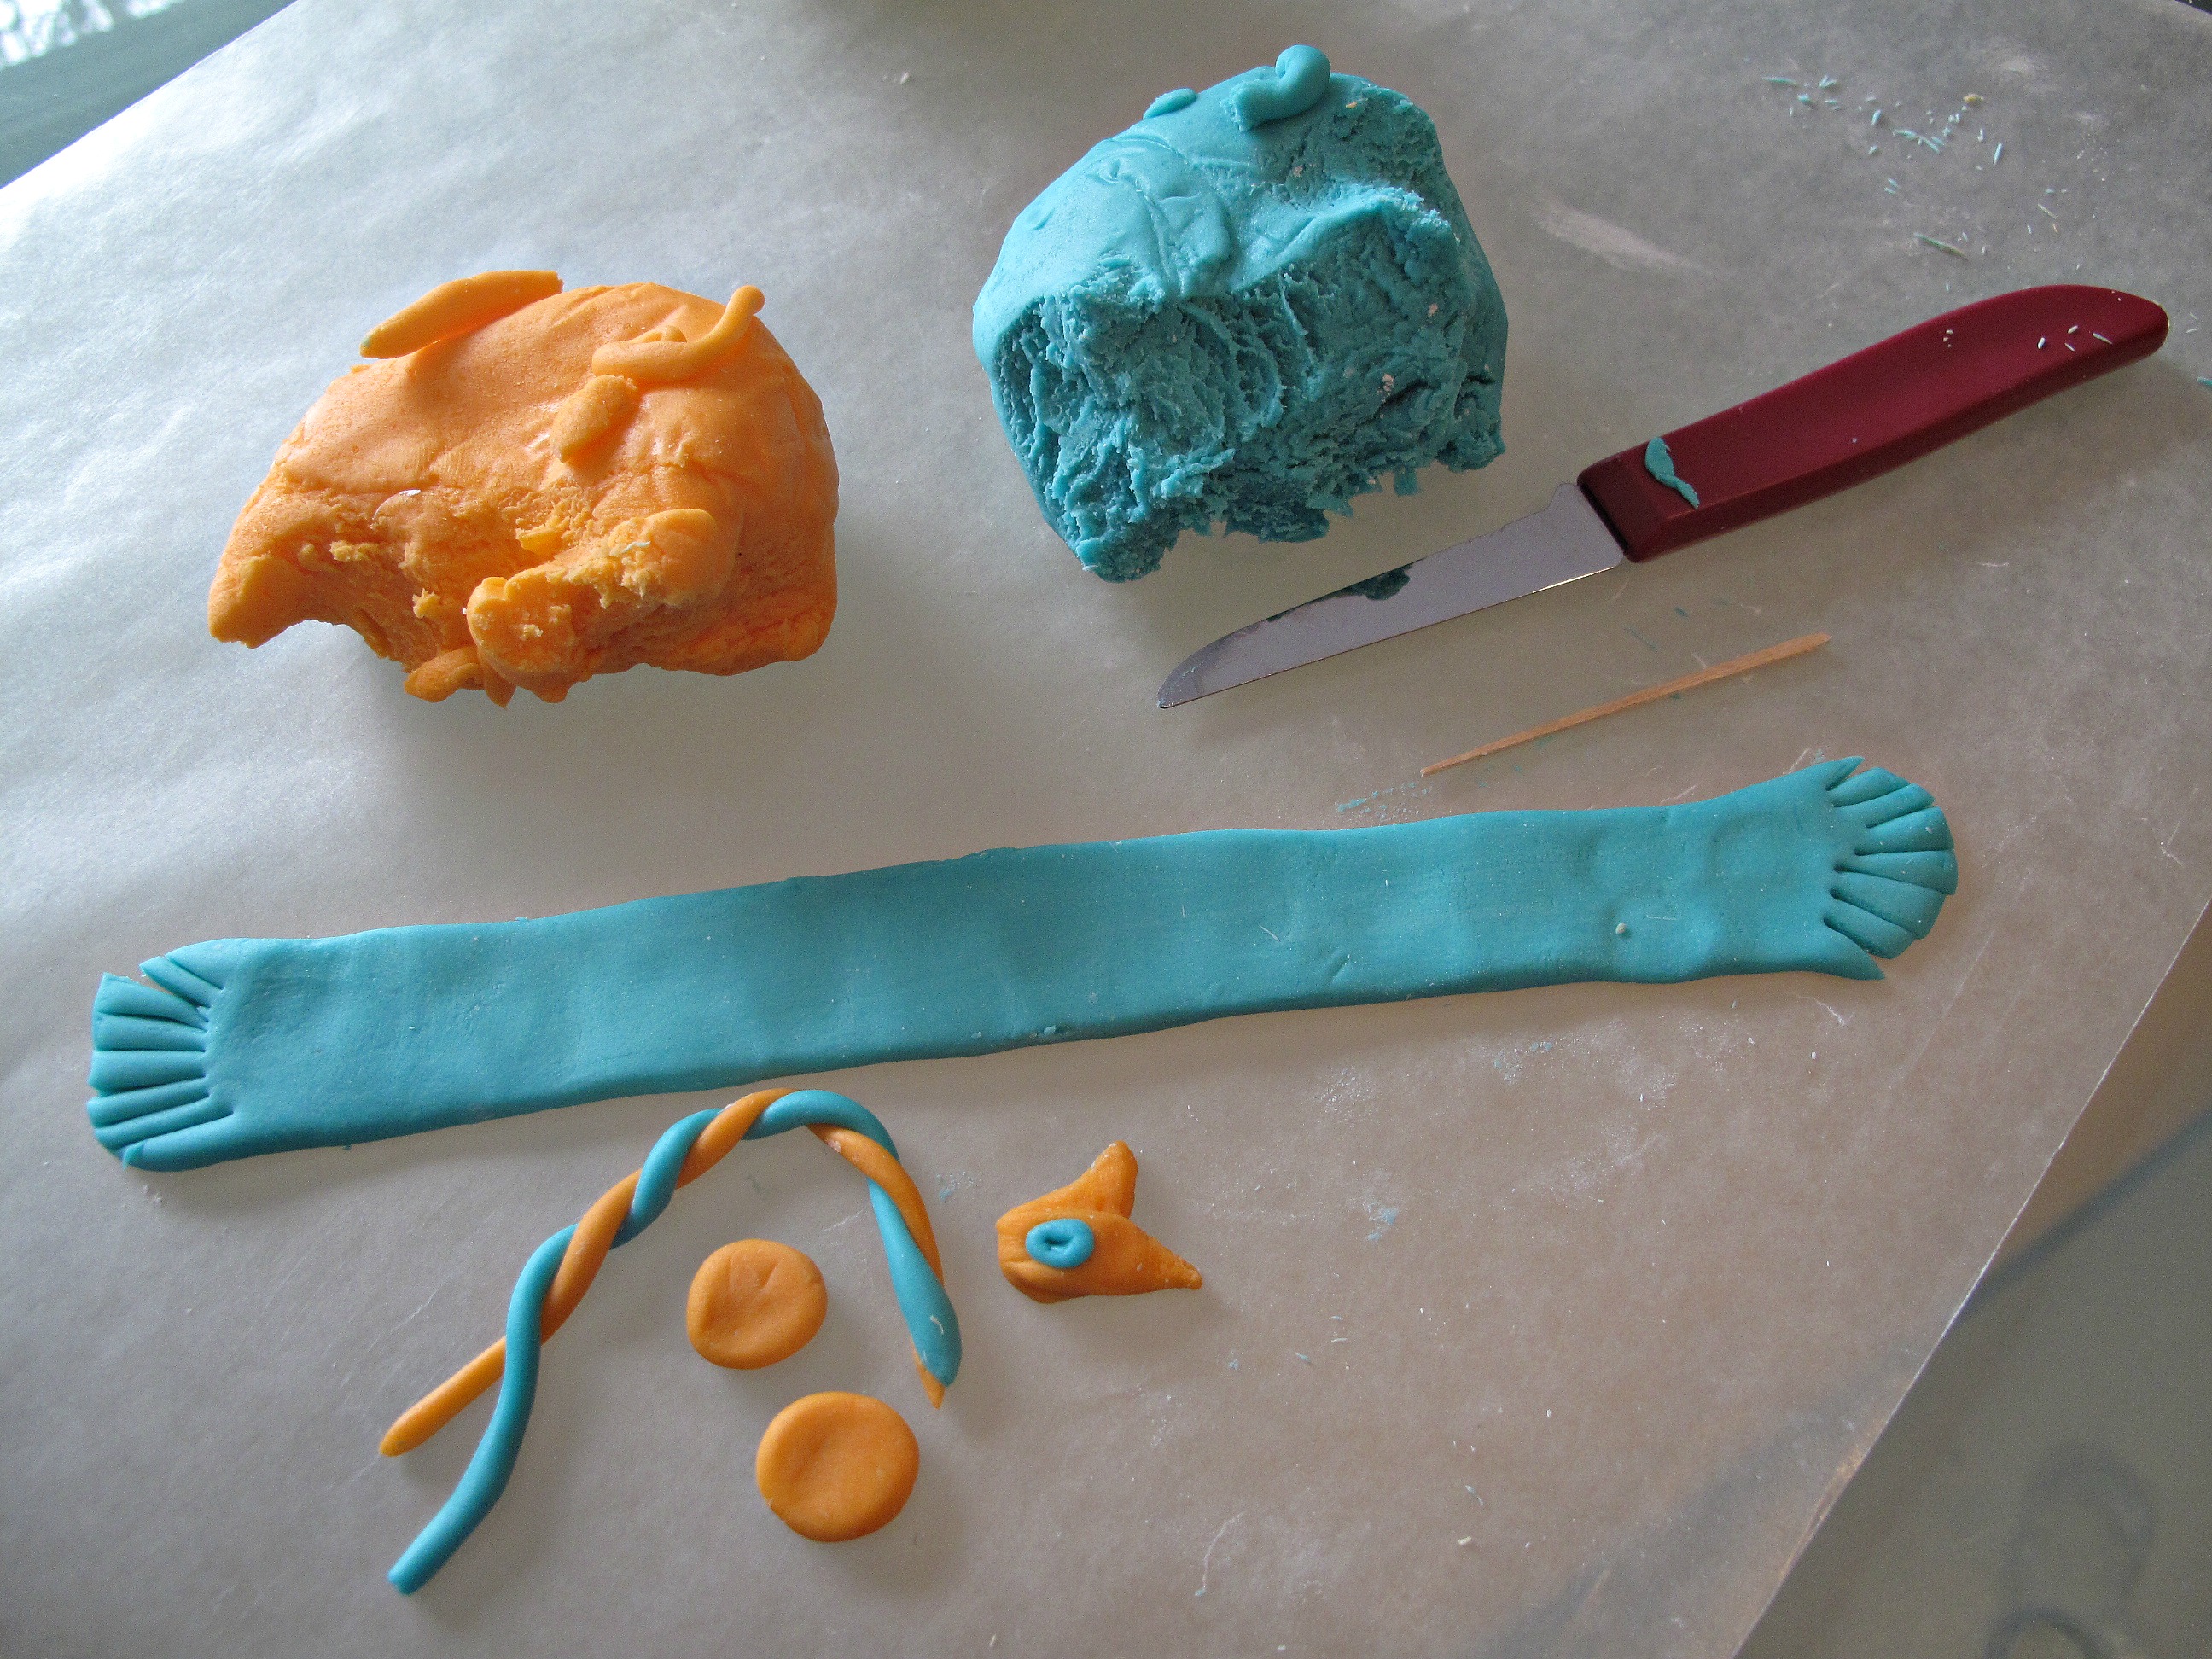
- Use the fondant just like playdough. Pinch off the desired amount and roll into a ball. Mine were a little smaller than a golf ball. Immediately insert eyes (sprinkle pearls) and nose (chocolate sunflower seeds). Using the tip of a spoon (I used a ¼ measuring teaspoon) make an indentation for the mouth. Place smiling heads on wax paper to firm overnight. Trying to work with the fondant heads before they are firm will result in lumpy snowman heads.
- Color the left over fondant to use for decorating (earmuffs, scarves, etc.). Divide the left over fondant depending on how many colors you want to make. To color, knead the fondant with 2-3 drops of food coloring gel until color is uniform. (Wash hands immediately after each color to remove the majority of the food coloring.) Refrigerate each color of fondant in separate in ziplock bags.
Day 4 (Sunday):
- Bring colored fondant and icing to room temperature.
- Using icing, glue the heads onto the cookie pile bodies. Wait at least 2 hours before decorating to allow the heads to attach firmly.
- Pinch and roll the colored fondant to create tiny scarves and ear muffs. Attach the decorations with tiny amounts of icing glue. I used a toothpick to apply tiny dots of icing to the decorations before gently pressing them onto the snowmen. Allow to air dry overnight before packaging.
Day 5 (Monday):
- Package each snowman individually in plastic goodie bags.
- For mailing, make plastic cup "space capsules": I used 1- large colored plastic cup (16 oz.), 1- small clear plastic cup (5 oz.), and tissue paper. Insert a crumpled sheet of tissue paper into the large cup so that the bottom of the snowman will be resting on the tissue paper as far into the cup as it fits without pushing. Use about a ¼ sheet of tissue paper twisted into a "collar" to place around the inside rim of the cup to provide cushioning between the snowman and the cup. Gently place an inverted small clear cup on top, fitting into the large cup. Test to make sure the snowman isn't moving at all before taping the two cups together.
- Send Smiling Snowmen off into the world to spread peace, joy, and happiness!

Ready to bake? Join the free membership group to get new recipes and a newsletter delivered to your inbox! You can also stay in touch on Facebook, Pinterest, and Instagram. I'd love to stay in touch!
Smiling Snowmen
Ingredients
Sugar Cookies
- 1 cup unsalted butter room temperature
- 1 ½ cups granulated sugar
- 2 large eggs
- 2 teaspoons vanilla extract
- ½ teaspoon salt
- ¾ teaspoon baking powder
- 4 cups all purpose flour additional ½ cup if using the dough without chilling
Corn Syrup Icing (Faux Royal Icing
- 4 cups confectioners' sugar
- 3 tablespons milk
- 3 tablespoons corn syrup
- 1 teaspoon vanilla extract
Marshmallow Fondant
- 16 ounces mini marshmallows 1 package
- 4 tablespoons water
- 8 cups confectioners' sugar
- 2 tablespoons butter or shortening for coating hands
Instructions
Sugar Cookies
- Pre heat oven to 350 degrees F. Line a baking sheet with parchment paper.
- In the bowl of an electric mixer, cream butter and sugar just until combined.Mix in eggs and vanilla. Then mix in baking powder and salt.
- Gradually add flour, 1 cup at a time. If making the cookies right away, use 4 ½ cups of flour. If refrigerating dough for use in several hours or several days, use only 4 cups of flour.
- Roll out on a lightly floured surface to slightly less than ½" thick ( about ⅜")Cut out circles in snowman sets of 8 circles ( 2 large, 2 medium, 2 small, 2 tiny).
- Transfer to prepared baking sheet and bake for 7 minutes.Cool on baking sheet for 5-10 minutes then transfer to a wire rack to cool completely.
Corn Syrup Icing
- In a medium bowl, combine sugar and milk until smooth.Add corn syrup and vanilla. Continue beating together until smooth and glossy. Add additional milk in tablespoon increments until desired consistency. (Icing consistency should be thin enough to spread easily but thick enough not to drip off the cookies. It should resemble a thin paste but not glue.)
- Spoon icing into piping bags or ziplock bags.
Marshmallow Fondant
- In a large microwave safe bowl, microwave marshmallows and water for 30 seconds on high. Stir in water and vanilla extract. Continue microwaving in 30 second intervals then stirring until melted and smooth.
- Gradually stir in the confectioners sugar, 1 cup at a time reserving 1 cup for kneading.
- Grease hands with butter and knead like dough. Turn marshmallow mixture out onto a counter lightly dusted with confectioners sugar. Add remaining confectioners sugar to fondant until no longer sticky, and forms a smooth ball (8-10 minutes).
- Double wrap the fondant in plastic wrap and refrigerate overnight.Bring to room temperature before using. Refrigerated marshmallow fondant, well wrapped in plastic to prevent drying, will remain fresh for several weeks.
Snowman Cookie Stacks
- Prepare and roll out Sugar Cookie dough. Cut out 8 circles for each Smiling Snowman. (2-tiny 1.5" , 2-small 2", 2-medium 2.5", 2-large 3")Exact size of circles is not important. The circles just need to get progressively larger.Bake cookies. Cool completely before storing or moving on to the next step.
- Prepare icing to a thick but spreadable consistency. Spoon icing into 1 or 2 (whichever you find easier to handle) plastic bags or icing bags. If using a plastic bag, cut off a small piece of the bottom corner. If using an icing bag, cut off a small piece of the tip.
- To ice all of the cookies, squirt a small amount of icing onto each cookie and spread to the edges with a knife, spoon, or icing spatula. Icing should be spread thin but even. The centers of the cookies will not show on the finished snowmen but an even surface is important for assembly. Allow the icing to set for at least an hour.
- For each snowman, assemble 2 pyramids of cookies icing side up (large-medium-small-tiny), by squirting a blob of icing glue in the center of each cookie and placing the next smaller cookie on top. For sturdiness and ease of handling, allow to completely set overnight.
- Refrigerate left over icing bag(s).Prepare fondant, wrap in plastic wrap, and refrigerate overnight.
- Remove fondant and icing from the refrigerator and warm to room temperature.
- To assemble the body for each snowman, glue together the 2 pyramids of cookie circles by sandwiching icing between the 2 largest circles. Squeeze a blob (approximately 2 teaspoons) of icing in the center of one of the largest cookie circles and gently press the other large circle on top. (You should now have a pile of 8 cookies, tiny-small-medium-large-large-medium-small-tiny.) Gently hold the cookies together for 20-30 seconds to ensure nothing moves.Refrigerate left over icing.
- Use the fondant just like playdough. Pinch off the desired amount and roll into a ball. Mine were a little smaller than a golf ball. Immediately insert eyes (sprinkle pearls) and nose (chocolate sunflower seeds). Using the tip of a spoon (I used a ¼ measuring teaspoon) make an indentation for the mouth. Place smiling heads on wax paper to firm overnight. Trying to work with the fondant heads before they are firm will result in lumpy snowman heads.
- Color the left over fondant to use for decorating (earmuffs, scarves, etc.). Divide the left over fondant depending on how many colors you want to make. To color, knead the fondant with 2-3 drops of food coloring gel until color is uniform. (Wash hands immediately after each color to remove the majority of the food coloring.) Refrigerate each color of fondant in separate in ziplock bags.
- Bring colored fondant and icing to room temperature.
- Using icing, glue the heads onto the cookie pile bodies. Wait at least 2 hours before decorating to allow the heads to attach firmly.
- Pinch and roll the colored fondant to create tiny scarves and ear muffs. Attach the decorations with tiny amounts of icing glue. I used a toothpick to apply tiny dots of icing to the decorations before gently pressing them onto the snowmen. Allow to air dry overnight before packaging.
- Package each snowman individually in plastic goodie bags. Send Smiling Snowmen off into the world to spread peace, joy, and happiness!
Notes
- The exact size of the circles doesn't matter. They just need to be one slightly bigger than the next.
- Drying or setting time is important. If the icing doesn't have time to harden, the cookies will slide around making the snowman off-centered and unable to stand.
- Use packaged refrigerator sugar cookie dough instead of homemade.
- To save time, skip the fondant. Make the heads from powdered sugar doughnut holes, cake balls dipped in white coating, or large marshmallows. Leave the snowmen au naturel (without ear muffs or scarves) or cut the decorations out of fruit roll-ups. (Kids can do this with scissors.)
- For mailing, make plastic cup "space capsules" with 1- large colored plastic cup (16 oz.), 1- small clear plastic cup (5 oz.), and tissue paper.
- Insert a crumpled sheet of tissue paper into the large cup so that the bottom of the snowman will be resting on the tissue paper as far into the cup as it fits without pushing.
- Use about a ¼ sheet of tissue paper twisted into a "collar" to place around the inside rim of the cup to provide cushioning between the snowman and the cup.
- Gently place an inverted small clear cup on top, fitting into the large cup.
- Test to make sure the snowman isn't moving at all before taping the two cups together.
Nutrition
First Published: December 11, 2013. Last Updated: April 23, 2023. Updated for additional information and better reader experience.

Debbie P
These look amazing! Thanks for the great cookie idea!
Wendy Sondov
Hi, Debbie. These Snowmen are as much a craft project as they are a cooking activity! They are very easy to create but do take several days to complete. Most people I have given them to fall in love with their smiles and choose to use them as decorations rather than eat them! Enjoy!
Winnie
These are the cutest cookies I've seen in a very long time.
Super creative, and perfectly done
You are really talented!!
themondaybox
Oh, Winnie! Thank you so much! I take that as a HUGE compliment coming from you. Everything you bake is a work of art!!
The faces on these snowmen came out so cute, without any talent on my part. I think they are just naturally cute. 🙂 I fell so in love with them that there is still on snowgirl smiling at me on my kitchen counter. I just couldn't give them all away!
Krystle Kouture (@KrystleKouture)
These are SO adorable! My face lit up the moment I saw them so I'm sure they'd bring a smile to anyone's face.
Because i have 90001 cookie recipes I want to make and December is SO short I decided I'm baking Christmasy cookies all year long this coming year. Perhaps in 12 months I can perfect these for next year lol?
themondaybox
Thanks, Krystle!! I am so glad these little guys made you smile. 🙂
I like your year round cookie baking plan! Why do people go crazy for cookie baking only in December? The only thing that really makes a cookie Christmas-y is the red and green sprinkles or the shape of a cookie cutter. I say, taste test cookies all year with a wide variety of sprinkles (I am a big believer in sprinkles!) and use a variety of cookie cutters (variety is good). Wouldn't it be fun to make these snowmen in July wearing sun visors instead of ear muffs?!