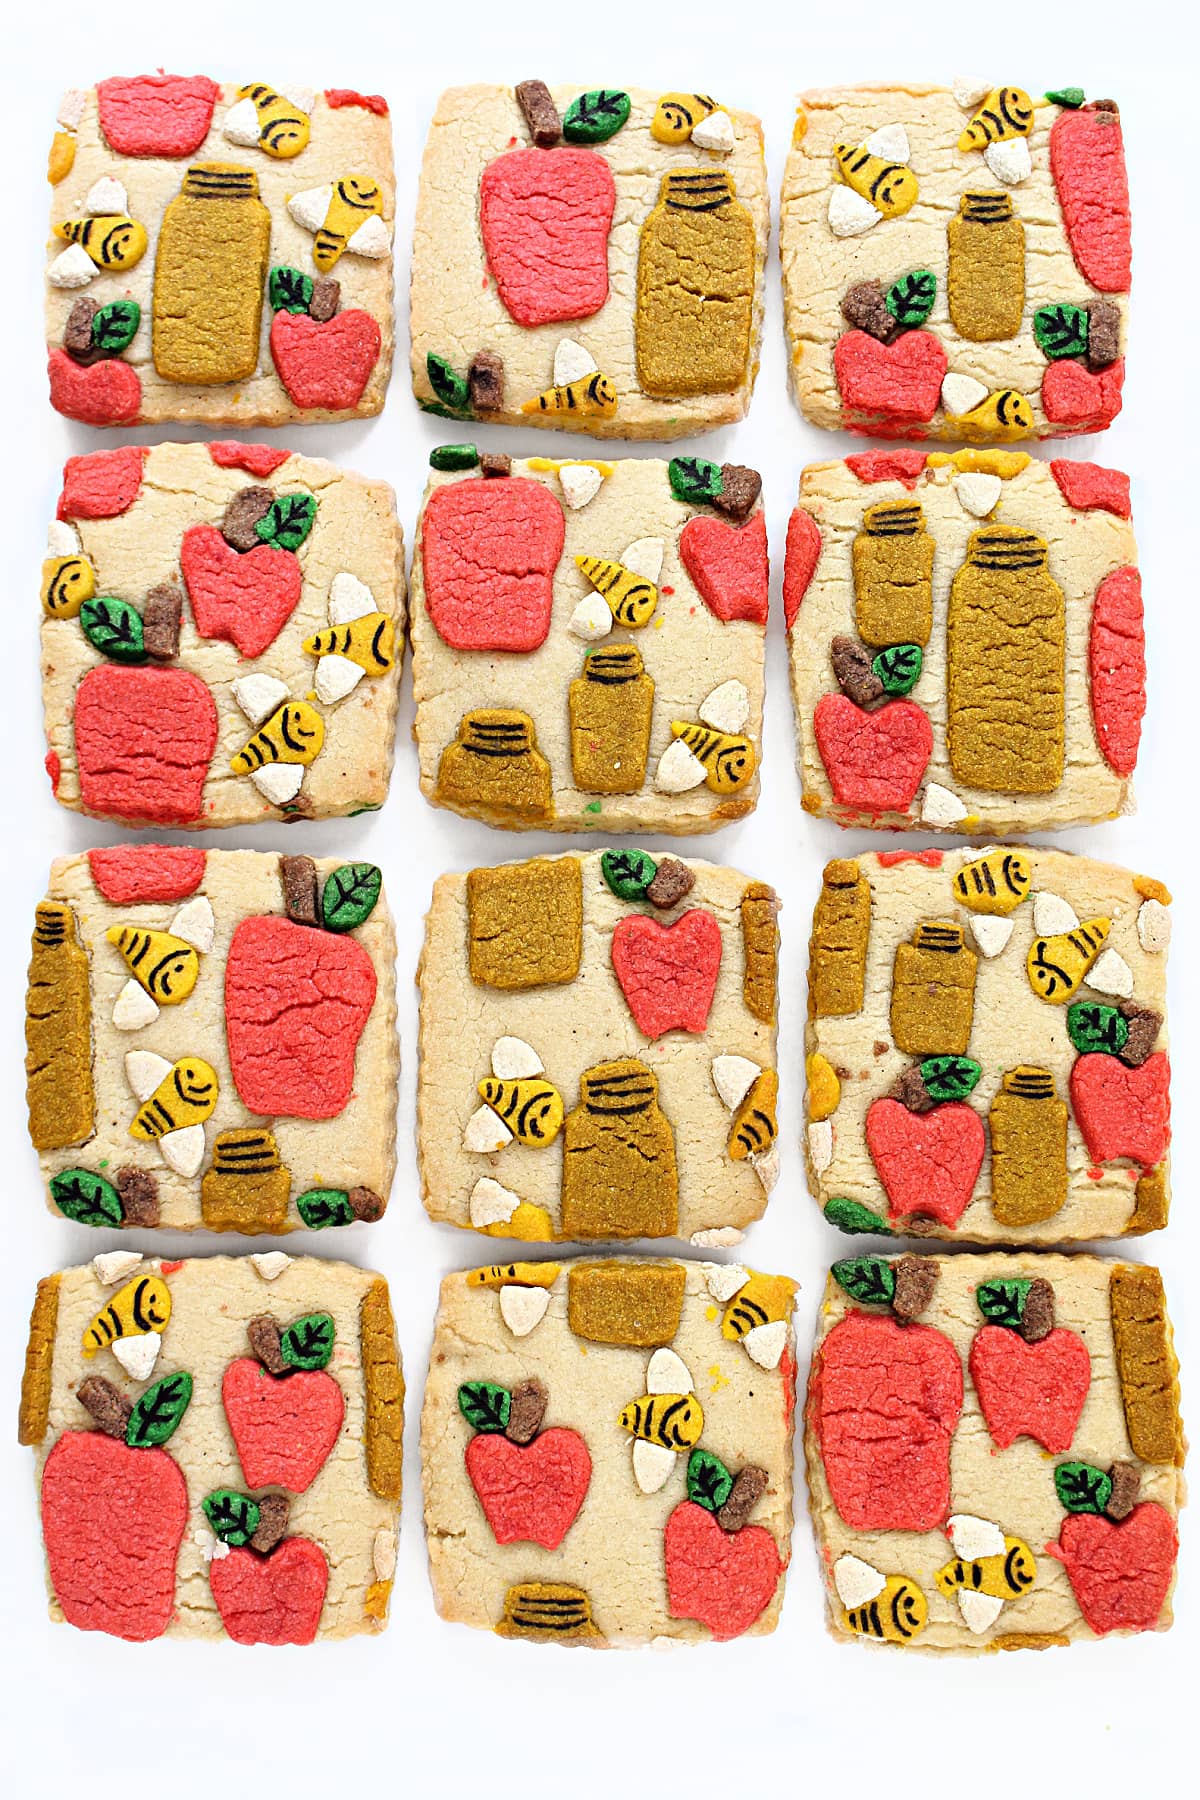
Rosh Hashanah Patterned Cookies are thick, crunchy sugar cookies with a flavor boost from a bit of ginger and nutmeg. Decorating with colorful cookie dough cutouts gives each cookie a unique design.
Why you'll love this recipe
- The cream cheese dough is plyable and not sticky for easy rolling out and cutting into shapes.
- The combination of three kinds of fats (butter, cream cheese, and vegetable shortening) keeps the colored sugar cookies tender and fresh for a long time.
- Using colored dough instead of frosting for the sugar cookie designs makes it easy to ship beautifully decorated cookies.
- This patterned design method can be used with any holiday or non-holiday design.
This is a creative baking project for people who loved playdoh as a child and still love playing with dough as an adult.
There are two additional recipes on The Monday Box that use colored dough shapes for decoration, but the method is slightly different.
Both Star Wars Cookies and the Palm Tree and Pineapple Sugar Cookies add dough shapes to cutout sugar cookie dough circles. The result is patterned cookies that look alike.
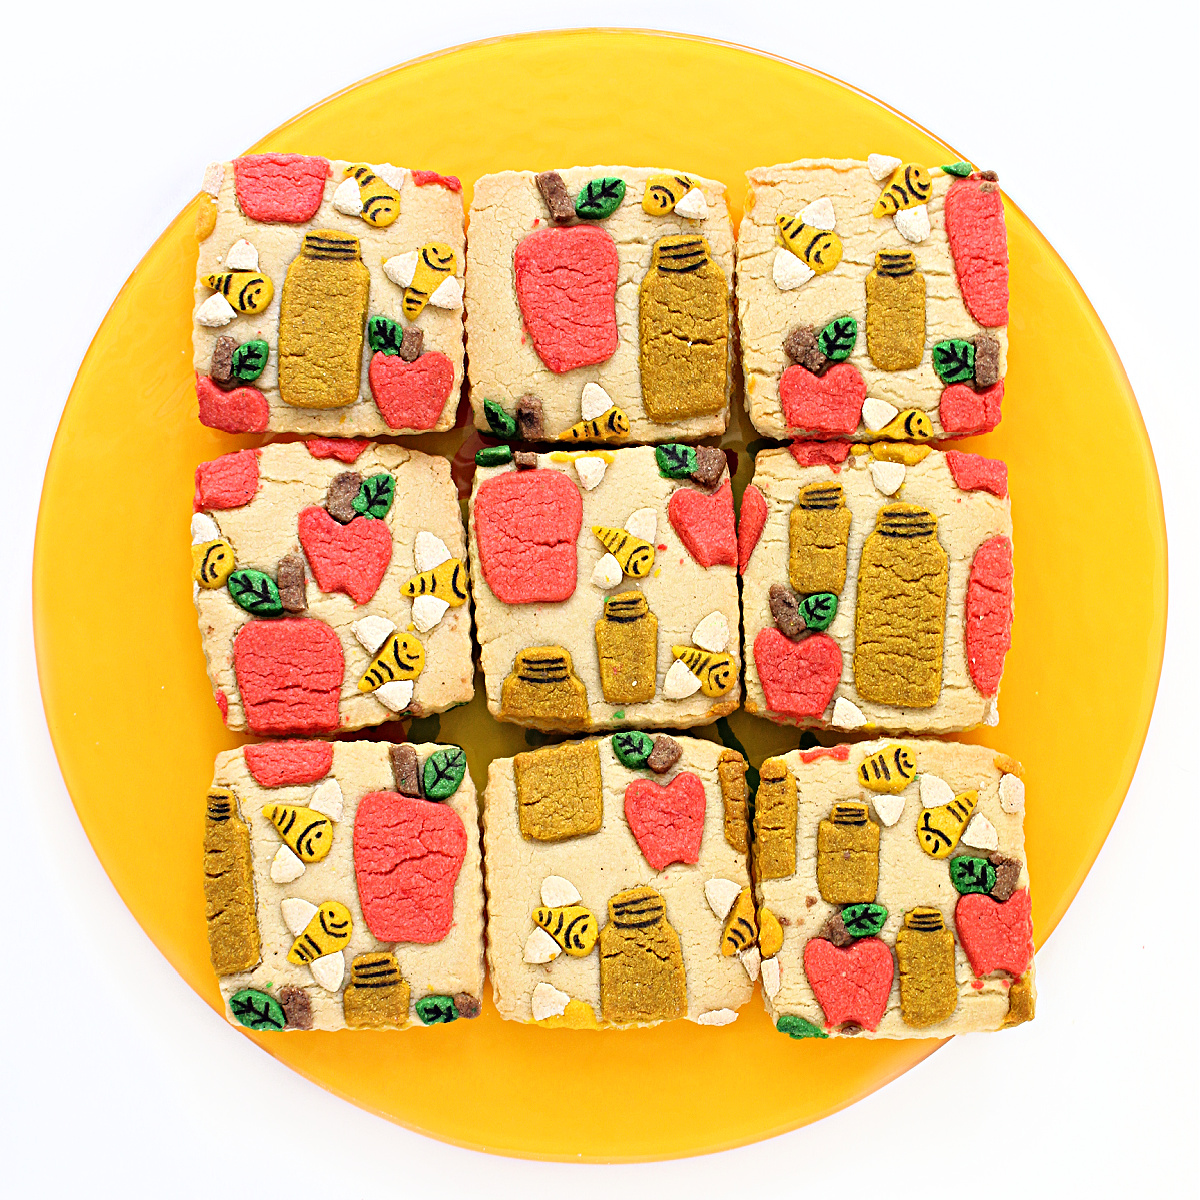
Patterned Cookies for Rosh Hashanah are cut out from a cookie dough canvas already decorated with colorful shapes. Each cookie ends up with a different, unique design.
These beautiful, thick and crunchy sugar cookies make special gifts as well as delicious snacks and great care package treats.
For more patterened cookie inspiration, I highly recommend looking at the amazing edible artwork by Sleeping Makes Me Hungry on Instagram.
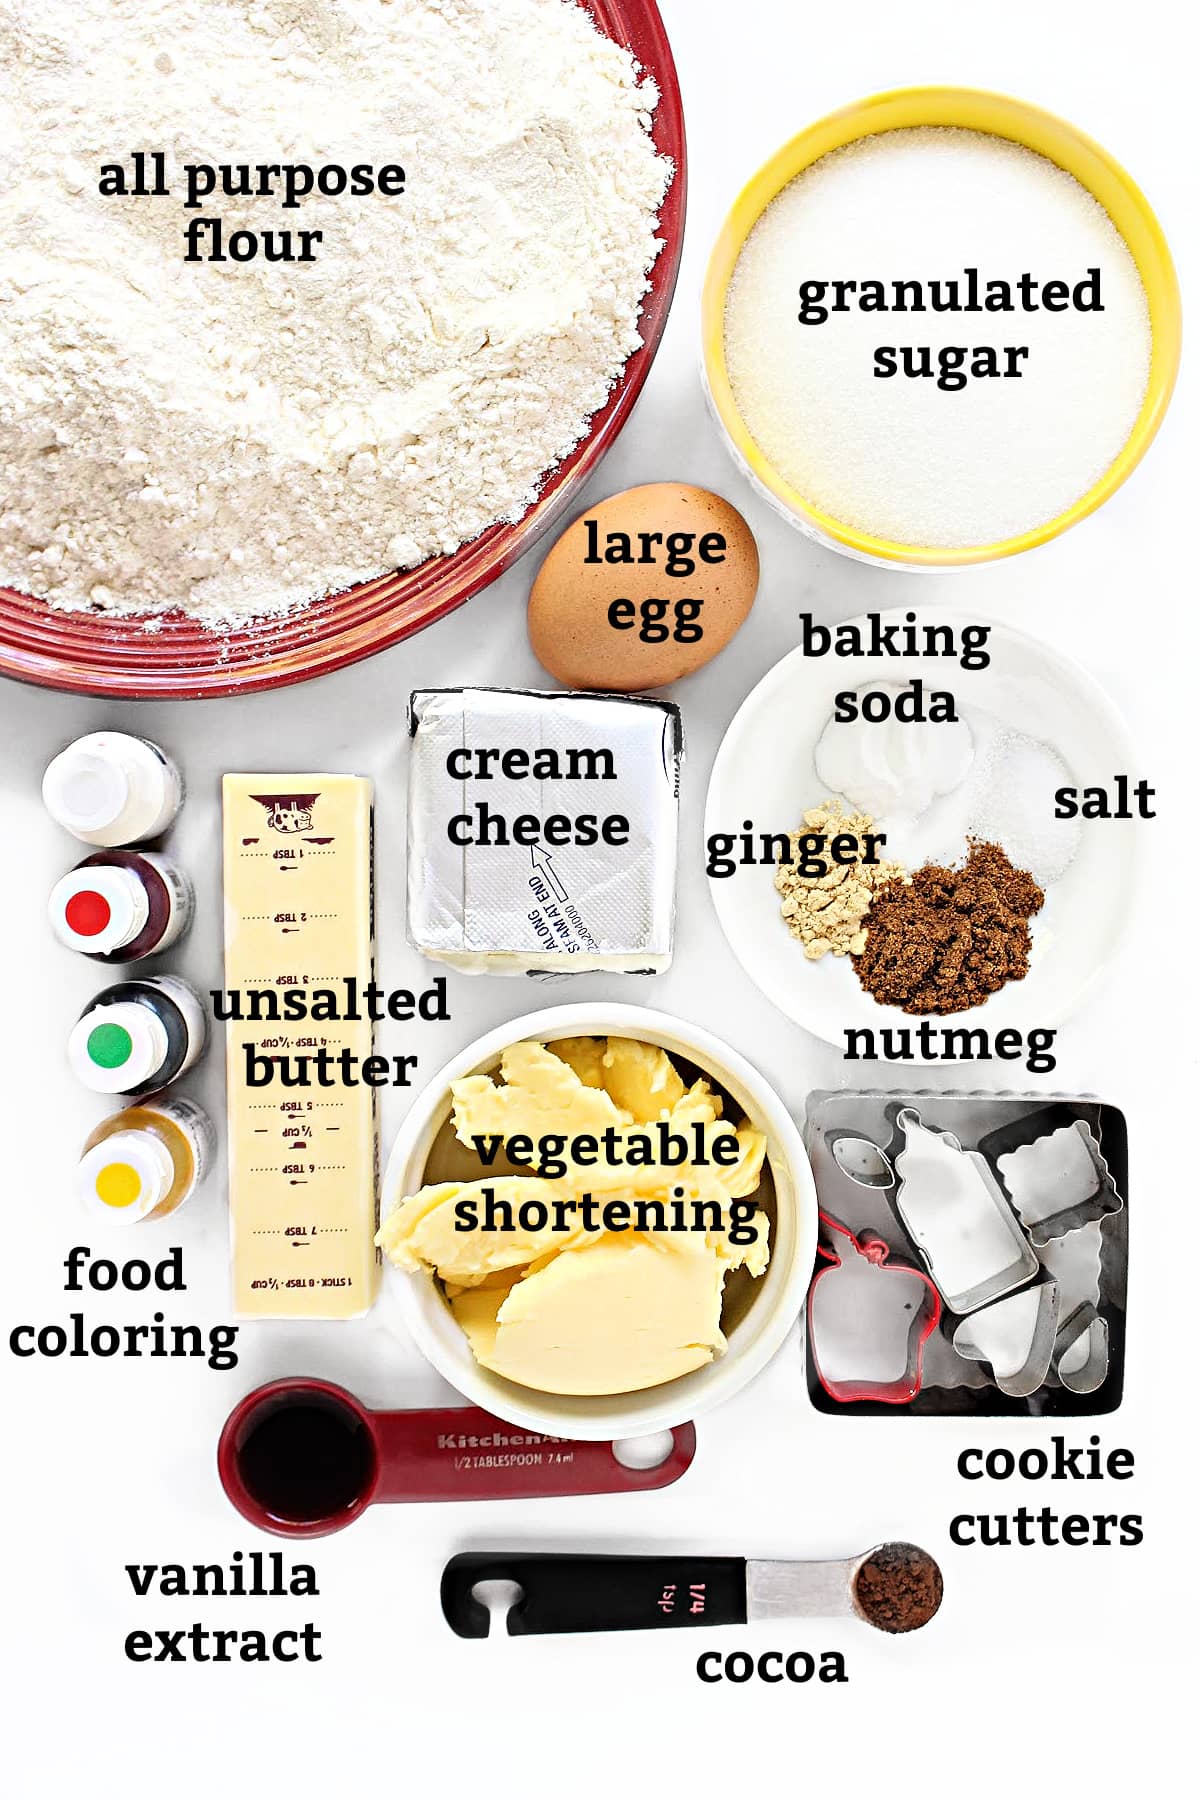
Ingredients
Instructions
This is an overview of the instructions. The full instructions are in the recipe card below.
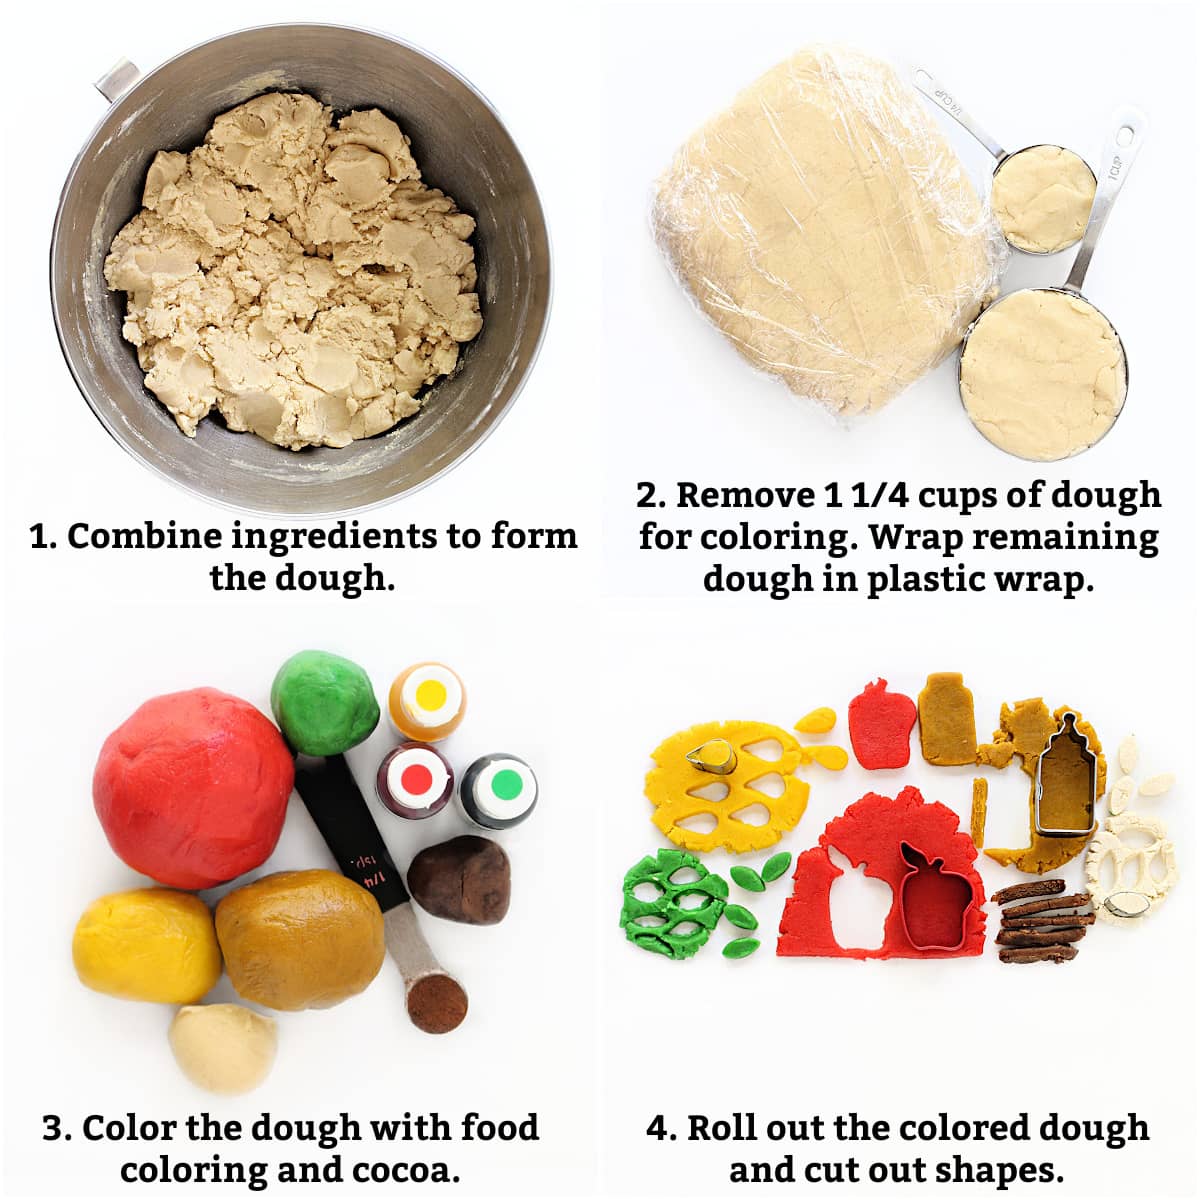
- In the bowl of a stand mixer, combine the ingredients to form the dough.
- Remove 1 ¼ cups of the dough for coloring. Wrap the remaining dough in plastic wrap to prevent drying.
- Color portions of the removed dough with food coloring gel and cocoa.
- Roll out the colored dough and use cookie cutters to cut out shapes.
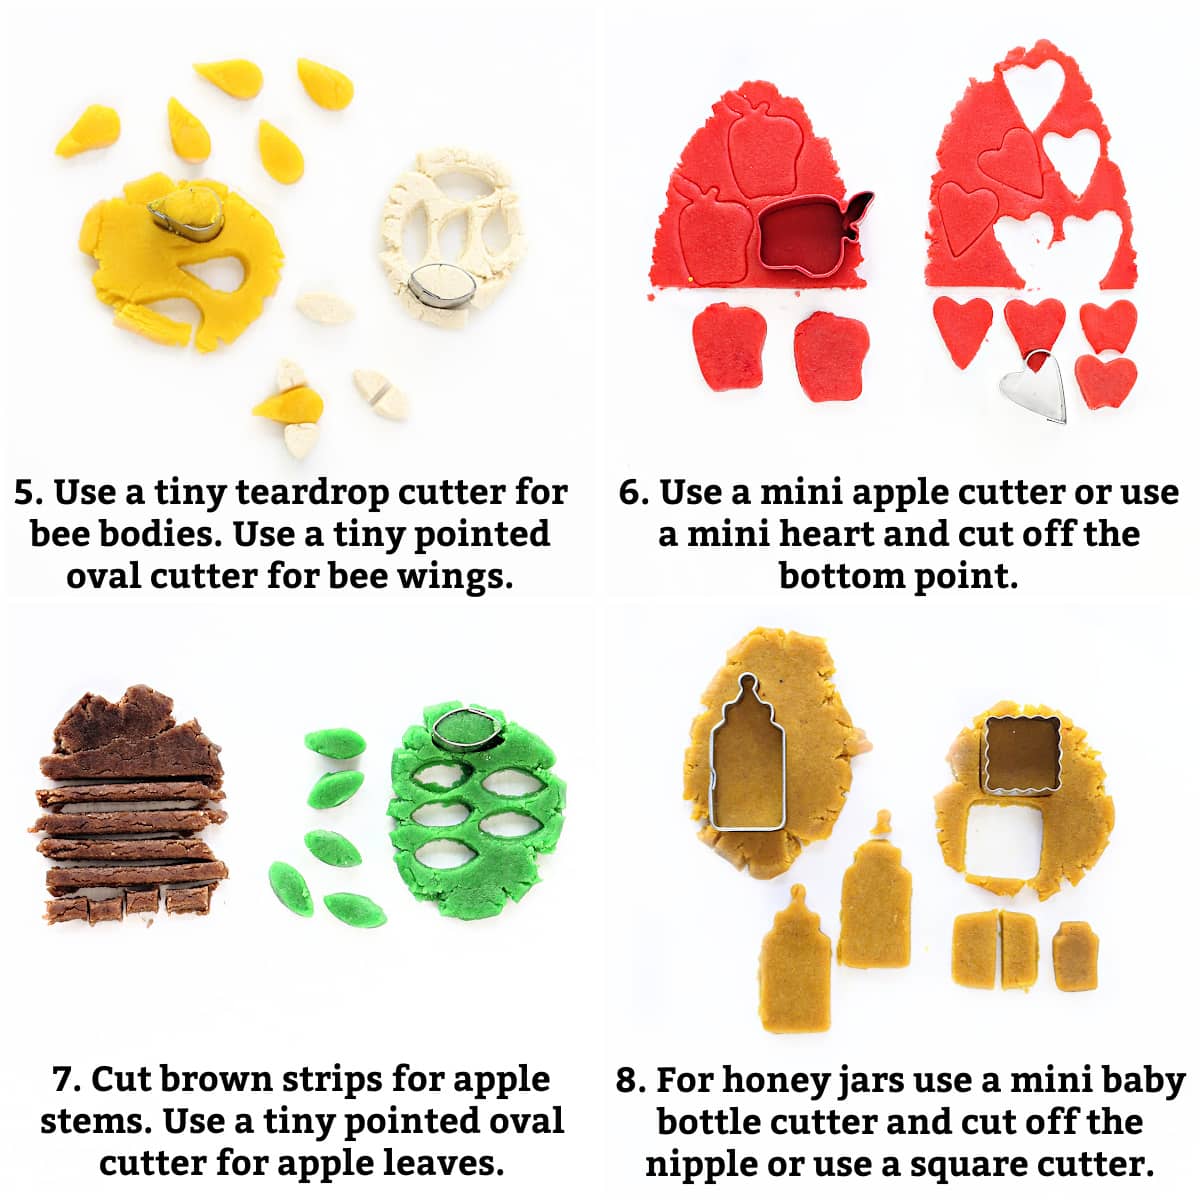
- To create bees: Cut out tiny tear drop shapes from the yellow dough for the bee bodies. Cut out tiny pointed oval shapes from the white dough for the bee wings.
- To create apples: Use a mini apple cookie cutter with the red dough, or use a mini heart cookie cutter with the red dough and cut off the bottom point of the heart.
- To create apple stems and leaves: Cut the brown dough into strips for the stems. Cut out pointed oval shapes from the green dough for the leaves.
- To create honey jars: For the larger jars, cut the gold dough with a baby bottle mini cutter. Cut the nipple off the top of the shape. For smaller jars, cut the gold dough into rectangles with a square or rectangle cookie cutter and indent the top edge for the jar lid.
Would you like to save this?
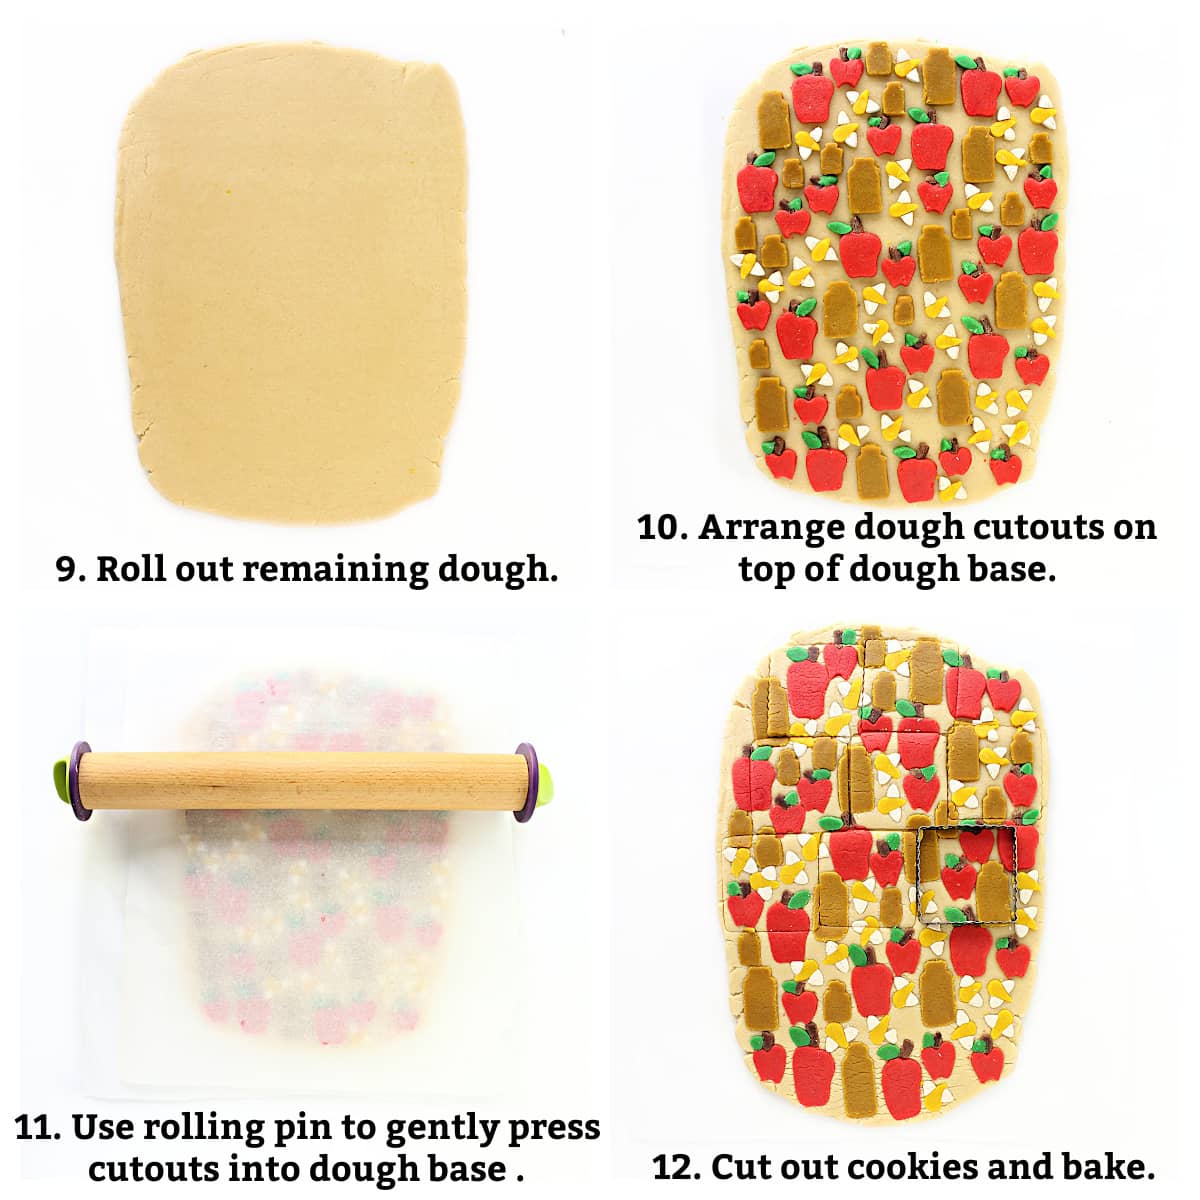
- Unwrap the reserved dough and roll out between two sheets of parchment.
- Arrange the dough cutouts on the rolled out dough.
- Roll over the design between two sheet of parchment to press the colored dough pieces into the dough base.
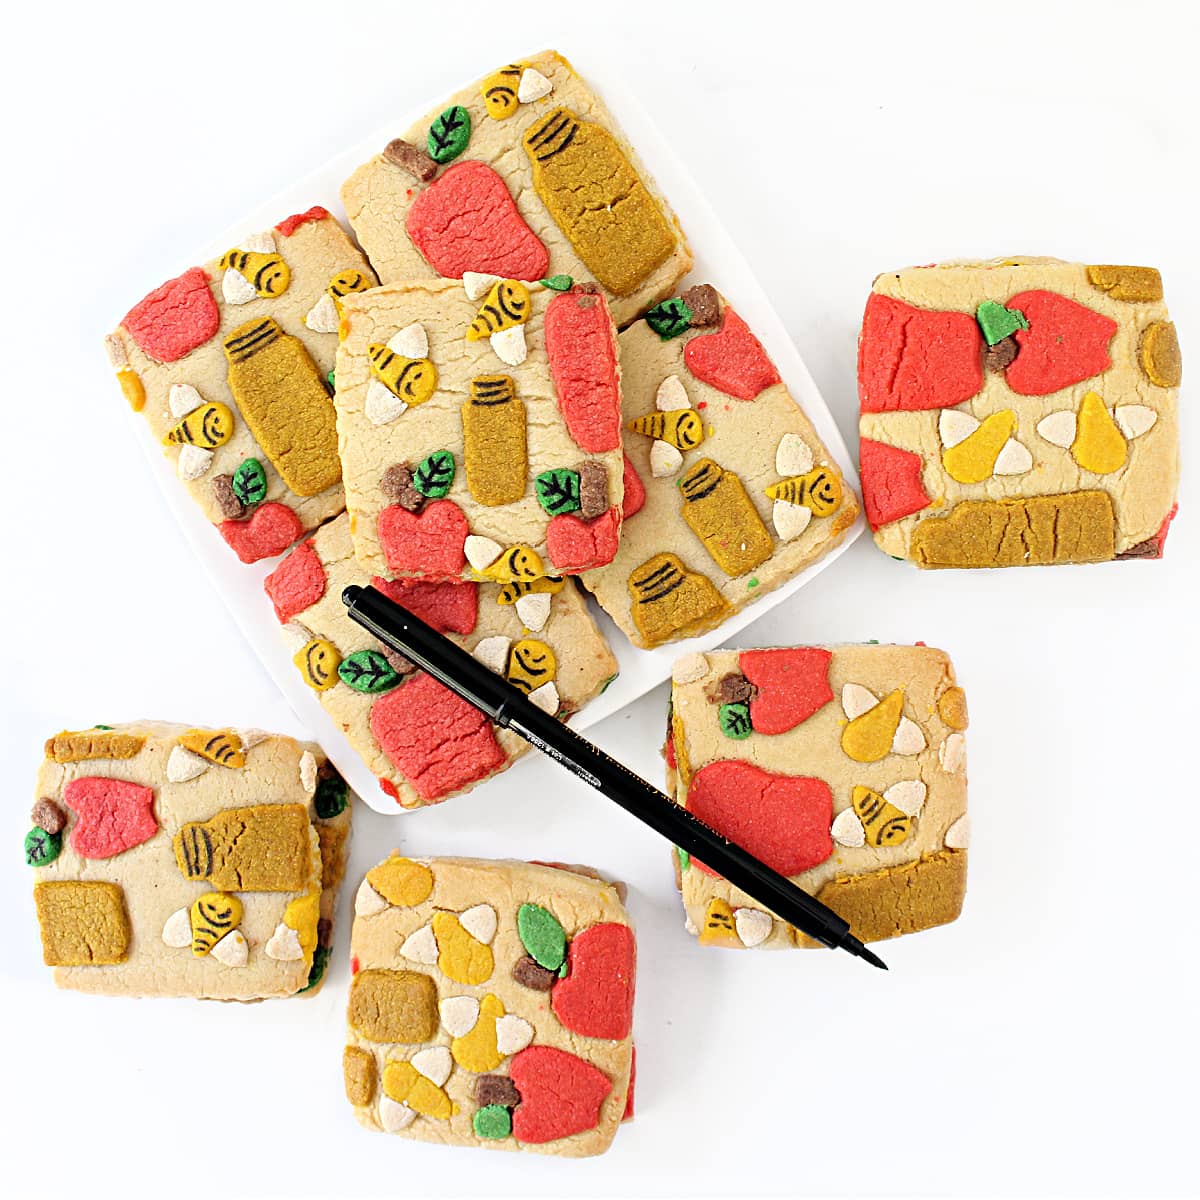
- Use a large cookie cutter to cut out cookies. Move the cookies to a parchment lined baking sheet and bake until edges are golden. When the cookies are completely cooled, add details with a food coloring marker.
Storage
Store the colored sugar cookies in an airtight container at room temperature for up to 3 weeks. These cookies taste even better after aging.
Tips
- Make the cream cheese dough and refrigerate it up to 3 days before cutting and baking.
- It's not necessary to buy cookie cutters in every shape. Cut off pieces from cutouts to make the shape you want.
- Be creative with the tools used to cut out shapes, using things like drinking straws or piping tips.
- Use small shapes and place them close together for the most pattern on each cookie.
- Use the dough scraps to make multicolored cookies. Roll the scraps together, and cut into shapes or strips.
Frequently asked questions
Liquid food coloring will make the dough sticky and will require added flour in order to roll out the dough. Gel or powdered food coloring are recommended.
Yes. This recipe will work with plant based butter and cream cheese. I recommend Earth Balance Buttery Sticks and Oatly cream cheese.
Polymer clay cutters aren't food safe. Instead mini cookie cutters or fondant cutters are recommended.
Related Recipes
Strawberry Sugar Cookies have chewy centers and crunchy edges with lots of strawberry flavor from freeze dried strawberry powder.
Painted Turkey Sugar Cookies are beautiful, tree dimensional cookies that are a great addition to a Thanksgiving meal.
Balloon Sugar Cookies are crunchy vanilla sugar cookies decorated with a simple, colorful birthday design.
Lavender Sugar CookiesLavendar Sugar Cookies are thick, crunchy cookies coated in sugar with the aromatic flavor of lavendar flowers.
Ube Cookies are crunchy sugar cookies with bright purple color and the warm vanilla flavor of ube.
Ready to bake? Join the free membership group to get new recipes and a newsletter delivered to your inbox! You can also stay in touch on Facebook, Pinterest, and Instagram. I'd love to stay in touch!
Patterned Cookies for Rosh Hashanah
Equipment
- mini cookie/fondant cutters teardrop, pointed oval/petal
Ingredients
- ½ cup vegetable shortening
- ½ cup unsalted butter room temperature
- 4 ounces cream cheese
- 1 ½ cups granulated sugar
- 1 large egg
- 1 teaspoon vanilla extract
- ½ teaspoon ginger
- 1 teaspoon nutmeg
- ½ teaspoon baking soda
- ½ teaspoon salt
- 4 cups all purpose flour
- food coloring gel white, yellow, red, green
- ¼ teaspoon cocoa powder
Instructions
Cookie dough
- In a large mixing bowl whisk together the flour, spices, baking soda, and salt. Set aside.
- In the bowl of a stand mixer, combine the shortening, butter, cream cheese and sugar.
- Mix in the egg and vanilla.
- Gradually add in the flour mixture to form a plyable dough.
- Remove 1 ¼ cups of dough to use for colored shapes and wrap the remaining dough for the cookie base in plastic wrap.
Coloring the 1 ¼ cups of removed dough
- Use white food coloring gel to make 1 tablespoon of white dough.
- Use yellow food coloring gel to make ½ cup of yellow dough.
- Remove 2 tablespoons of the yellow dough.
- To the remaining yellow dough add ⅛ teaspoon of cocoa and knead to create a golden brown color.
- Use green food coloring gel to make 1 ½ tablespoons of green dough.
- Combine ⅛ teaspoon cocoa and ½ tablespoon dough to form brown dough.
- Use red food coloring gel to color the remaining dough.
Making colored shapes
- Roll out the white dough to ¼ inch thickness. Use a tiny pointed oval cutter to cut out bee wings. Cut the ovals in half vertically.
- Roll out the yellow dough to ¼ inch thickness. Use a tiny teardrop cutter to cut out bee bodies.
- Roll out the golden brown dough to ¼ inch thickness. Cut out honey jars using a mini baby bottle cutter (cutting off the nipple on the cutouts to form a jar shape) or use a mini square or rectangle cutter, trimming the top to look like a jar.
- Roll out the green dough to ¼ inch thickness. Use a tiny pointed oval cutter to cut out apple leaves.
- Roll out the brown dough to ¼ inch thickness. Use a knife to cut strips, then cut the strips into small pieces for apple stems.
- Roll out the red dough to ¼ inch thickness. Cut out apples using a mini apple cutter or use a mini heart cutter, then trim of the pointed heart tip with a rounded edge of the cutter to form an apple shape.
Assemble the patterned cookie design and bake
- Heat the oven to 350° F. Line a baking sheet with parchment paper.
- Unwrap the reserved cookie dough and roll out to ½ inch thickness between two sheets of parchment paper.
- Remove the top sheet of parchment paper. Place the colored cutout shapes close together all over the cookie dough base.
- Replace the top sheet of parchment paper and roll over the design to press the cutouts into the dough base.
- Remove the top sheet of parchment paper. Use a 3" cookie cutter to cut cookies from the design. (about 12)
- Use a spatula to place the cookies about 1 inch apart on the prepared baking sheet.
- Dough scraps can be combined into a multi-colored dough, rerolled, cut into cookies, and placed on the baking sheet.
- Bake the cookies for 12 minutes, just until the edges turn light golden brown.
- Allow the cookies to cool on the baking pan for 5 minutes before transfeeeing to a wire rack to cool completely.
- When the cookies are completely cooled, add details to the design using a fine tip black food coloring marker.
- Store in an airtight container at room temperature for up to 3 weeks. Enclosing each cookie in a self sealing cellophane bag helps to prolong freshness.
Notes
-
- Make the cream cheese dough and refrigerate it up to 3 days before cutting and baking.
-
- It's not necessary to buy cookie cutters in every shape. Cut off pieces from cutouts to make the shape you want.
-
- Be creative with the tools used to cut out shapes, using things like drinking straws or piping tips.
-
- Use small shapes and place them close together for the most pattern on each cookie.
-
- Use the dough scraps to make multicolored cookies. Roll the scraps together, and cut into shapes or strips.
- Place individual cookies in 4" x 6" cellophane self sealing bags for longer freshness and easy sharing.
- If not using cellophane bags, wrap small stacks of cookies in plastic wrap.
- Place wrapped cookies in a colume in a freezer weight ziplock bag or in layers in a firmly packed plastic storage container.



Leave a Reply