
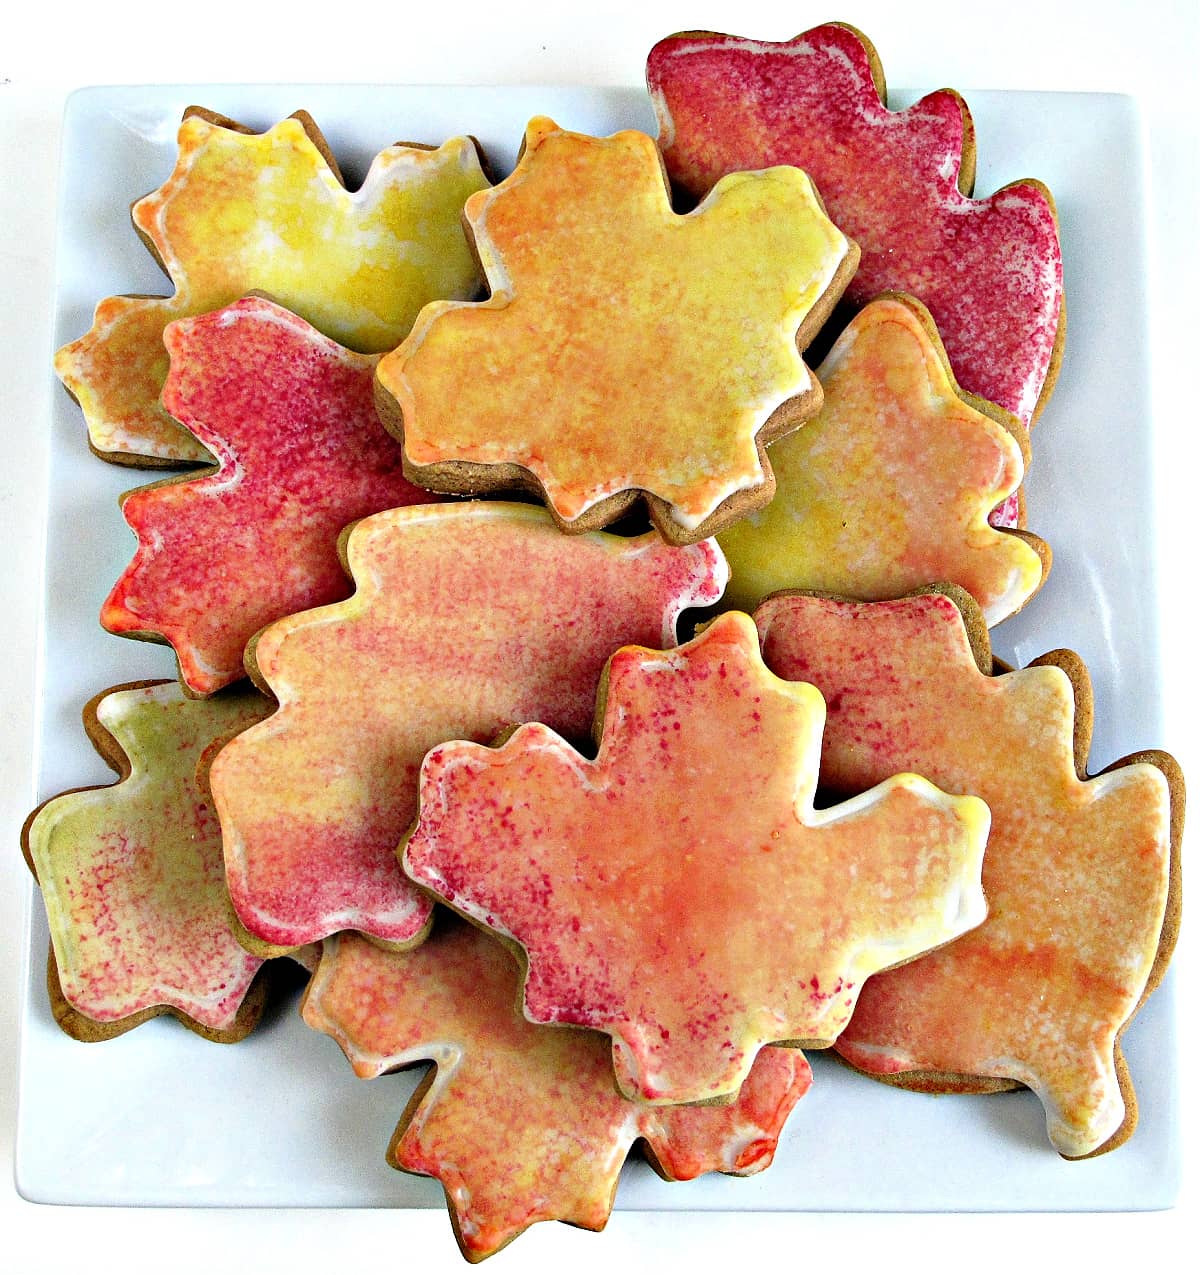
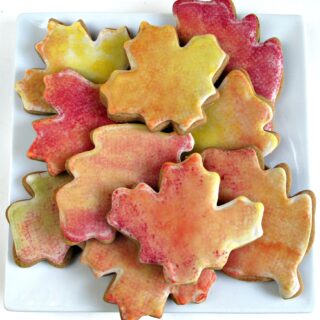
Gingerbread Fall Leaf Cookies embrace the colors and flavors of the season. Chewy, iced gingerbread cookies are dappled in autumn colors using a fun, simple decorating technique for the easiest and most beautiful fall decorated cookies ever!
Why you'll love this recipe
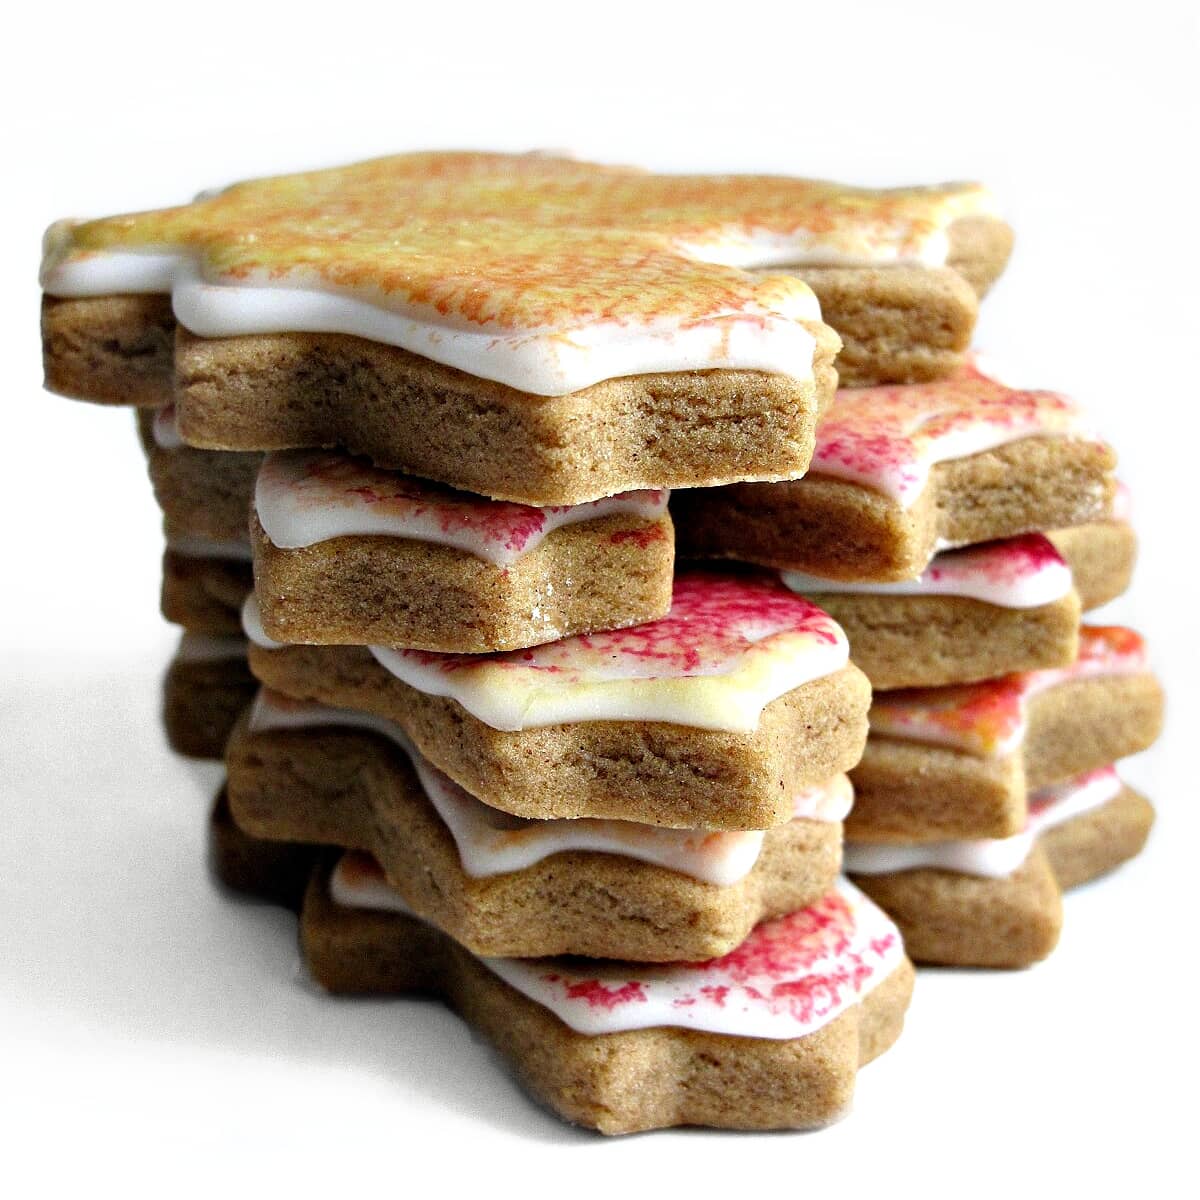
- This gingerbread recipe makes cookies with no spread and no rise for defined shapes with crisp edges.
- The show stopping icing looks fancy, but is just a simple white corn syrup icing topped with "sponge painted" food coloring.
- A long shelf life makes these fall cookies ideal for care packages and cookie jars.
Fall Leaf Cookies are soft and chewy gingerbread cutout cookies are decorated with the glorious colors of autumn. They take a bit of planning because they require time for the icing and then the food coloring to dry, but the actual baking and decorating is very easy.
Corn syrup icing provides a smooth, iced surface with no decorating skills required. It tastes better than royal icing and is easier to make and to use.
Then comes the fun part. Turn the plain white iced cookies into fall decortated cookies by dabbing different colors of food coloring onto the iced cookies. A great cookie for beginner cookie decorators!
Ingredients
Cookies
Icing
Painting
Instructions
This is an overview of the instructions. The full instructions are in the recipe card below.
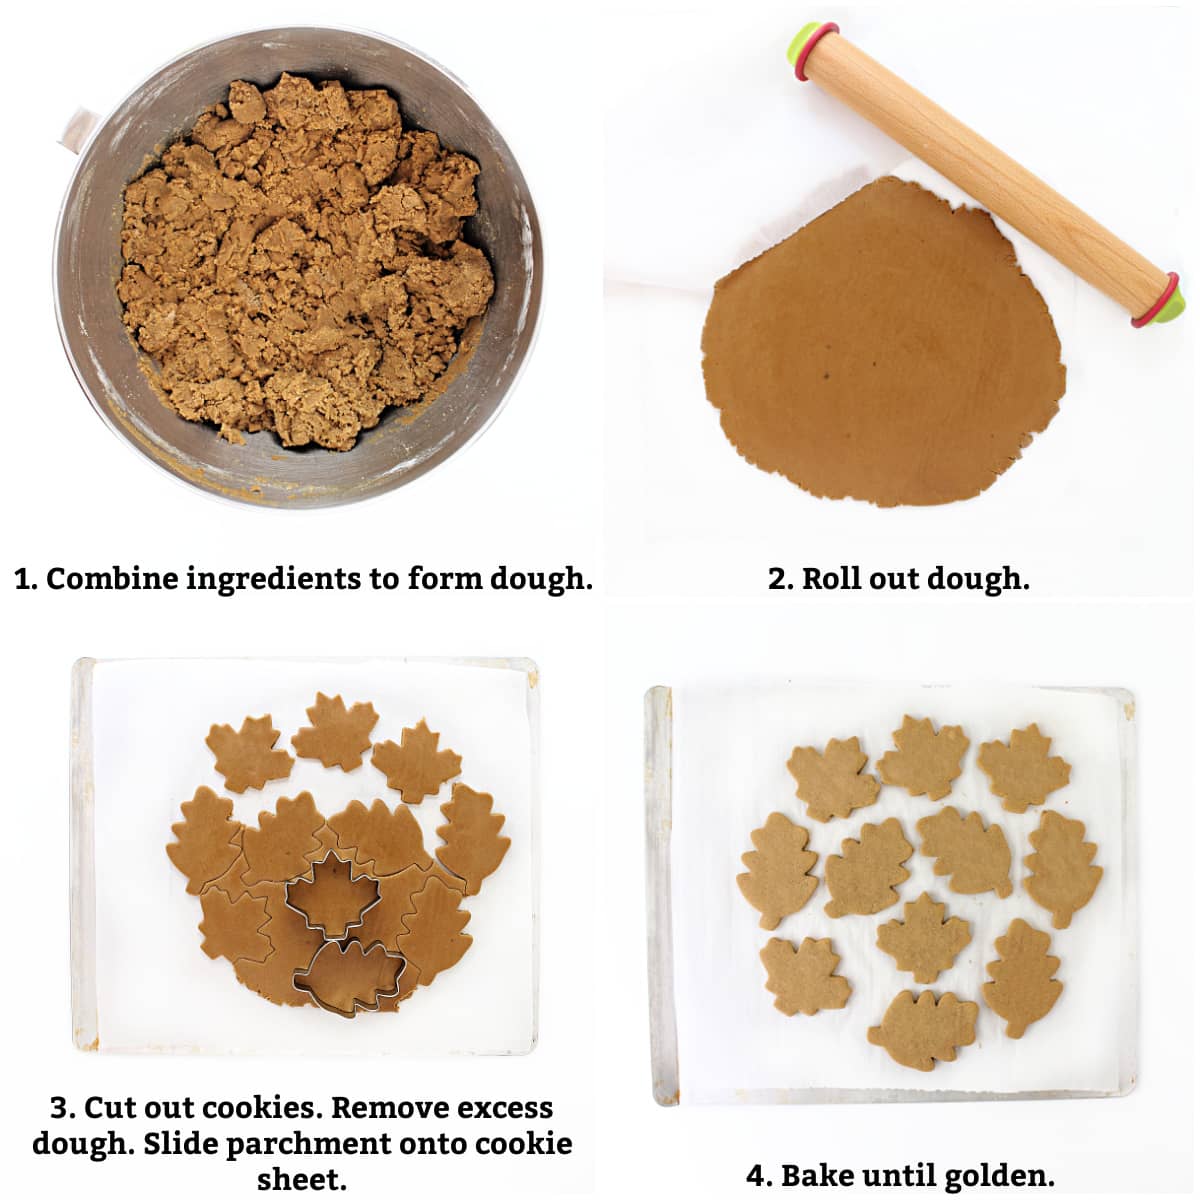
- In the bowl of an electric mixer,combine the ingredients to form the dough.
- Roll ⅓ of the dough out to ¼" thickness btween two sheets of parchment. Cut the cookies into leaf shapes about 1" apart.
- Remove the excess dough from around the cut-out cookies. Slide the parchment onto your cookie sheet. Repeat with the remaining dough.
- Bake for 6-7 minutes. Cool on baking sheet for 10 minutes before transferring to a wire rack to cool completely.

Would you like to save this?

- Outline each cookie with white icing.
- Fill in the outline with icing and allow to dry completely.
- Moisten a paper towel dauber slightly in the water. Dip the dauber in a food color, then pat onto the cookie in a random pattern.
- Allow the cookies to dry overnight before storing.
Storage
Place individual cookies in self-sealing cellophane cookie bags, or stack with wax paper squares between the cookies, and wrap the stacks in plastic wrap.
Store at room temperature in an airtight container or freezer weight ziplock bag.
These long lasting fall leaf cookies cookies stay fresh for at least 2 weeks.

More molasses recipes
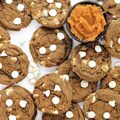
Molasses, chocolate, and spice make Chocolate Chip Molasses Cookies chewy cookies full of the flavors of fall.
Gingerbread Pirate Cookies are the cutest crew of pirates you will ever see. This tasty cookie will delight children along with the book that inspired them.
Gingerbread Loaf Cake is an easy quick bread that is soft and deliciously spiced with cinnamon and ginger. A delicious way to usher in the holiday season!
If you love the flavor of gingerbread and the convenience of bar cookies, next time try Lebkuchen Bars, a deliciously spiced and chewy German treat. Great for holiday gatherings.
Pumpkin White Chocolate Chip Cookies are deliciously soft and chewy cookies with the fall season favorite flavor of pumpkin pie spice plus creamy white chocolate chips.
Honey Jumbles are a soft, chewy, spiced honey cookie popular in Australia. Molasses takes the place of treacle in this Americanized recipe.

Ready to bake? Join the free membership group to get new recipes and a newsletter delivered to your inbox! You can also stay in touch on Facebook, Pinterest, and Instagram. I'd love to stay in touch!
Gingerbread Fall Leaves Cookies
Equipment
Ingredients
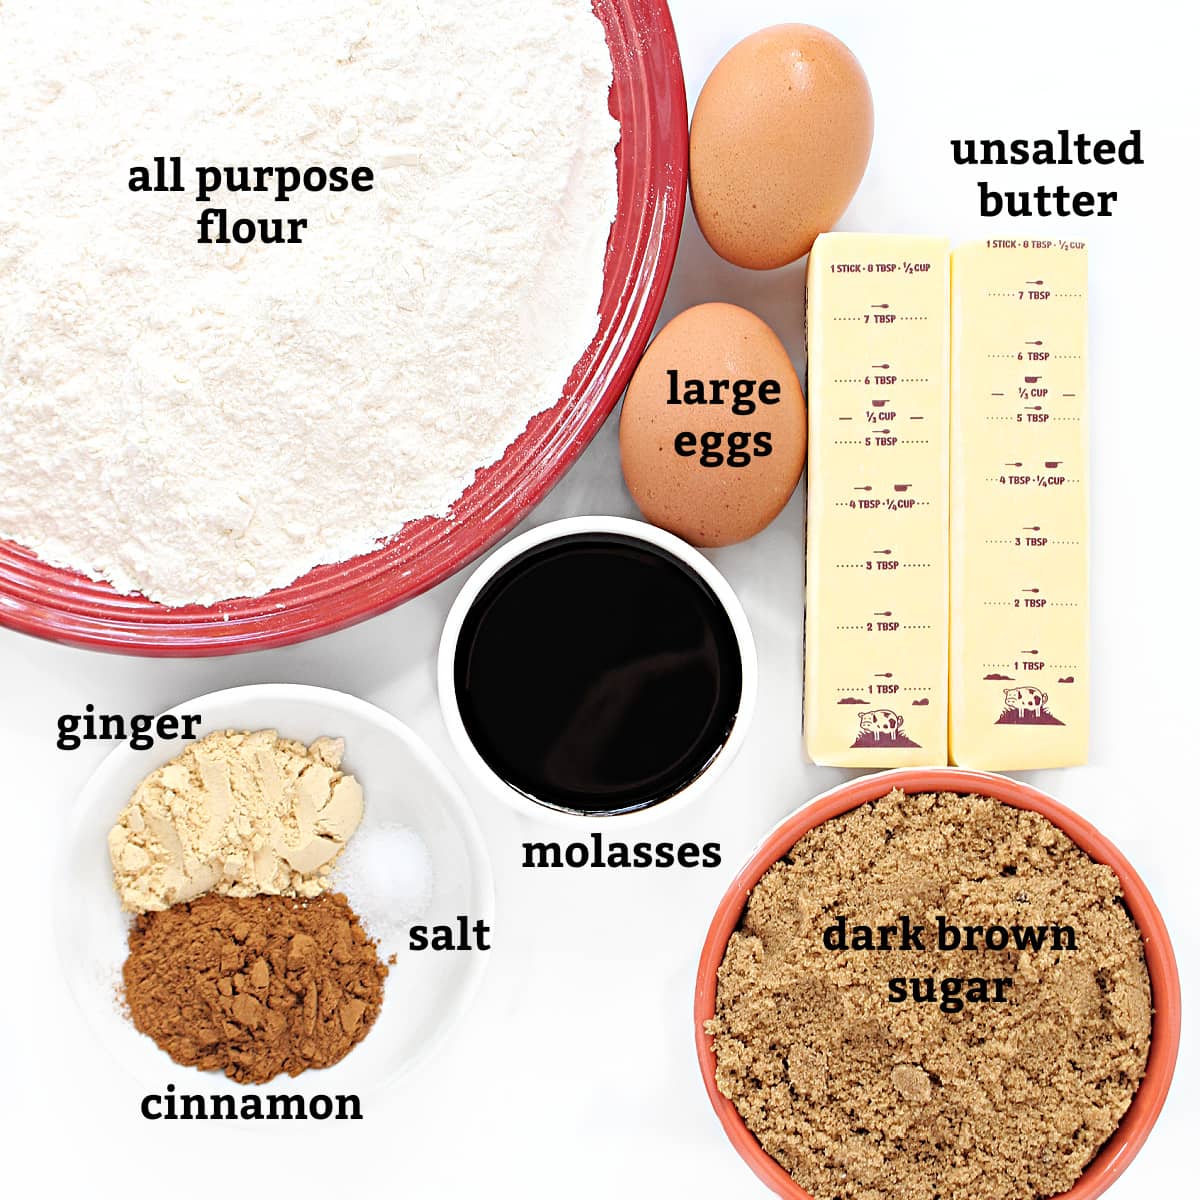
Cookies
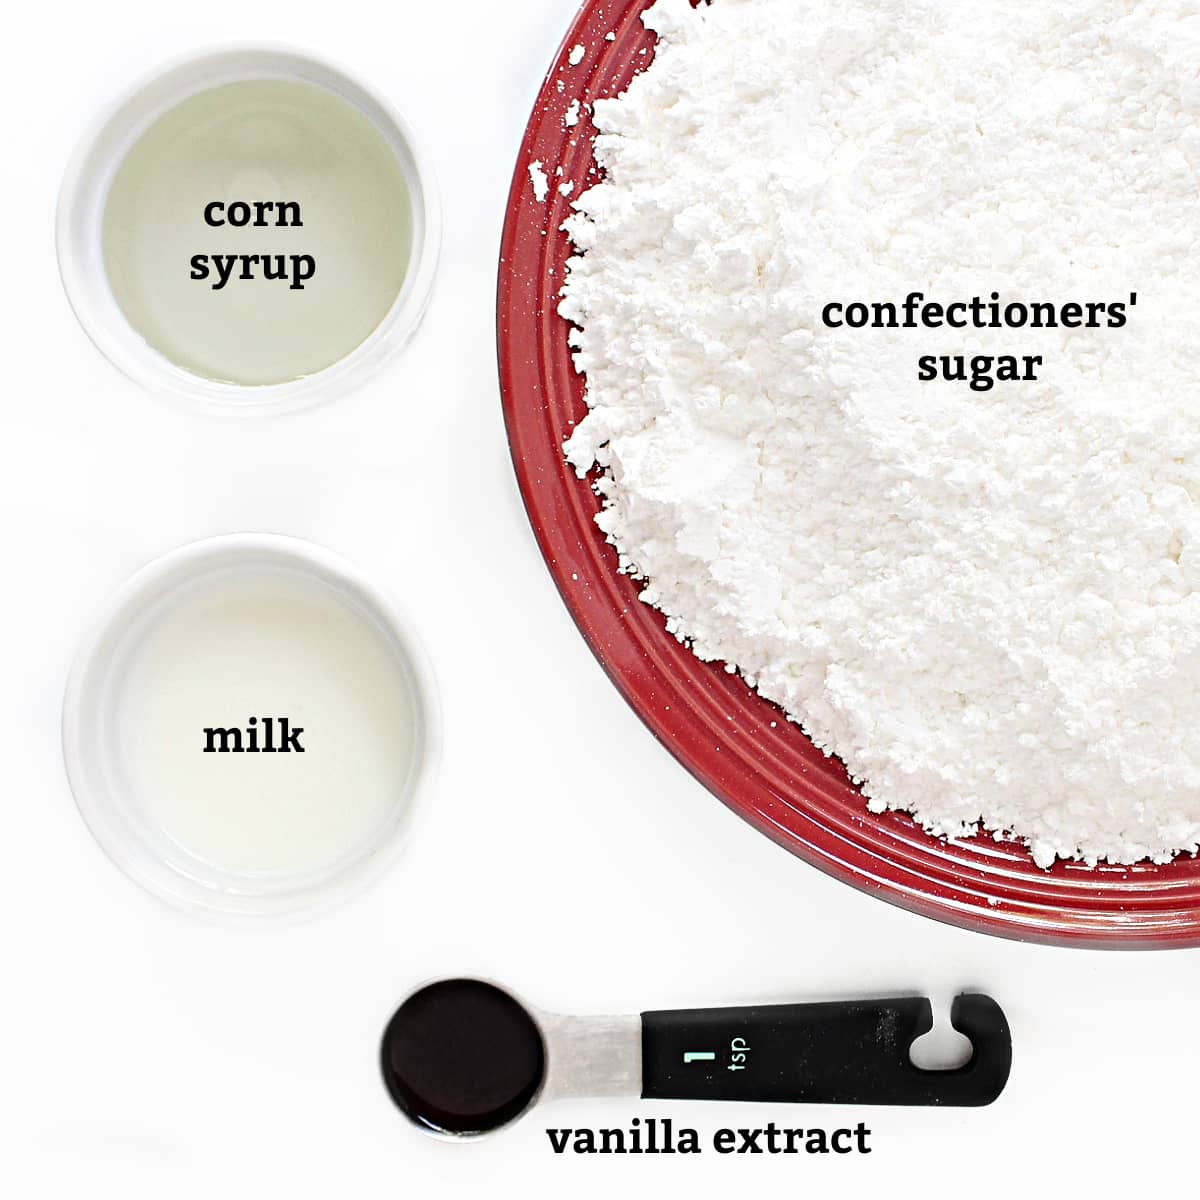
Icing
- 4 cups confectioners' sugar
- 3 tablespoons milk add more to thin icing to desired consistency
- 3 tablespoons light corn syrup
- 1 teaspoon vanilla extract
Decorating
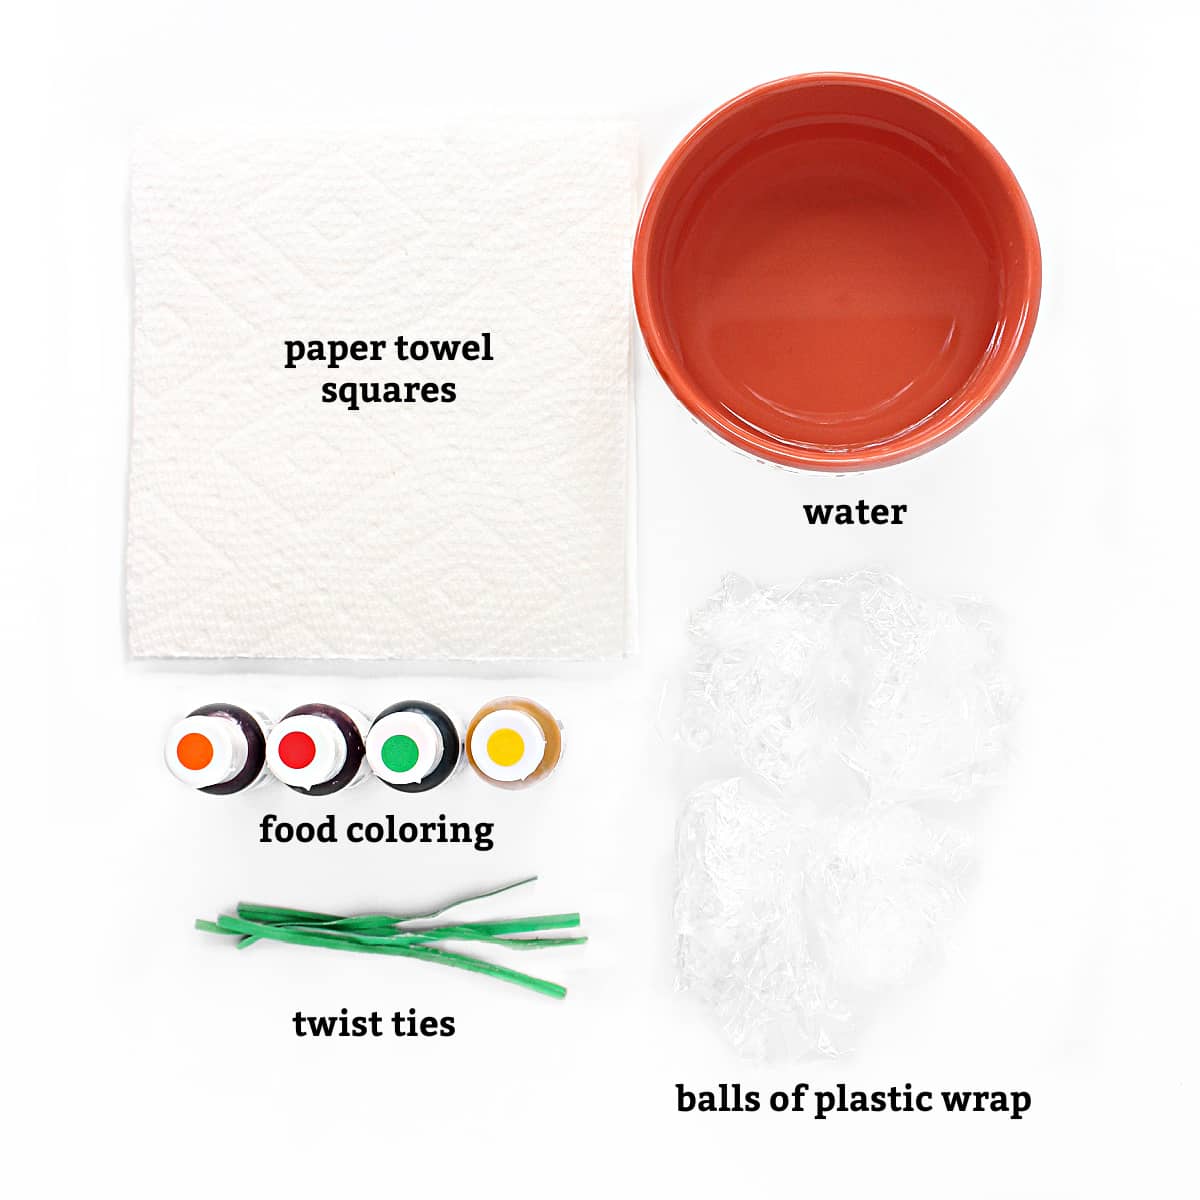
- food coloring gel or liquid
- paper towel squares 1 for each color being used
- plastic wrap 1- 6" strip for each color being used
- twisty ties 1 for each color being used
- small bowl of water
Instructions
Cookies
- Preheat oven to 350˚F.
- In the bowl of a stand mixer, cream butter and sugar. Add eggs and molasses and mix until incorporated. Stir in spices and salt.
- Gradually add flour, 1 cup at a time, until the dough is roll-out consistency. When baking immediately, use 4 ½ - 5 cups. For dough that will be refrigerated overnight before baking use only 4 cups.
- Roll ⅓ of the dough out to ¼" thickness between two sheets of parchment paper. These cookies spread minimally, cutting them out directly on the parchment paper they will be baked on, eliminates the need to transfer the cut out dough. For best results, roll the dough out on a sheet of parchment paper the size of your cookie sheets. Cut out the cookies about ½" to 1" apart. Remove the excess dough from around the cut-out cookies. Slide the parchment onto a cookie sheet. Repeat with the remaining dough.
- Bake cookies for 7-9 minutes. Cookies are done when the tops are a solid golden color. (Cookies will firm slightly as they cool.)
- Cool on baking sheet for 10 minutes before transferring to a wire rack to cool completely.
Icing
- By hand or with an electric mixer, combine sugar and milk until smooth.
- Add corn syrup and vanilla. Continue beating together until smooth and glossy. Add additional milk in tablespoon increments until desired consistency. (Icing consistency should be thin enough to spread easily but thick enough not to drip off the cookies. It should resemble a thin paste but not glue.)
- APPLYING THE ICING: (choose 1 of the following suggested methods)
- SPATULA METHOD: Use icing that is a spreadable consistency. Spoon icing into a piping bag or ziplock bag with a small part of a bottom corner cut off. Pipe some icing onto a cookie and use a knife or offset spatula to spread the icing evenly over the surface of the cookie. Allow the icing to dry overnight.
- OUTLINE/ FLOOD METHOD: Two consistencies of icing will be used. First, spoon about 1 cup of icing (thin paste consistency) into a piping bag or ziplock bag with a small part of a bottom corner cut off. Outline the top of each cookie. Thin all remaining icing to the consistency of glue and spoon into a piping bag or ziplock bag. Set aside and allow the icing outline to dry for about 1 hour. When the outline has set slightly, pipe the remaining icing onto each cookie filling in the outlines. Allow the icing to dry overnight.
Decorating
- You will need 1 paint dauber for each color. Cut a paper towel sheet into 4 pieces. Scrunch a piece of plastic wrap into a ball and place at the center of a paper towel square. Twist the paper towel around the plastic wrap and secure with a twisty tie.
- Dispense about 5 drops of each color food coloring onto a plate. Leave room between colors.
- Moisten a dauber slightly in the water. Dip the dauber in a food color, blot off excess color, then pat onto the cookie. Use a different dauber for each color.
- Cookies should be dry before they are stored. Drying time varies. My India Tree natural food colors required overnight drying.
- Store cookies in an airtight container at room temperature for up to 2 weeks.
Notes
Nutrition
First published October 1, 2014. Last updated September 28, 2024. Updated for additional information, improved photographs and better reader experience.


Marlene
Wendy, thanks for sharing this decorating technique! I’ve never seen it before, and I just happen to be decorating Halloween sugar cookies this morning. I have maple leaves and pumpkins and will try this on some of them. I”ll be using royal icing and regular gel colors, as I need the icing to dry quickly to mail the cookies to the grandkids.
Wendy Sondov
Have fun with decorating Marlene! Lucky grandkids!! Be sure the royal icing is dry before sponge painting with the gel colors. I found that the gel colors dried very quickly. After making these leaves, I loved the look so much that I made Thanksgiving turkeys too! https://themondaybox.com/3-d-turkey-cookies/ Let me know what you think and how your cookies turned out. 🙂
Helen at the Lazy Gastronome
Yikes - I'm so far behind! But I wanted to make sure I thanked you for sharing at our What's for Dinner party! Hope you bring more deliciousness this Sunday! Have a great weekend.
Liberty
They're gorgeous! If my molasses is still good... well, I wonder how these cookies would taste un-iced? ....Thanks for sharing at Best of the Weekend Link Party!
Amy - The Speedy Spatula
Beautiful! These would be gorgeous for a fall themed party!
Barbara Chapman
Oh, your Gingerbread Fall Leaves are so beautiful and delicious-looking! Too good to eat {almost!}. 😉 I'm just coming over from the Hearth and Soul link party at April J. Harris and saw your cookies. Thank you for a wonderful recipe ~ I pinned to my Yummy! board for you and our readers. <3
Have a great rest of your week,
Barb 🙂
The Monday Box
Thank you, Jan! Thanks for the invite to your link party. I would be happy to share! Have a great week.
Jenny
These cookies look beautiful & delicious! Thanks for sharing at Merry Monday!
The Monday Box
Thank you, Jenny. They are fun to make and share.
April J Harris
I love these gorgeous, seasonal cookies, Wendy! They are so pretty - and they are gingerbread too,a real favourite of mine! Sharing around. Thank you for being a part of the Hearth and Soul lInk Party.
Miz Helen
I love your fall leaves, they are just beautiful! Thanks so much for sharing with us at Full Plate Thursday,we are so happy to have you join us. Have a wonderful week and come back to see us real soon!
Miz Helen
Emily
Your sponge painting technique is beautiful! These sound so delicious, too - I love a good gingerbread cookie! Thanks for linking up with Merry Monday!
The Monday Box
Thanks, Emily! The sponge painting is so easy, a preschooler could do it, but I love how it resembles the colors on fall leaves! Thanks for hosting Merry Monday!
Emily | OatandSesame.com
I love these! They are so pretty!
The Monday Box
Thank you, Emily! The pretty colors are so easy to create!
Erin Vincent
These gingerbread leaves are gorgeous!!!
The Monday Box
Thank you, Erin! The natural food dyes (rather than regular food coloring) create the real fall leaf colors!
Dawn
These are just STUNNING!! Look almost too pretty to eat BUT I think that icing deserves a good lick or two! Love how you dabbed the colors on to mimic fall leaves. I do the same with paper crafting but never thought to do it on a cookie, can't wait to give it a try! I've chosen your beautiful fall cookies as my feature this week for the Friday Favorites Linky Party - have a wonderful weekend!
The Monday Box
Thanks so much, Dawn for your kind words and for the feature! These cookies are my attempt at edible art. Dabbing with color is the extent of my painting ability! 🙂