
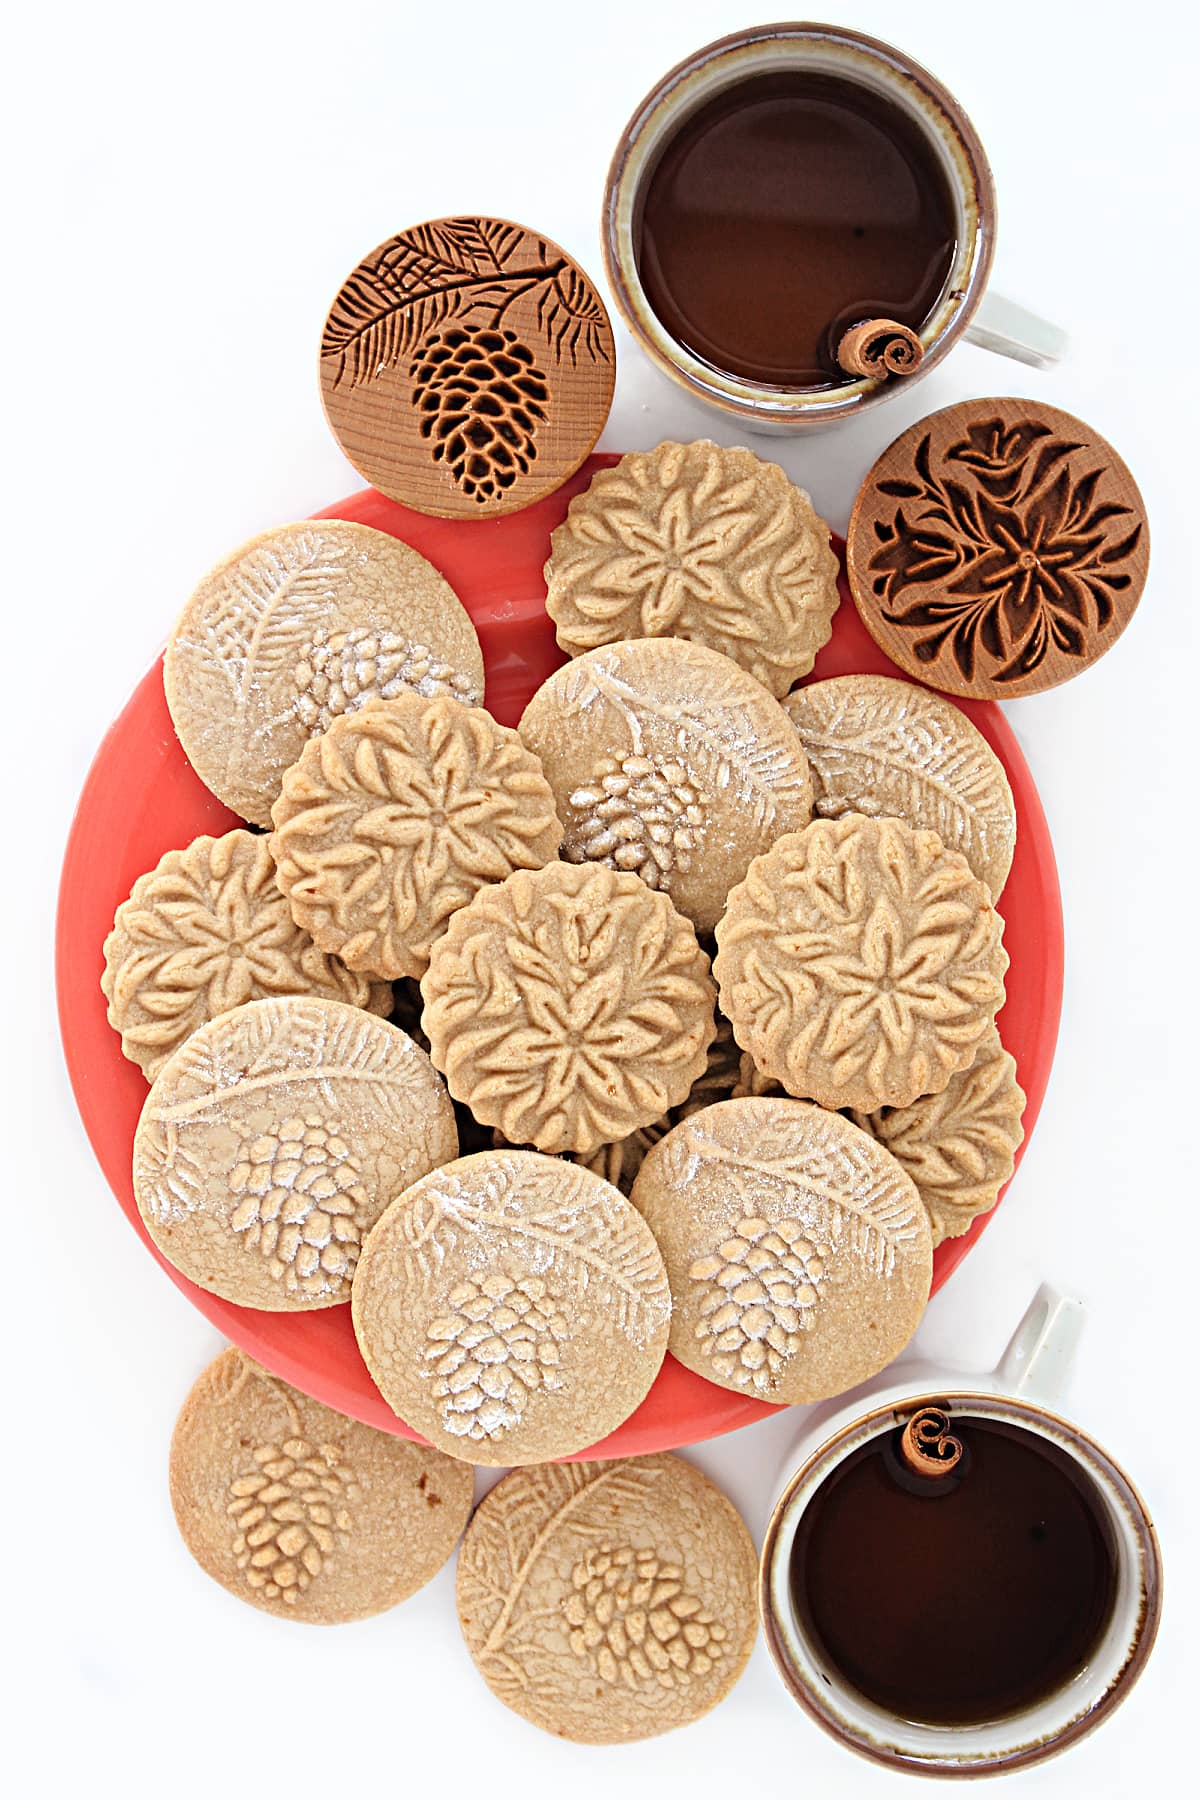
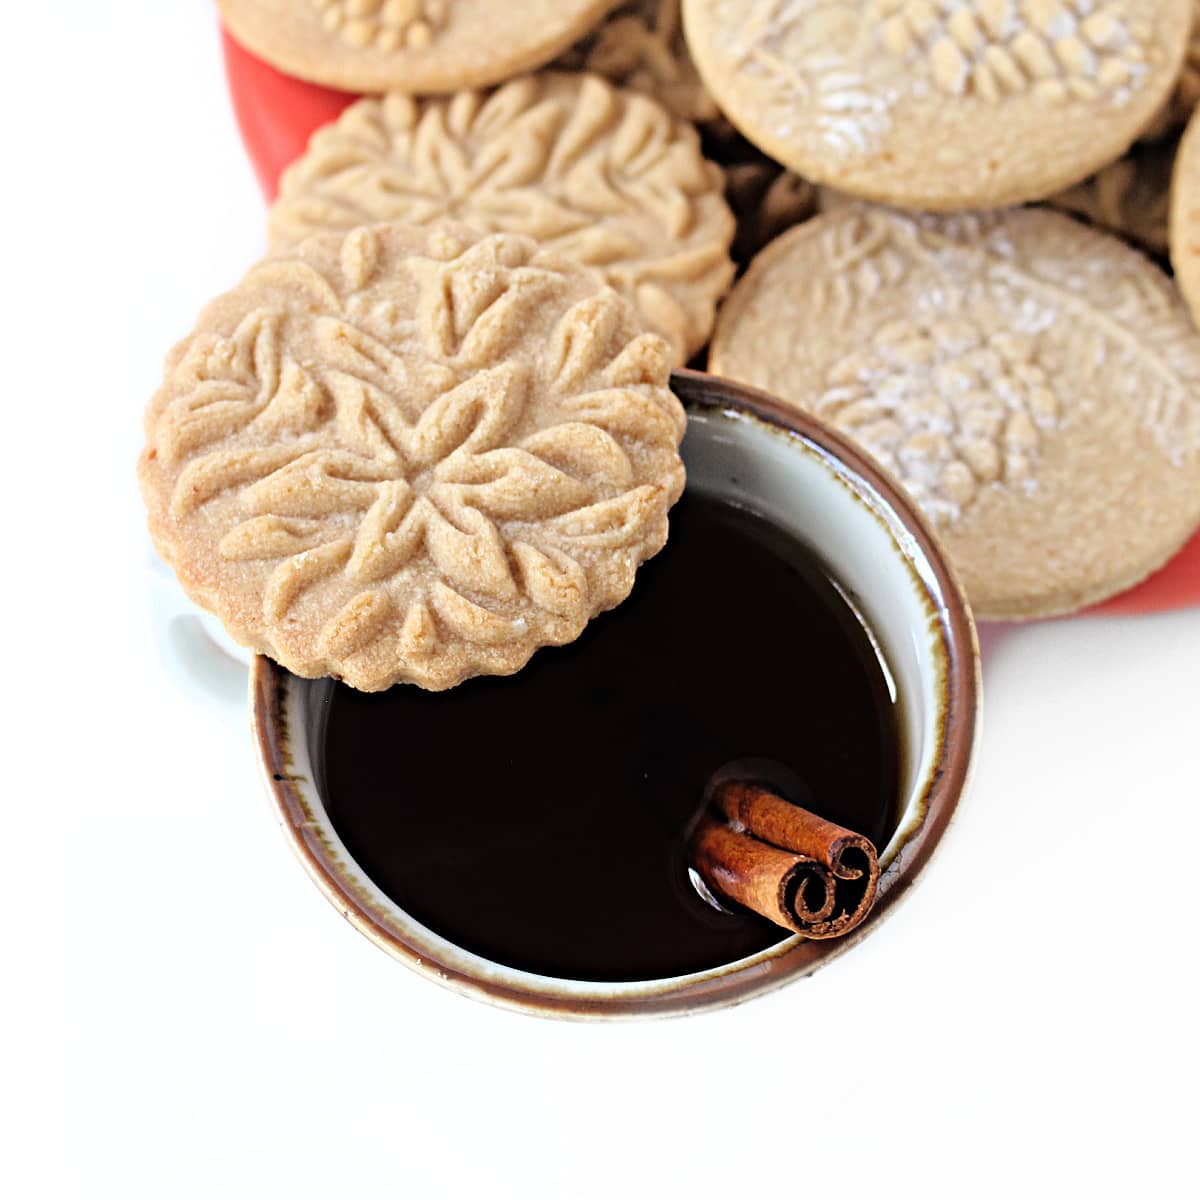
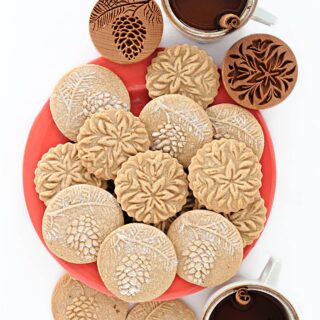
Use cookie stamps to create beautiful Apple Cider Stamped Cookies with this recipe for crunchy butter cookies bursting with spiced apple flavor. They are a delicious tea time treat that are perfect for gifting.
Why you'll love this recipe
- This stamped cookies recipe is full of apple spice flavor.
- Stamped cookies are an easy way to decorate cookies and are so much fun to make.
- Stamped cookies make great gifts!
Decorated cookies are beautiful, but can be time consuming. Using cookie stamps is a fun way to embelish cookies without the need for icing or sprinkles. The embossed designs make these treats special.
When using cookie stamps, it's important to choose the right recipe that will keep the design while baking. Ingredients that cause dough to spread, flatten or puff up would ruin the impression.
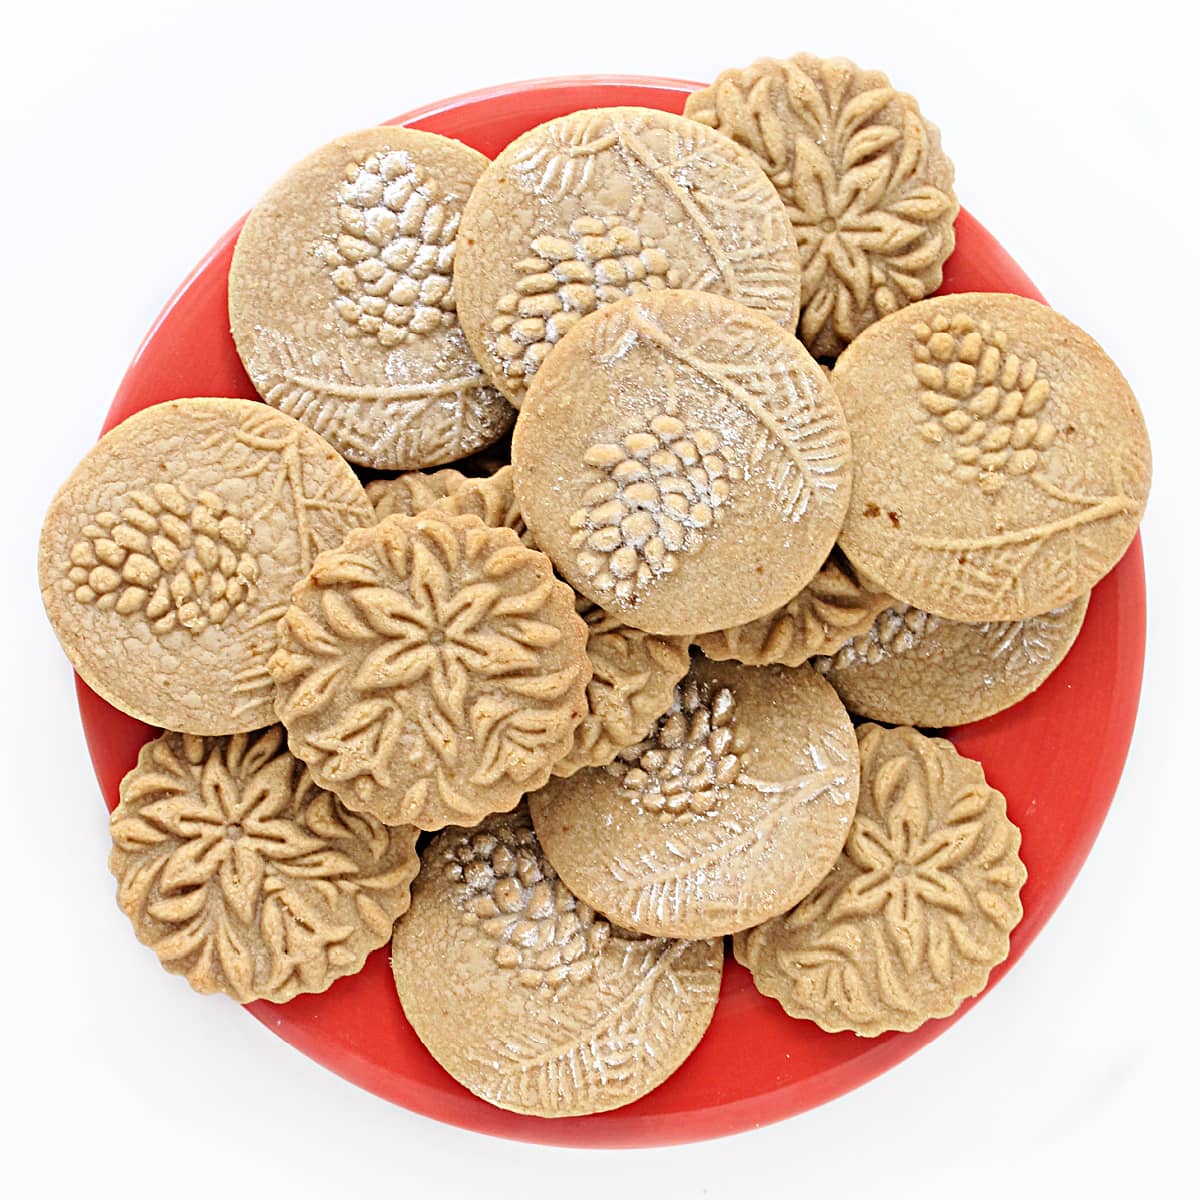
This apple cider cookies recipe holds the stamped impressions beautifully allowing even fine details to be visable after baking. The dough is easy to roll out, stamp without sticking, and transfer to a baking sheet without loosing its shape.
Powdered apple cider mix is the special ingredient that gives these stamped cookies so much spiced apple flavor. Your kitchen will smell amazing while these bake!
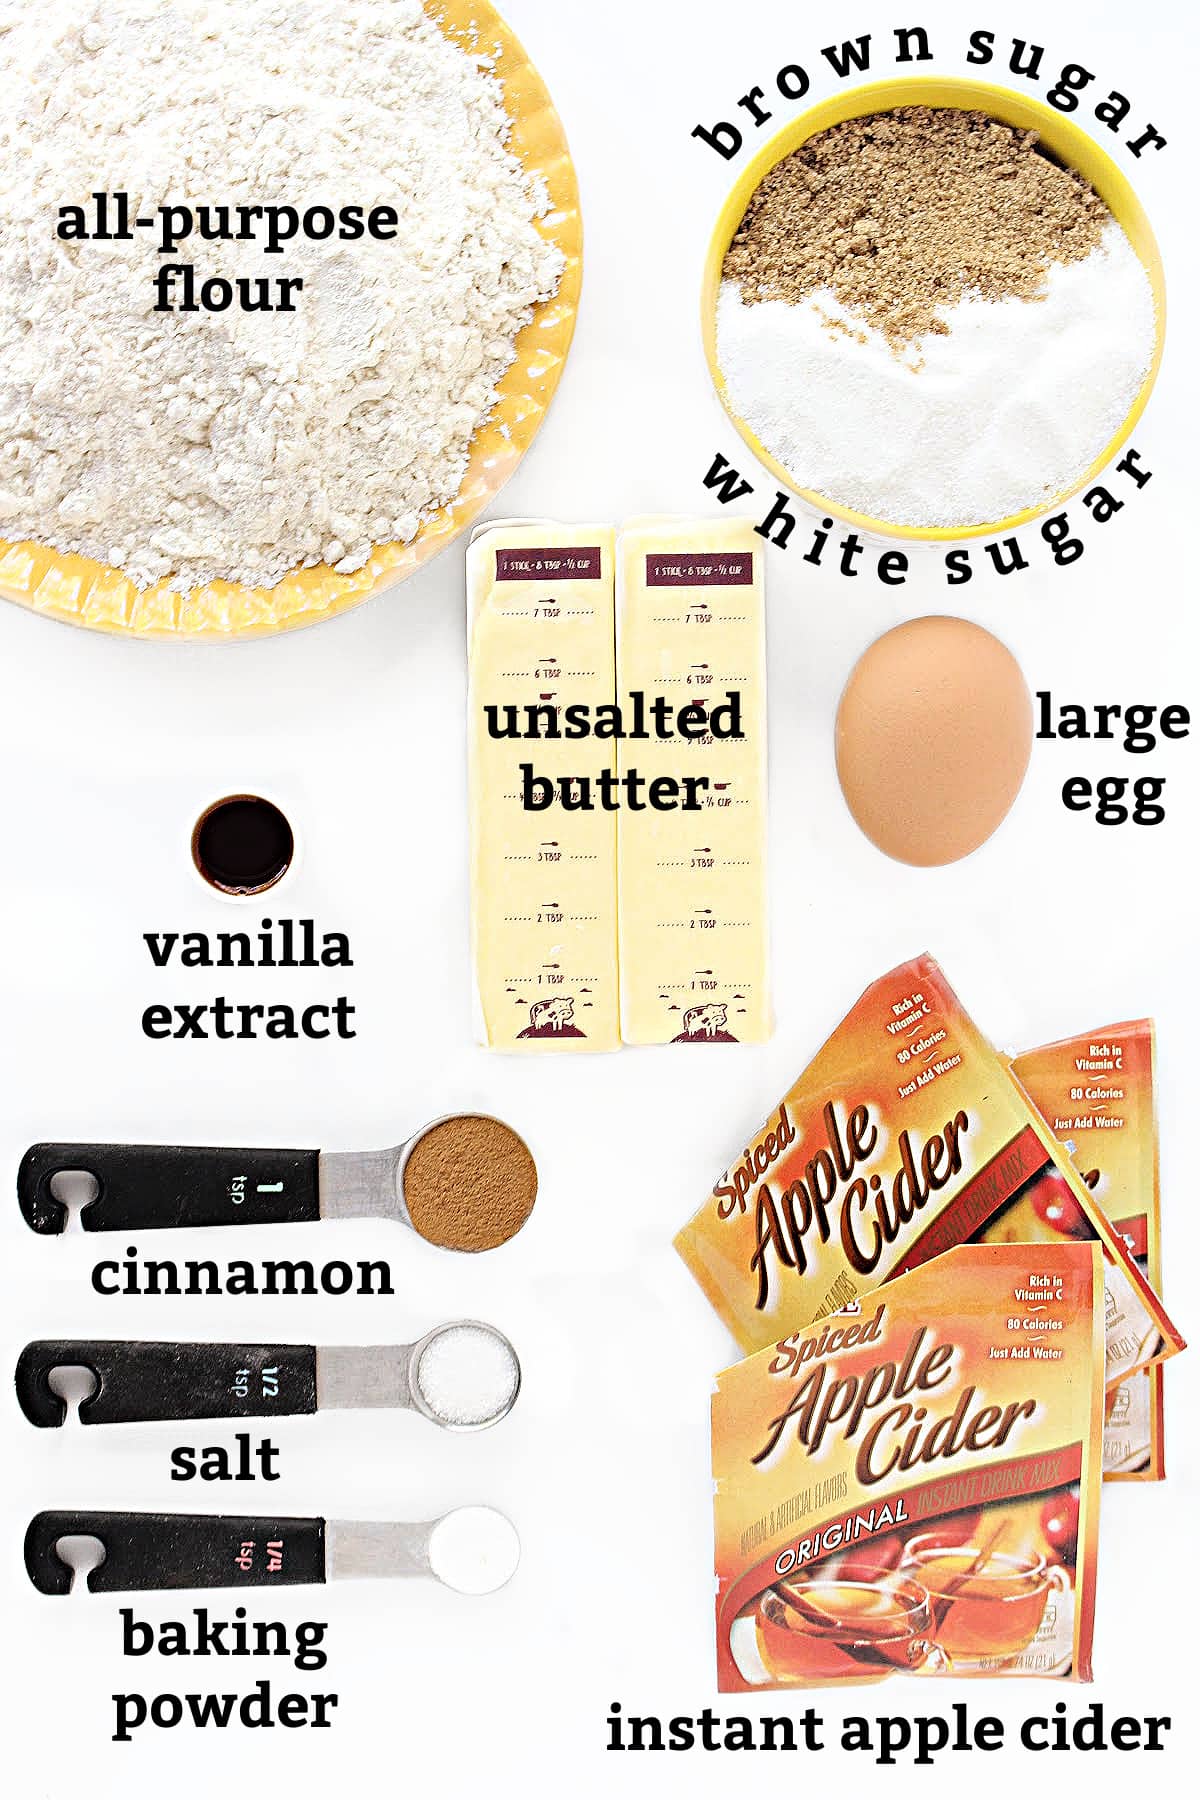
Ingredients
Instructions
This is an overview of the instructions. The full instructions are in the recipe card below.
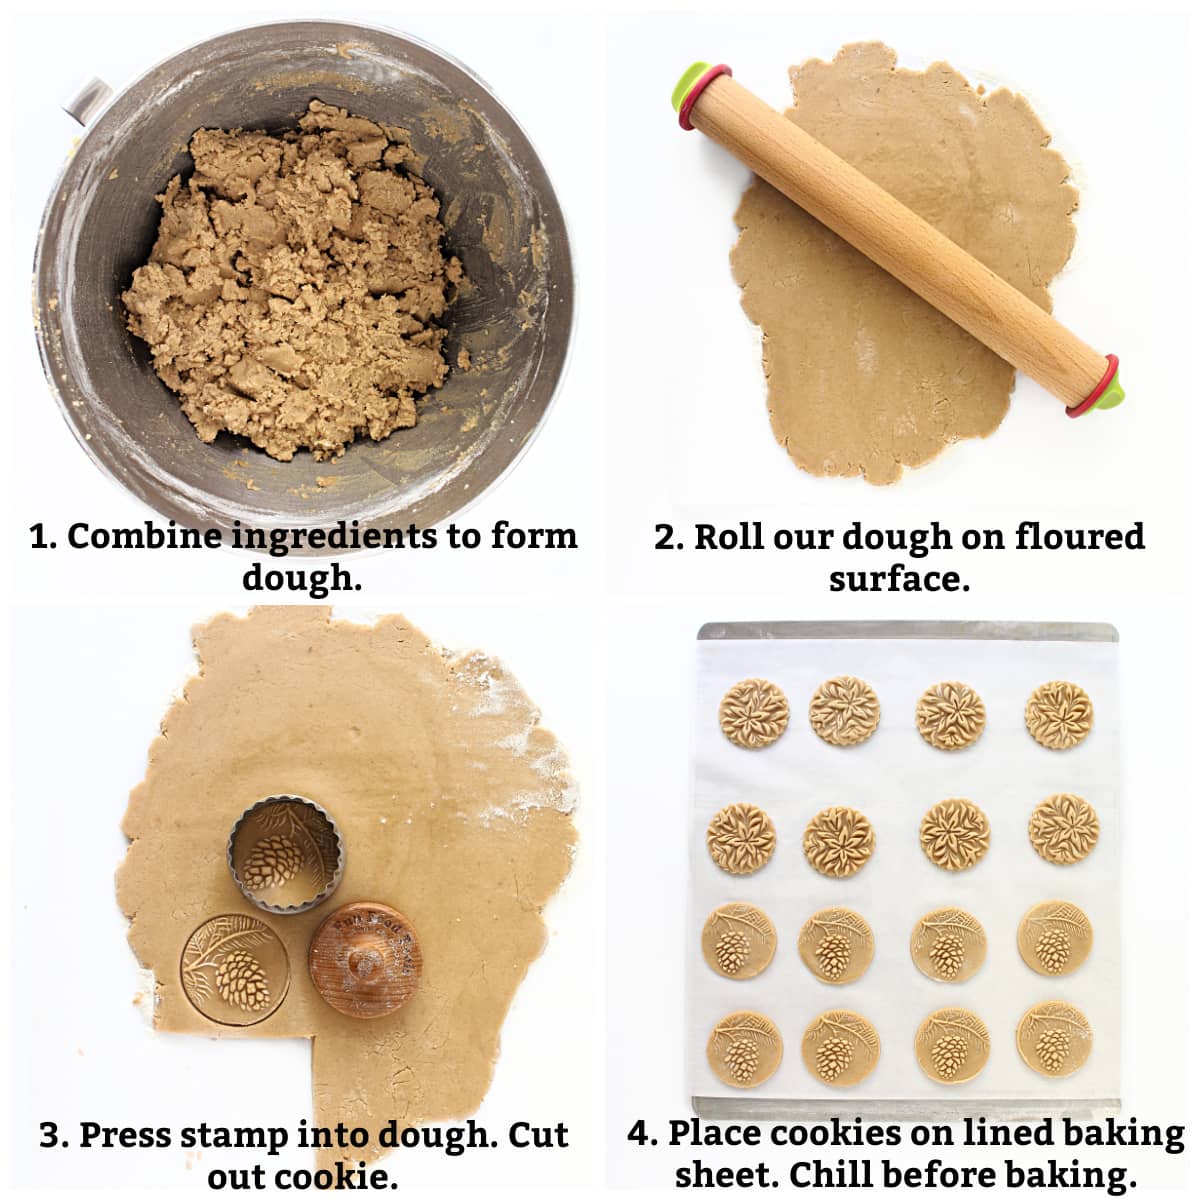
- In the bowl of an electric mixer, cream together the butter and sugars until combined. Add the remaining ingredients and mix until a dough forms.
- Roll dough to ¼" thickness on a lightly floured work surface.
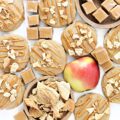
- Dust the surface of the cookie stamp and the top of the dough with flour. Press the stamp into the dough and remove slowly. Use a round cookie cutter to cut out the cookie.
- Transfer cookies to a parchment paper lined cookie sheet and chill for at least 30 minutes before baking. Bake cookies for 8-10 minutes until the bottom edges are golden brown.
Storage
Store completely cooled cookies in an airtight container at room temperature for up to 2 weeks.
Would you like to save this?
Tips
- This recipe can be used with cookie stamps, cookie molds, and embossing rolling pins.
- You can purchase cookie stamps online from Etsy and the Nordic Ware brand can be found in many home goods stores.
- When adding flour to the dough watch the consistency. Humidity can effect how much flour is needed. Add the flour just until the dough is firm and stops being sticky.
- If the cookie stamp is sticking to the dough, dust both the top of the dough and the stamp with flour.
- If some of the stamped design is hard to see after baking, lightly brush the surface of the completely cooled, baked cookies with powdered sugar to make the embossed design more visable.
- Save time by use with holiday stamps for gorgeous cookies that require minimal, if any, additional decorating.
- Another time saving tip is to skip cut-out cookies and press cookie stamps directly onto a cookie dough ball.
- Stamped cookies are ideal for hot weather care packages when icing would melt, but you still want to send something special.
- No cookie stamps? No problem! Make impressions in cut out cookies with regular kitchen tools ( i.e. fork, meat mallet, strainer, etc.) to create patterns and designs.
Frequently asked questions
The dough is stamped before baking and chilled to keep the details sharp.
Sprinkles can be added before or after baking. Glaze is usually added after baking, though washes (egg wash, milk wash) are added before baking to produce a shiny surface.
A cookie stamp can be used on either rolled out dough or dough balls. Dust the stamp with flour and press it onto the dough. Use a cookie cutter to cut around the stamped impression for an even shaped edge.
Roll out the dough to ¼"- ½" thickness. Dust the top of the dough and the embosser with flour. Press the cutter into the dough, then press the plunger to emboss the cookie.
Related Recipes
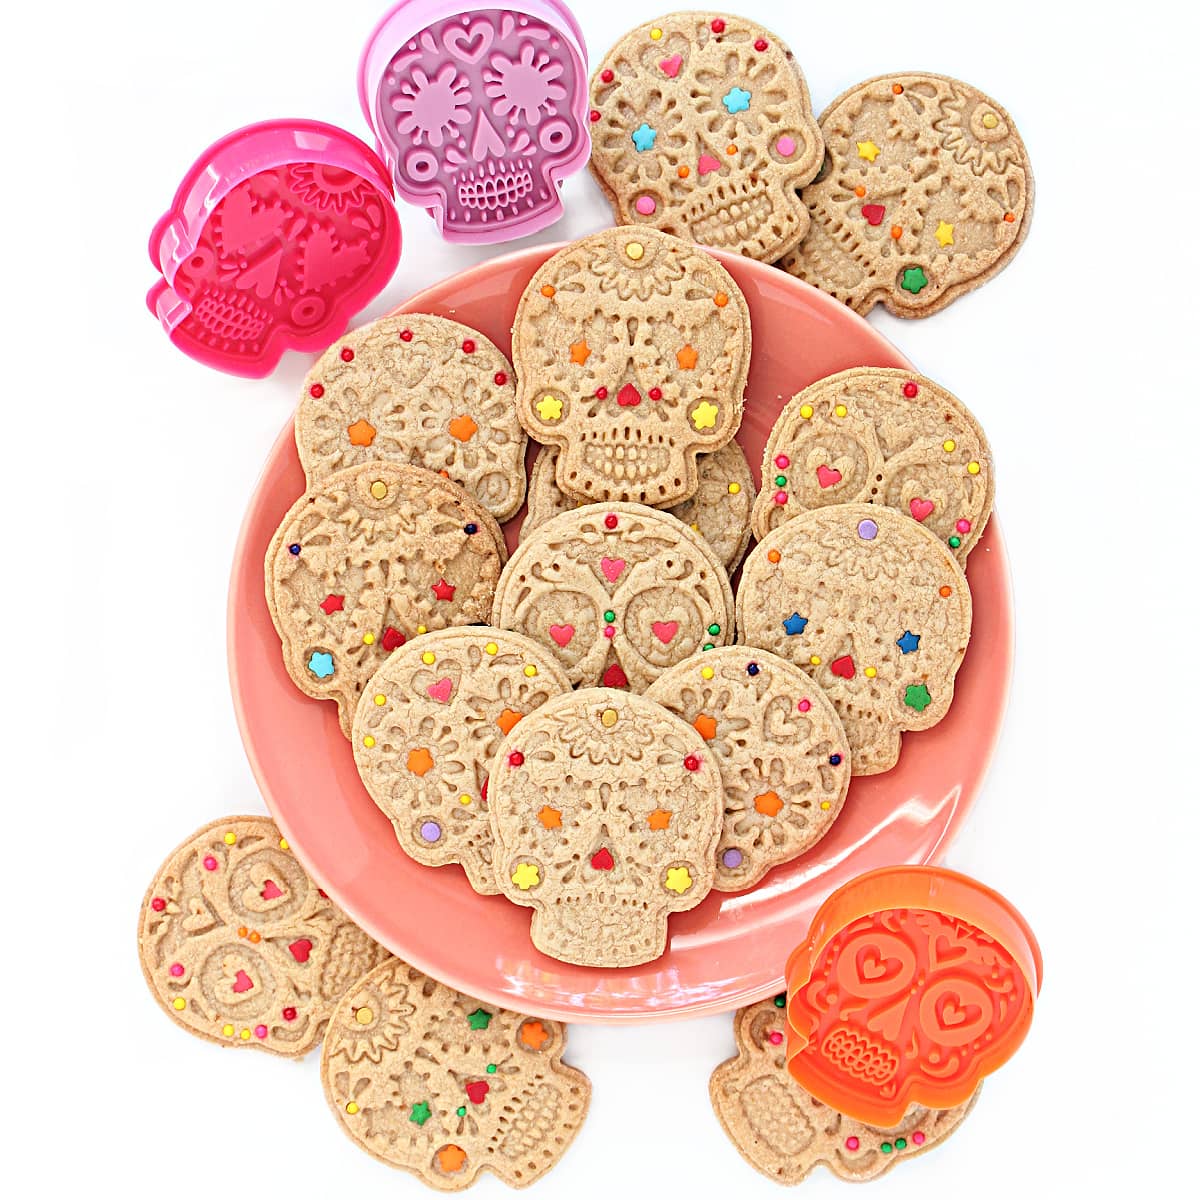
For a delicious Day of the Dead Theme Care Package, use this Apple Cider Cookies recipe with calavera skull stamp cookie cutters, plus bake some Pabassinas nut raisin cookies and Dia de los Muertos sugar cookies.
These Sugar Cookies with Shortening are ideal for stamp decorated cookies in hot weather care packages. Of course, the crunchy vanilla cookies are a tasty treat any time of year.
Honey Gingerbread cookies are very mildly spiced, chewy cookies that are breath taking when stamped with holiday designs or a snowflake cookie stamp. This stamped cookies recipe is the perfect addition to your Christmas cookies list.
Ready to bake? Join the free membership group to get new recipes and a newsletter delivered to your inbox! You can also stay in touch on Facebook, Pinterest, and Instagram. I'd love to stay in touch!
Apple Cider Stamped Cookies Recipe
Ingredients
- 1 cup unsalted butter
- ½ cup white sugar
- ½ cup brown sugar, packed
- 1 large egg
- 1 teaspoon vanilla extract
- 1 teaspoon cinnamon
- ½ teaspoon salt
- ¼ teaspoon baking powder
- 3 packets instant apple cider powder 0.74 ounces each
- 3 cups all purpose flour divided
Instructions
- In the bowl of a stand mixer, cream together the butter and sugars until combined.
- Mix in the egg, vanilla, cinnamon, salt, and baking powder.
- Mix in the apple cider powder, then add 2 ¾ cup of flour and stir until combined.
- Use the remaining ¼ cup of flour for dusting while rolling out the dough.
- Lightly dust the counter and top of the dough. Roll out the cookie dough to ¼" thickness. If sticking occurs, dust with additional flour.
- If using a cookie stamp, dust the surface of the stamp with flour, press into the dough and remove slowly. Use a roundcookie cutter to cut out the cookie and transfer, about 1 inch apart, it to a parchment lined baking sheet before stamping the next cookie.
- If using a cookie cutter with an embossing attachment, press the cutter into the dough then press the plunger to emboss the dough. Transfer, about 1 inch apart, the cookie to a parchment lined baking sheet before stamping the next cookie.
- If using an embossing rolling pin, dust the rolling pin with flour then press and roll over the dough. Use cookie cutters to cut shaped cookies from the embossed dough and transfer, about 1 inch apart, to a parchement lined baking sheet
- Place the baking sheet in the refrigerator and chill the cookies for at least 30 minutes.
- When ready to bake, preheat the oven to 375 degrees F. Bake for 8-10 minutes (depending on the size of the cookies), until the bottom edges are golden brown.
- Remove from the oven and let the cookies cool for 10-15 minutes on the baking sheet before moving them to a wire rack to cool completely.
- Store completely cooled cookies in an airtight container at room temperature for up to 2 weeks.
Notes
- Used this recipe with cookie stamps, cookie molds, and embossing rolling pins.
- When adding flour to the dough watch the consistency. Humidity can effect how much flour is needed. Add the flour just until the dough is firm and stops being sticky.
- If the cookie stamp is sticking to the dough, dust both the top of the dough and the stamp with flour.
- If some of the stamped design is hard to see after baking, lightly brush the surface of the completely cooled, baked cookies with powdered sugar to make the embossed design more visable.
- Stamped cookies are ideal for hot weather care packages when icing would melt, but you still want to send something special.
- No cookie stamps? No problem! Make impressions in cut out cookies with regular kitchen tools ( i.e. fork, meat mallet, strainer, etc.) to create patterns and designs.
- Wrap pairs of cookies, bottoms together, in plastic wrap.
- Stack the wrapped bundles in a freezer weight ziplock bag or airtight storage container.
Nutrition
First Published: October 20, 2022. Last Updated: October 5, 2023. Updated for additional information and better reader experience.
Cici
Hi Wendy! I am wondering if you know if the texture would be affected if I added more apple cider packets? I haven't tried this recipe yet but I am hoping for a very strong apple cider flavor. Thank you in advance!
Wendy Sondov
Hi Cici! I don't know if this is possible for you, but I would really suggest trying the recipe as written first. I found there to be a lot of apple cider flavor and would think that adding more might be too much. Also, I'm unsure whether the extra sugar would cause more spreading in the dough. I would love to know the results if you decide to experiment!
Cici
I will do that, thank you for the advice, Wendy; can't wait to try it!
Nick
I see that you folded back the product label on the apple cider spice packets.… I don’t think the company is gonna sue you! LOL Can you please tell us what brand it is so I can get the exact same one?
Wendy Sondov
The brand I used (only because this is the only brand my supermarket sells) is Alpine. The labels aren't folded back in fear of being sued. Usually, I remove ingredients from their packaging before photographing unless it is a sponsored post where a brand is paying me to develop a recipe using their product. In this case, I was trying to show that the instant cider comes in packets, but as any brand will work, I didn't think it was necessary to advertise a particular brand. I am always happy to share the exact product brands I used when asked.
Darlene Geyer
Where did you find the apple cider powder?
Wendy Sondov
Apple cider powder is located in the hot chocolate aisle of most supermarkets and places like Target or Walmart. At my supermarket it comes in a box of individual envelopes by the Alpine brand.
Sharpless Debbie
I'm planning on making these cookies. Can they be frozen? If yes, for how long?
Wendy Sondov
Yes, these cookies freeze well. Wrapped well to prevent freezer burn, these cookies can be frozen for 1-2 months.
Barb
Hi There, just starting to make a batch of these cookies, cuz they sound sooooo good, and noticed that your directions don't mention when to add the apple cider power. I'm adding it with the flour because that sounds like a plan. But unless I missed it in your directions, and I apologize if I did, suggest you edit the directions.
Thanks for the recipe!
Wendy Sondov
Thank you for pointing out that error. Quite an important detail when the whole recipe is about the apple cider flavor! It's been corrected. You are correct that the apple cider powder is mixed in right before the flour.
I hope you enjoy your cookies. We love them with a cup of tea.
Barb
One word ... DELICIOUS
Thanks Wendy!
saltandserenity
Wendy, these cookies are so beautiful. I have never seen the apple cider powder. What a great idea to punch up the flavour without having to affect the texture. I'm going to look for it.
Cookie stamps are my favourite. They do all the work for you. I usually buy mine on Etsy. I'm going to have to check out Michaels.
I have never been successful rolling out the dough and then stamping the cookies. They always stick, even when I dust with flour. I have started rolling the dough into a 2 ounce ball, rolling it in granulated sugar and then pressing with the stamp. They never stick and I don't have to struggle with rolling out the dough evenly.
Wendy Sondov
Thanks, Cindy! I got these wooden cookie stamps from Etsy and the plastic embossing cutters from Michaels. As for sticking, the recipe makes a huge difference. It can't be a wet or sticky dough. Even with doughs meant for stamping I sometimes have to add a bit more flour to absorb moisture and prevent sticking.
Lorna Sundet
I'm planning to make these cookies, but I wondered if instead of rolling them out, they could be rolled into balls, then stamped/pressed? I would add more flour to the dough, and roll the balls in granulated sugar before stamping.
Wendy Sondov
Absolutely. You can use this dough with whatever method you usually use for stamped/molded/embossed cookies. The only thing about rolling in granulated sugar is that the bumpy surface might interfere with some details on the stamp design.
Carlee
They turned out beautifully! I've never used a cookie stamp like that, but I will have to keep my eyes open for one because I love this look.
Wendy Sondov
Thanks, Carlee! The wooden stamps come from Etsy and the skull embosser cookie cutters came from Michaels. Michaels has embossing cutters for most holidays and they are very inexpensive. Embossing makes decorating easy!
Mei Lin McKinney
Hi Wendy!
My name is Mei Lin and I work with Fun Food Tools, where we design and create these cookie stamps you used. Your cookies look great! However, we don't sell our cookie stamps at Michaels - would you be able to adjust your reply to address this?
Thanks!
Wendy Sondov
Hi, Mei Lin. I'm sorry for the confusion. The beautiful wooden stamps are, of course, from Fun Food Tools on Etsy, but the skull embosser cookie cutters are from Michaels. I believe the commentors understood my responses, however I did edit those responses to be very clear where the stamping tools came from.